How to Set Up AWS CloudFront with S3 for Content Delivery
In today’s online world, it’s crucial to make sure your website loads quickly and reliably for a smooth experience. Amazon Web Services (AWS) provides a powerful tool called AWS CloudFront, to help you achieve this. AWS CloudFront is a Content Delivery Network (CDN) service designed to distribute content globally with low latency and high data transfer speeds.
In this article, I will show you how to use this distribution service to make your website faster and more available when you’re serving a website through an S3 bucket. By following these steps, you can significantly enhance your website’s performance and availability.
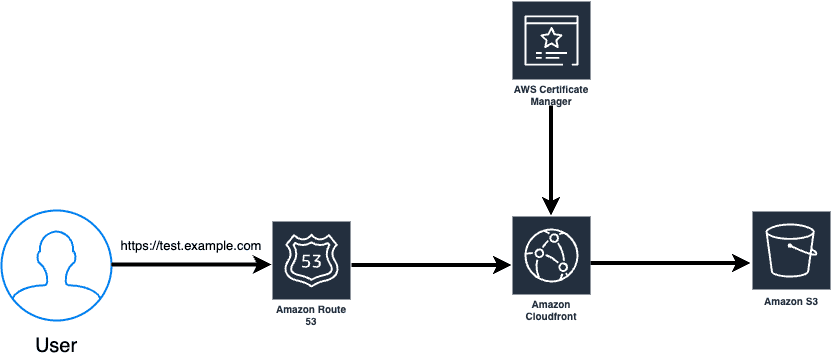
Let’s dive into each step and explore basics and advanced configurations to further optimize your content delivery.
Prerequisites
Before you start the setup process, ensure you have the following:
An AWS account with the necessary permissions to create and manage cloud resources.
A registered domain name or access to DNS settings.
Web content stored in an S3 bucket.
Step 1: Creating an S3 Bucket and Hosting a static website on S3
Log in to your AWS Management Console.
Navigate to the S3 (Simple Storage Service) section.

Click on the “Create bucket” button.

Provide a unique and descriptive bucket name following S3 naming conventions. (The bucket name must be unique, so I would suggest you start with your full name/company name so it can be unique.)
Choose a region for your S3 bucket, ideally one closest to your target audience.
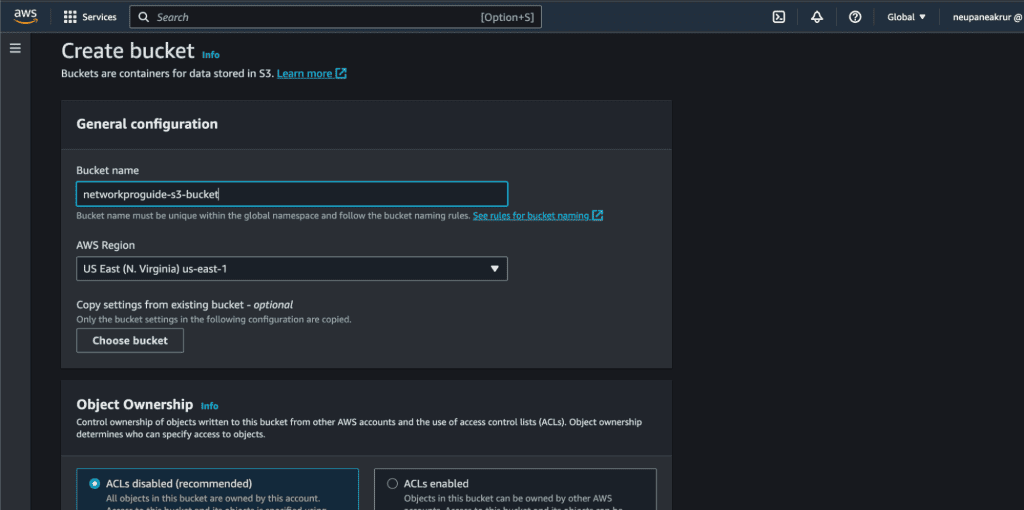
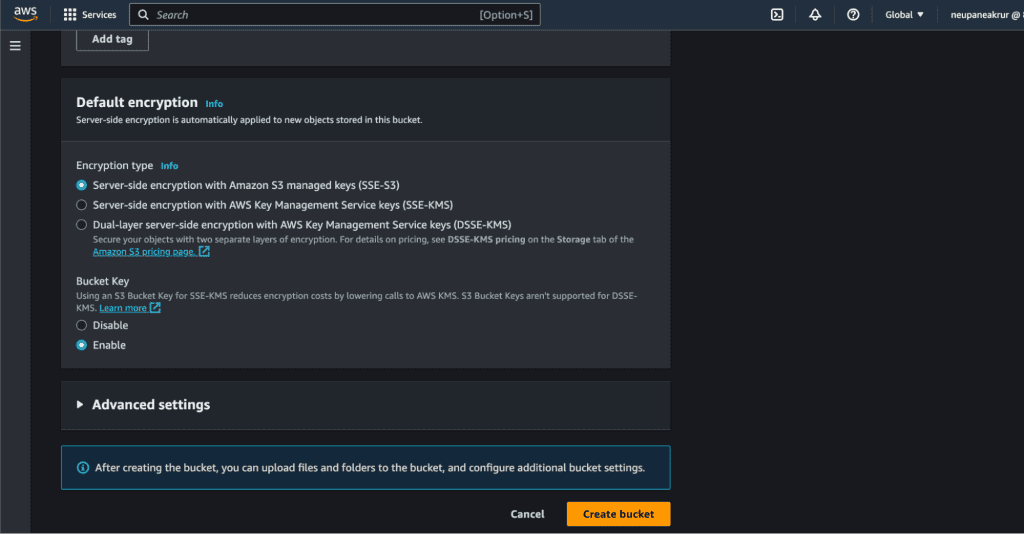
Leave all the things as default. (Don’t make it public as we are using CloudFront distribution to access these buckets.)
Click “Create bucket”.
Step 2: Uploading Content to Your S3 Bucket
Select your S3 bucket from the dashboard.
Click on the “Upload” button to add your static web assets (e.g., HTML files, and images).
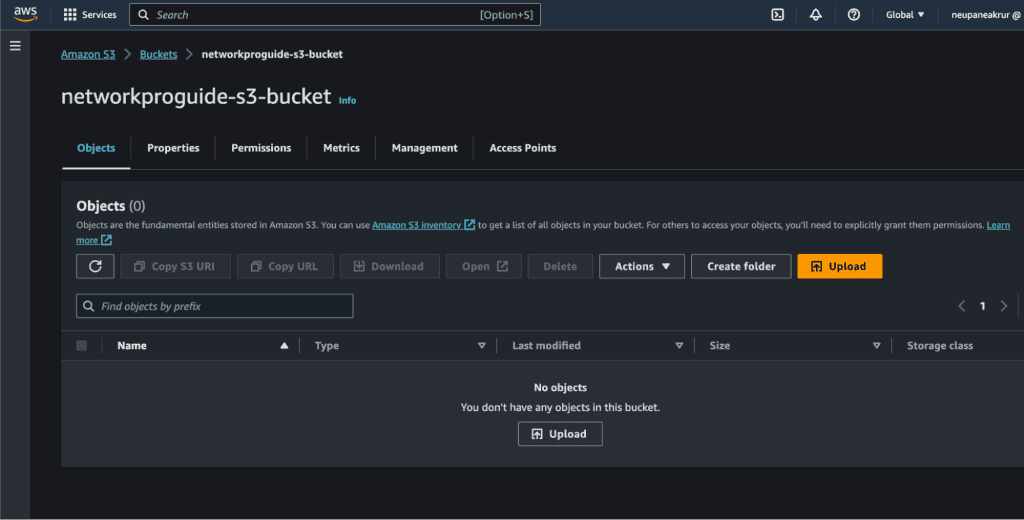
Click on “Add files” if you have only files (just HTML and CSS) but if you have build files (e.g. React or Next) you can click on “Add folder” and upload the files or folder.
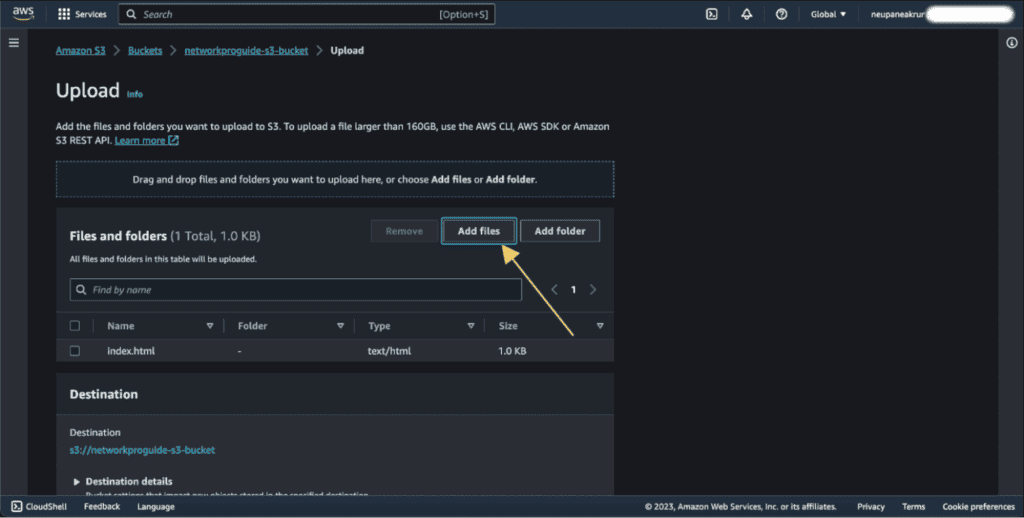
Click on the “Upload” button.
Step 3: Creating an AWS CloudFront Distribution for the S3 bucket
Go to the AWS CloudFront console.
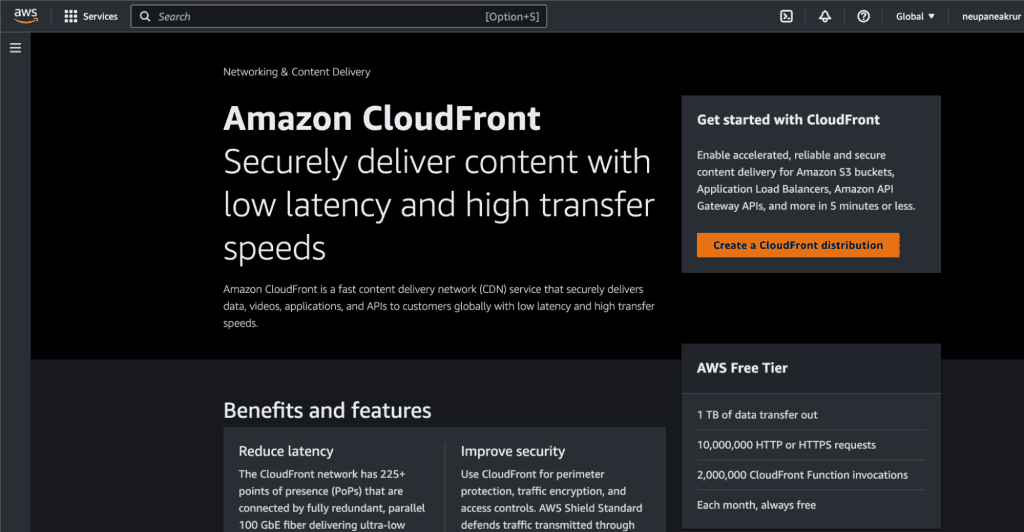
Click on the “Create a CloudFront distribution” button.
On the Origin domain select the S3 bucket that we have created.
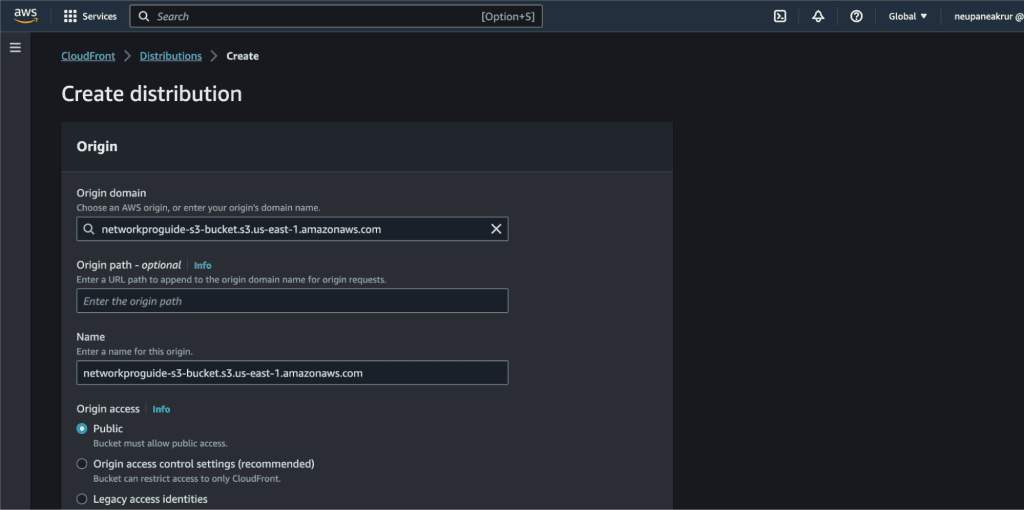
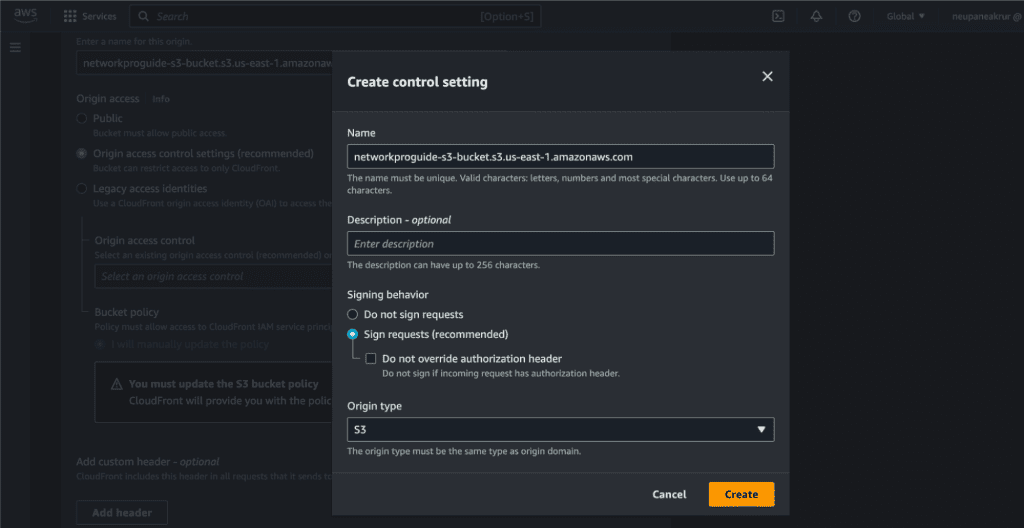
In the Origin access select “Origin access control settings.”
Now click on “Create control setting.”
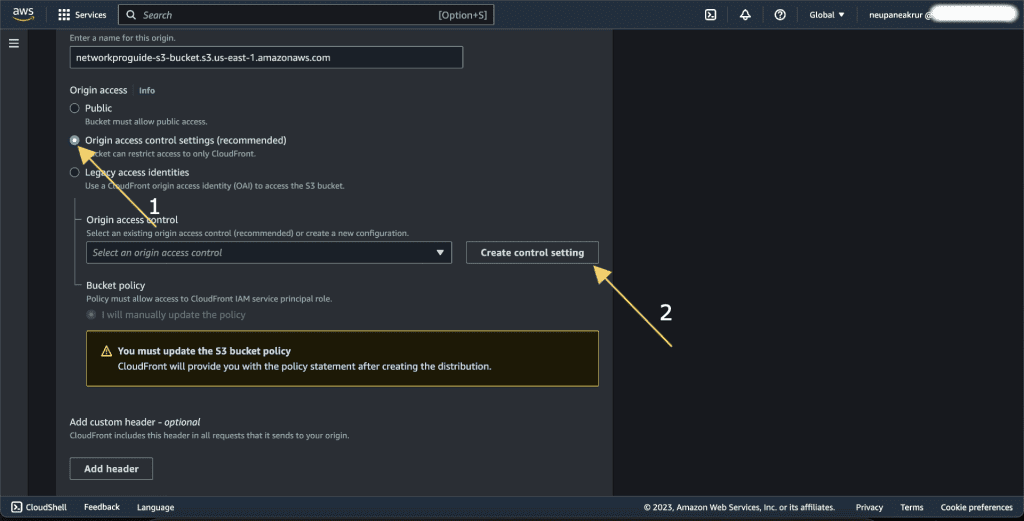
It’s recommended to configure the S3 bucket to restrict access to only CloudFront. In this setup, CloudFront acts as a security layer in front of the S3 bucket, and direct access to the S3 bucket is blocked.
Give the name and description. I am leaving it as default.
Click on “Create.”
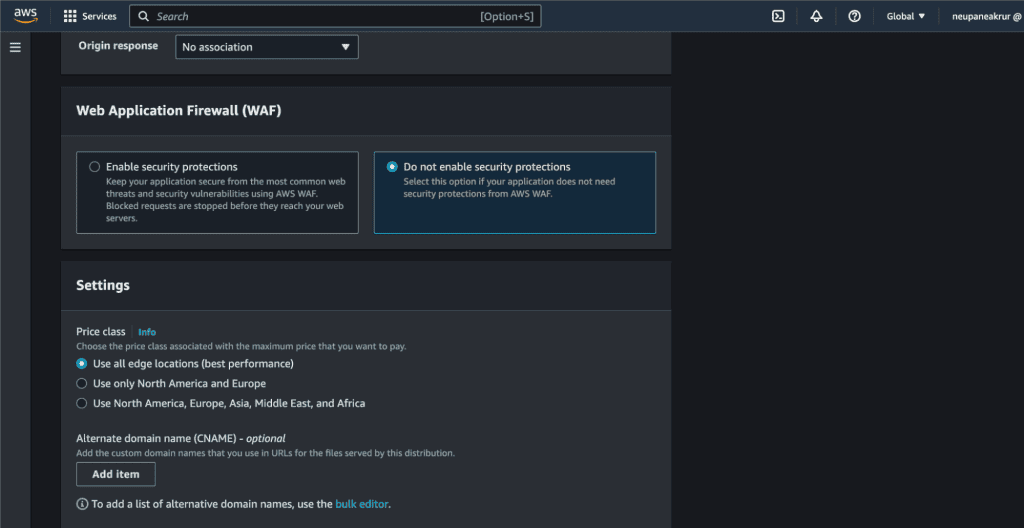
Leave all the things as default for now.
In the Web Application Firewall (WAF), disable the security protection. (You can enable it if you need.)
In the default root object, add your default root object file name. In my case it’s index.html.
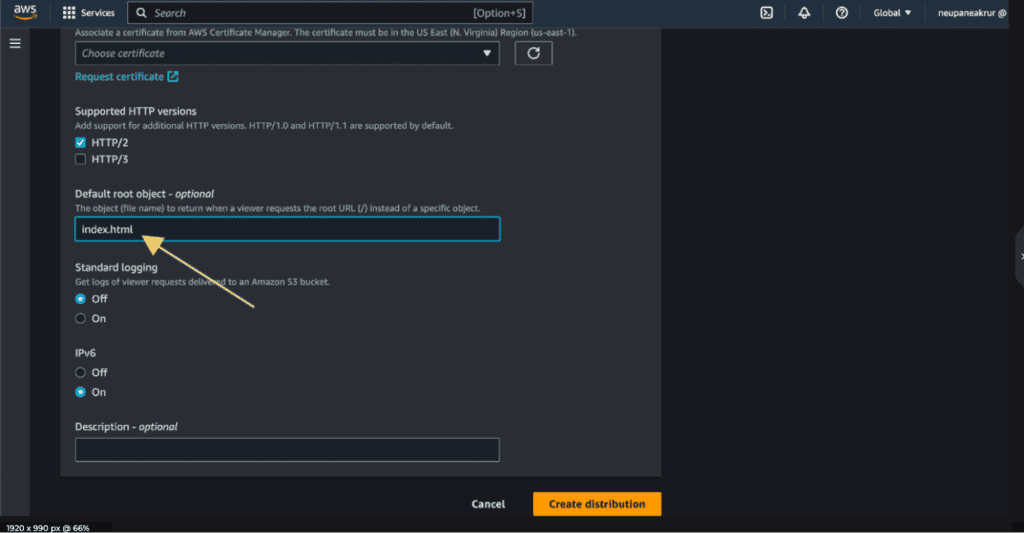
Click on “Create distribution.”
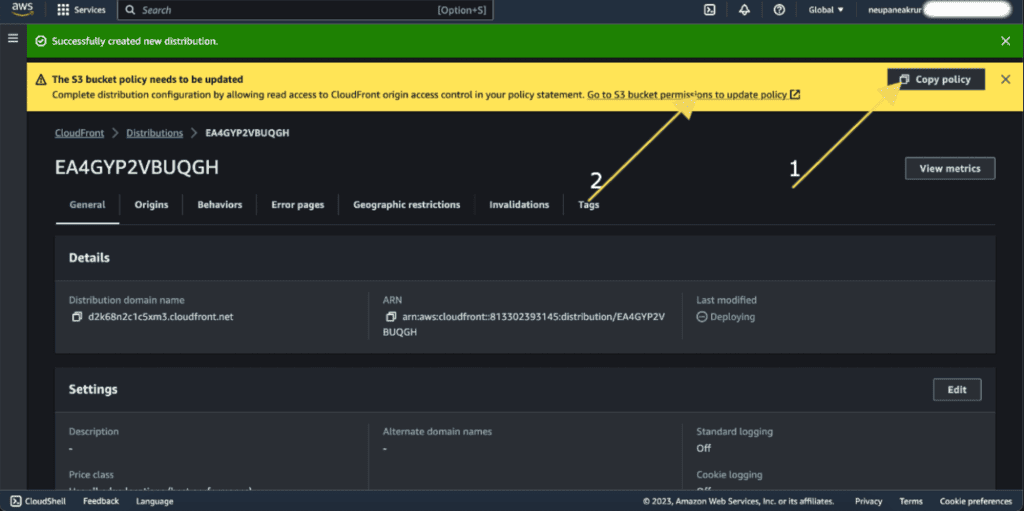
You can see the notification that our S3 bucket policy needs to be updated.
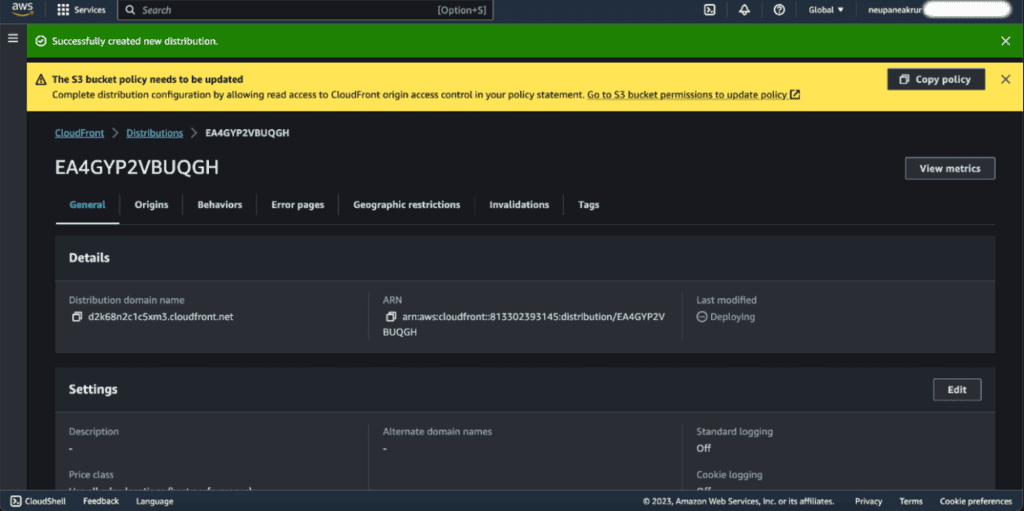
Copy the policy first.
Click on “Go to S3 bucket permission to update policy.”
It will open up the S3 bucket policy.
Scroll down a bit and click on “Edit” under bucket policy.
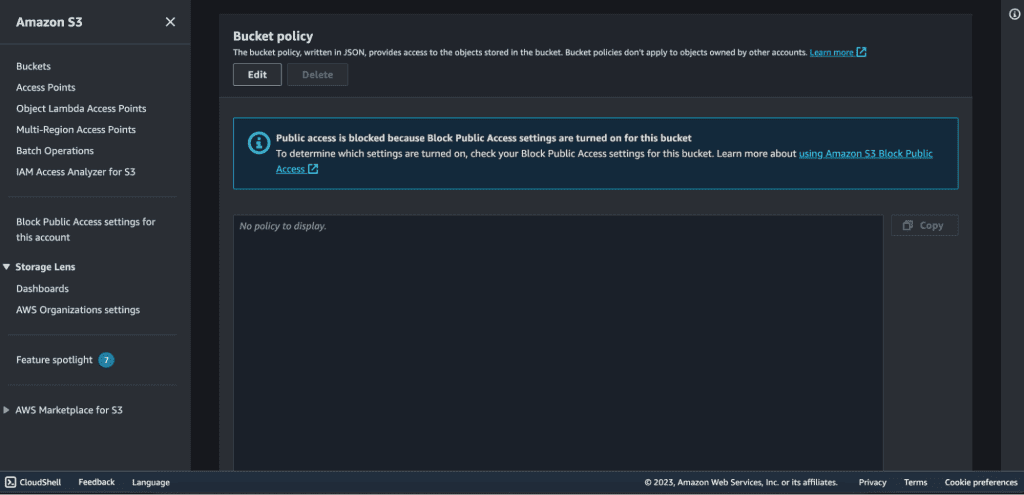
Paste the policy that you have copied from CloudFront.

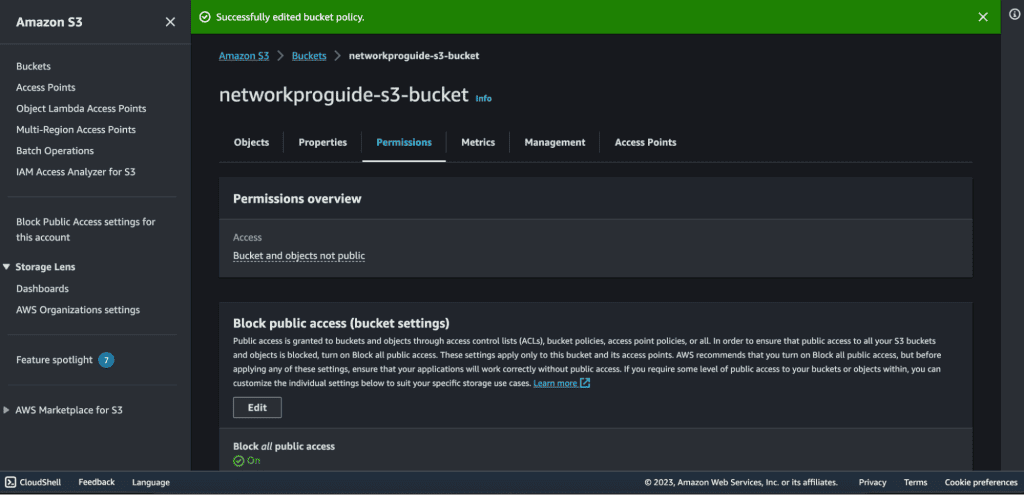
And click on “Save changes.”
Our bucket policy has been successfully edited.
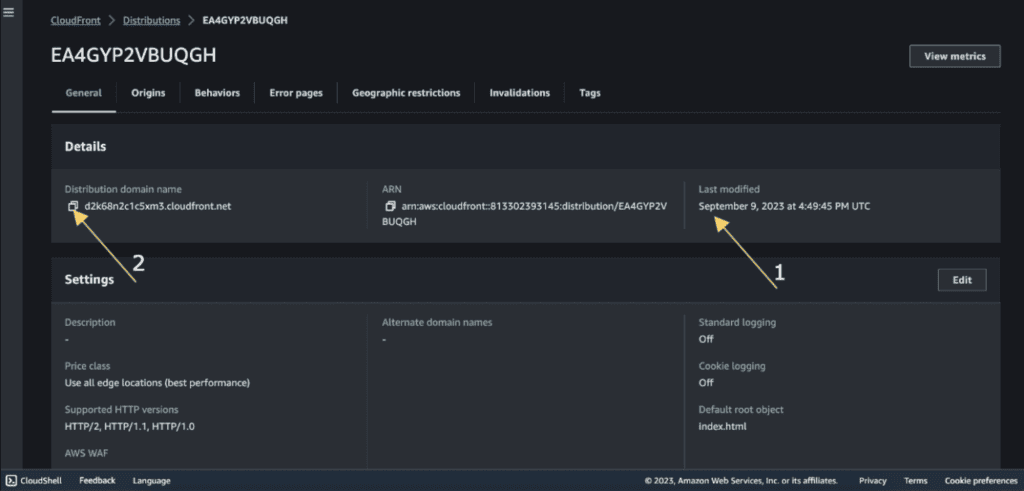
Go back to the CloudFront.
Make sure that your “Last modified” is changed from “Deploying” to the date and time.
Copy the distribution domain name.
Access your static website from the CloudFront distribution name.
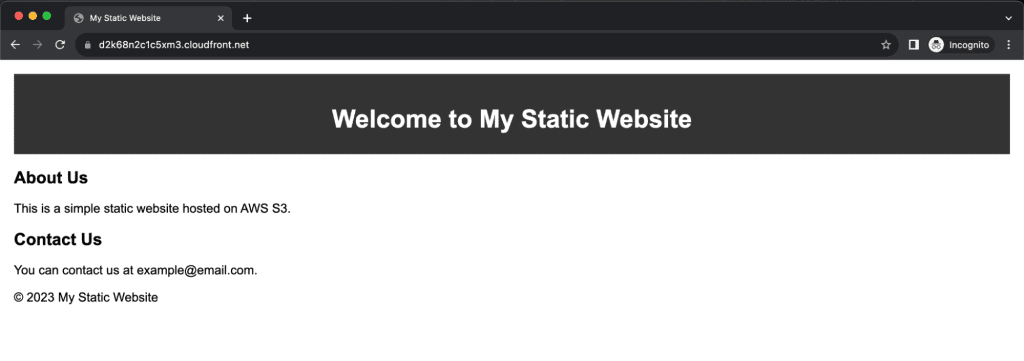
The files and images will now be distributed from the platform cache, not from the S3 bucket.
Step 4: Setting up a custom domain name for CloudFront
Go to your CloudFront distribution.
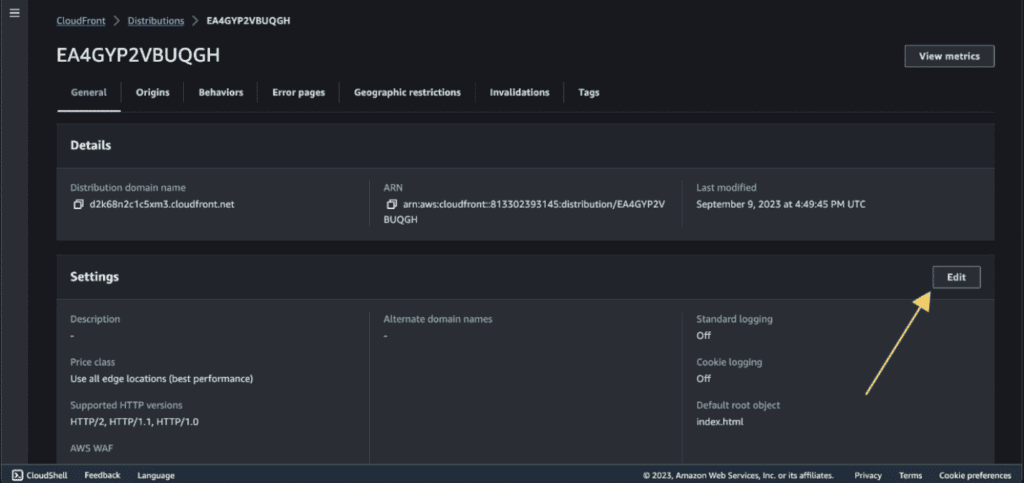
Click on “Edit” in the general tab.
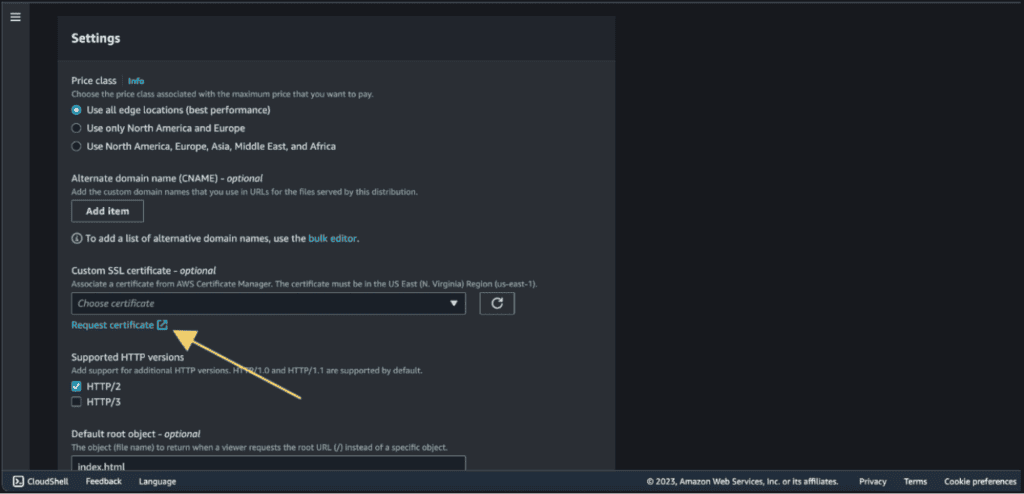
Click on “Add item” in the alternate domain name section.

(You can also do this step while configuring the CloudFront distribution at the beginning)
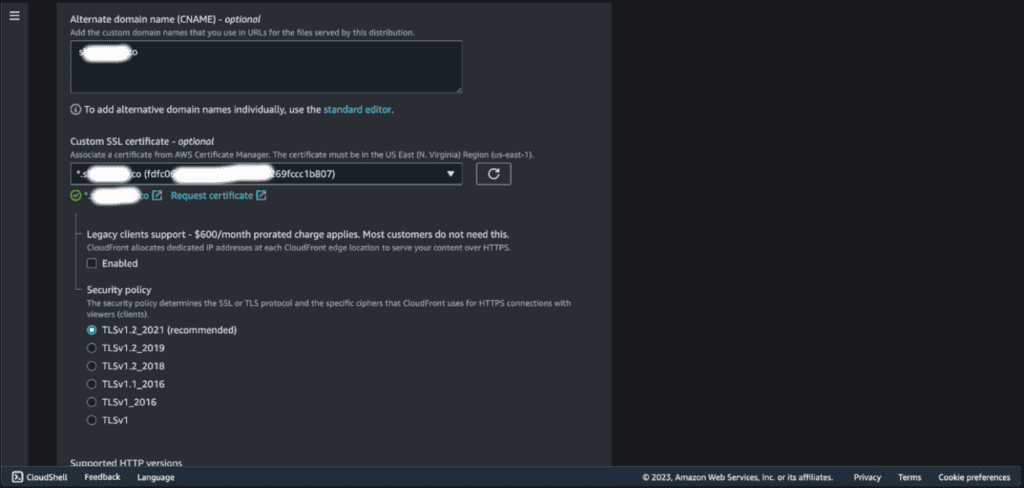
Enter your domain or subdomain name.
Choose the certificate from your AWS Certificate Manager (ACM).
If you haven’t got a certificate, then click on “Request a certificate” and issue the certificate for your domain from ACM.
Now click on “Save changes.”

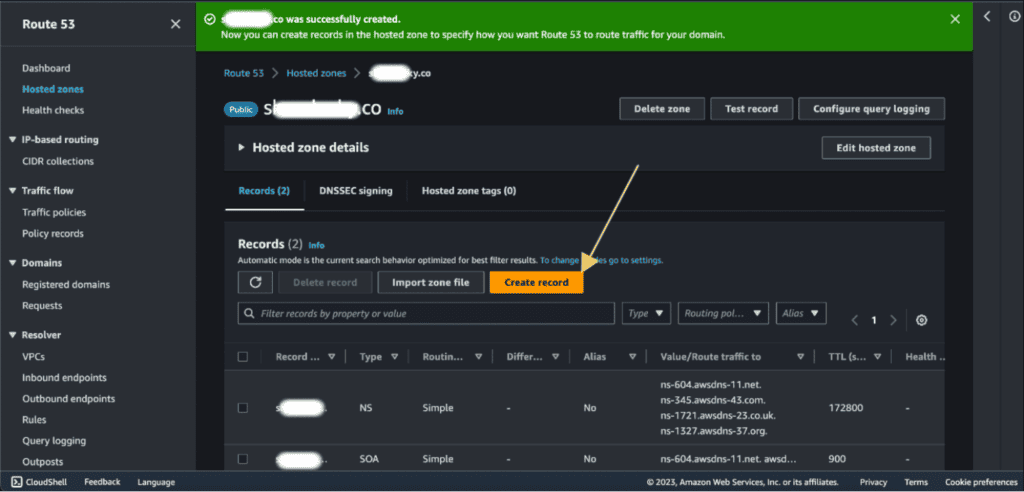
Now go to Route 53.
Select your hosted zone for the domain.
Click on “Create Record.”
Add the subdomain name if you have added a subdomain on the CNAME in CloudFront or if you have added a root domain then leave it as empty. In my case, I have added a subdomain so I will add “S3” to the record name.
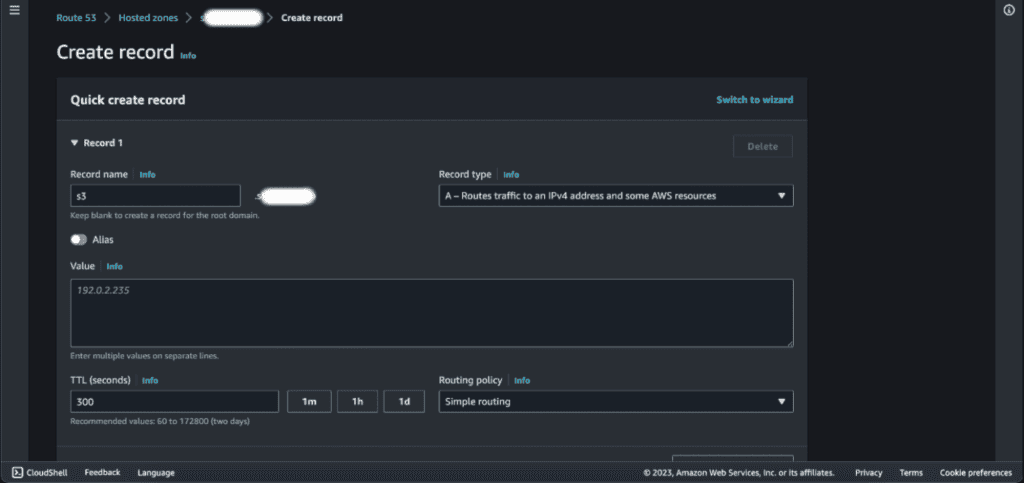
Select the “Alias.”
In the Route Traffic section, select “Alias to CloudFront distribution” in the endpoint.
Select the destination to the above-created CloudFront distribution.

Click on “Create records.”
Wait for the status to be INSYNC.
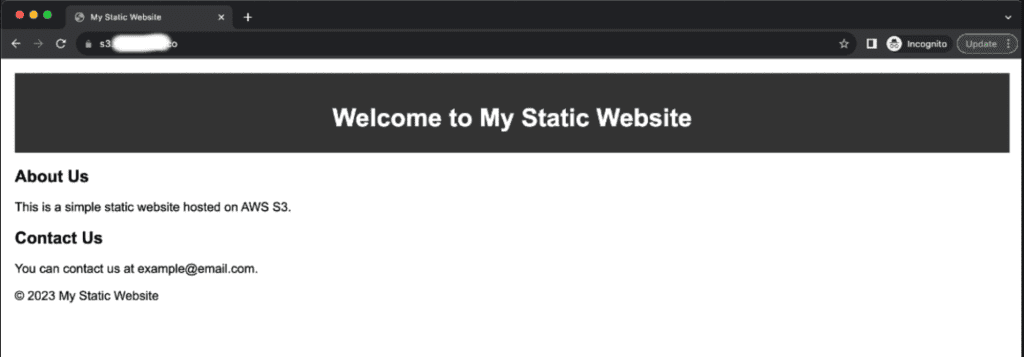
Now you can access your S3 bucket from the domain name through CloudFront distribution.
Step 4: Advanced configuration on AWS CloudFront
Cache invalidation in CloudFront
Cache invalidation keeps your website fresh and accurate for a seamless user experience. It is a process for ensuring that the newest website content reaches users quickly. It lets you remove specific files from CloudFront’s cache before they naturally expire. This is useful for updating content like images or urgent fixes, ensuring timely promotions, or displaying personalized user content. To utilize cache invalidation do the following:
Log in to your AWS Management Console.
Go to the AWS CloudFront console.
Select your CloudFront distribution.
In the distribution settings, navigate to the “Invalidations” tab.
Click on the “Create Invalidation” button.
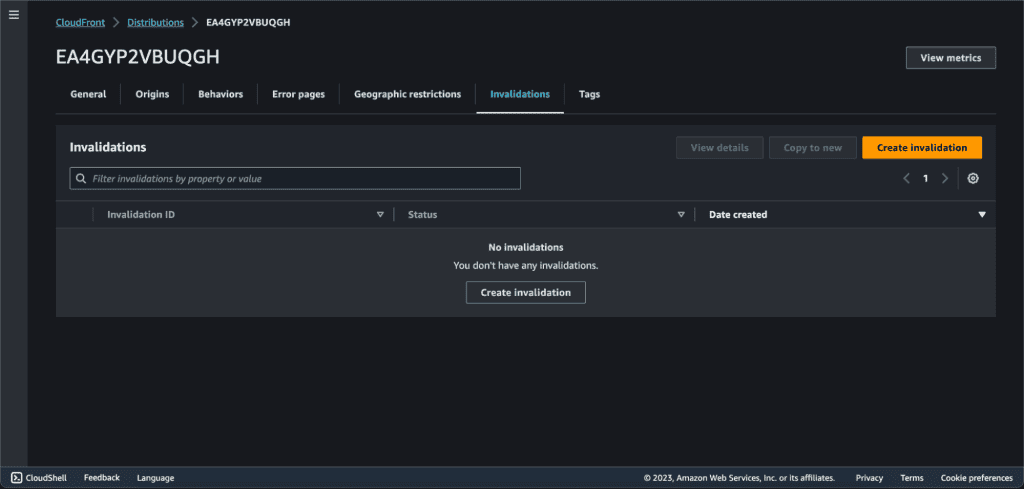
Add the object paths.
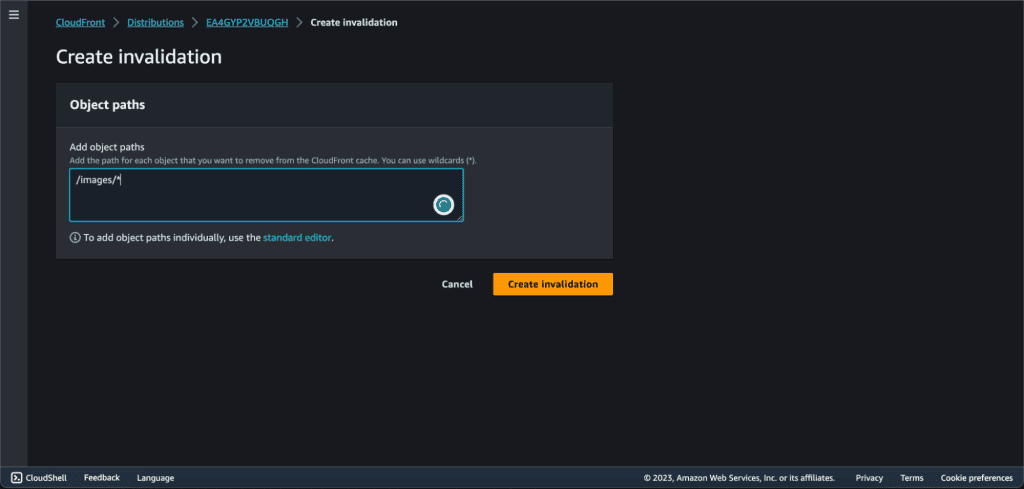
Invalidation paths allow you to specify which content should be invalidated. For example, if you want to invalidate all files under a directory named “images,” you would enter /images/* or you can invalidate all files (*).
Geographic Restrictions
You can restrict who can access your distribution. It has mainly two types of restriction.
- Allowlist: It will allow the users to access the content only if they are in one of the countries on a list of approved countries.
- Blocklist: It will prevent the users from accessing the content if they are in one of the countries on a list of banned countries.
To set up a geo restriction, do the following:
Select your CloudFront distribution.
In the distribution settings, navigate to the “Geographic Restrictions” tab.
Click on “Edit.”
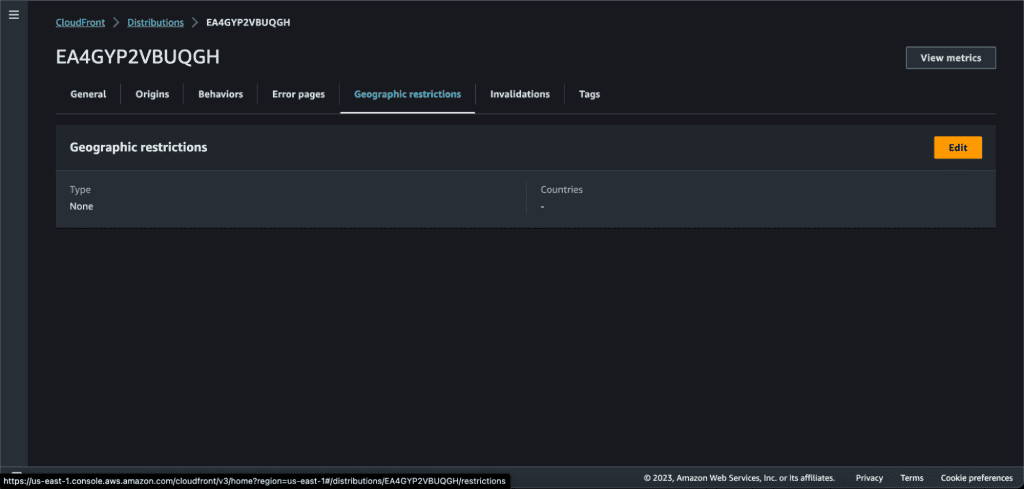
Select either “Allow list” or “Block list”. I am going to block the users from the USA, so select “Block list.”
Choose the countries to add to the block list.
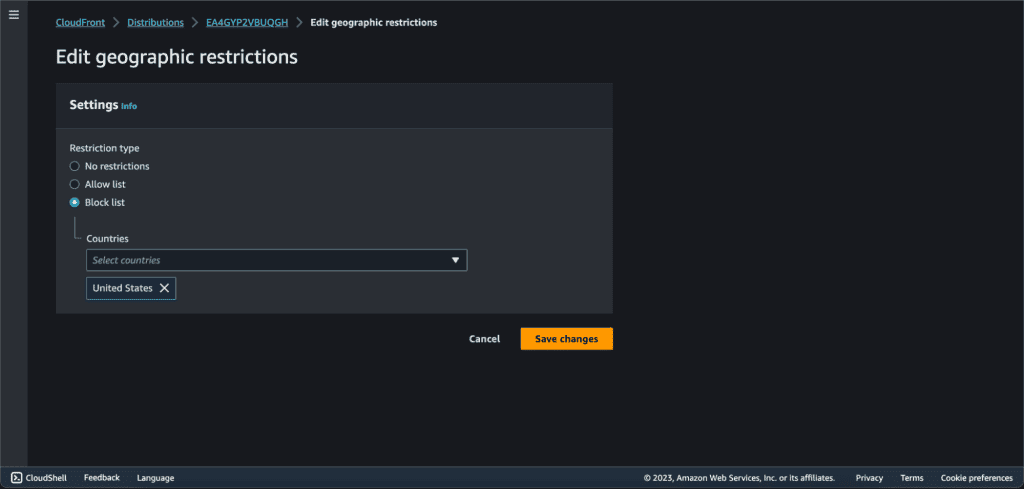
Click on “Save changes.”
Now users from the USA cannot access this distribution.


