Secure Your AWS Resources with a Network Firewall
Securing your AWS resources and controlling network traffic is crucial for maintaining the integrity and reliability of your applications. AWS Network Firewall provides a robust solution for achieving this goal. In this tutorial, I will walk you through the process of implementing AWS Network Firewall in a detailed, step-by-step manner.

In this scenario, I aim to achieve the following:
To host a web server on an EC2 instance and utilize AWS Network Firewall to apply specific rules. These rules include blocking ICMP (ping) requests and allowing access to a particular domain through TLS (HTTPS) connections while blocking all other outbound traffic.
Stateless Rules
- Drop all ICMP traffic from 0.0.0.0/0 to 0.0.0.0/0
- Forward all other traffic to the Stateful rule group
Stateful Rules
- Allow the ssh
- Allowing the HTTP traffic and will only be able to access my web server using the AWS-provided DNS name.
- Allows the outbound request from this web server to only the domain named networkproguide.com and the traffic will only be the TLS traffic.
- Drop all other TCP traffic so that there is no other traffic that can flow in and out of my web server.
Prerequisites
Before you start the setup process, ensure you have the following:
- A VPC.
- Subnets: Under your VPC, create two subnets – one for the public web server and another for the firewall.
- Internet Gateway is attached to your VPC.
- A web server running on a public subnet.
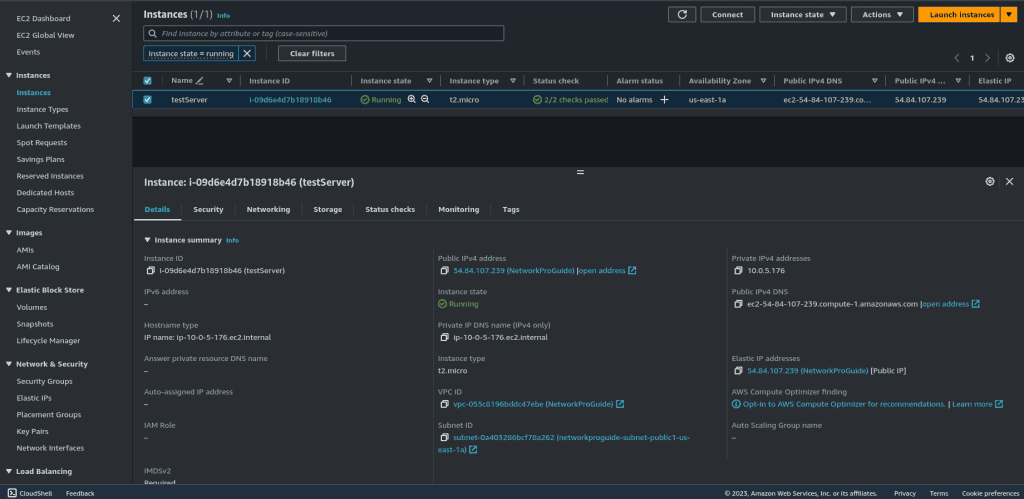
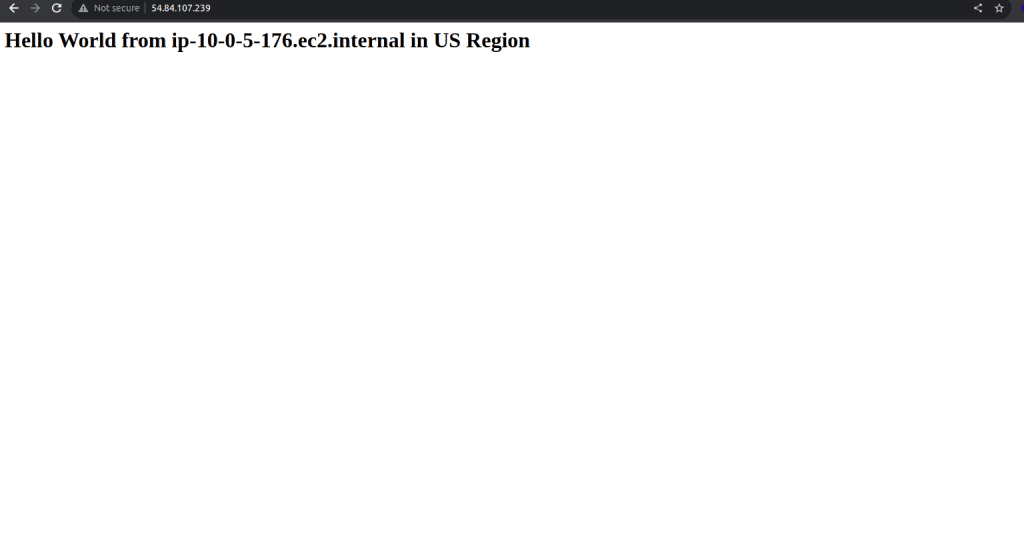
Step 1: Implementing AWS Network Firewall
Log in to your AWS Management Console.
Navigate to the AWS Network Firewall service.
In the AWS Network Firewall dashboard, click “Create firewall.”

Choose a meaningful name for your firewall.

Choose the VPC and the subnet (private subnet) for your firewall with the availability zone.
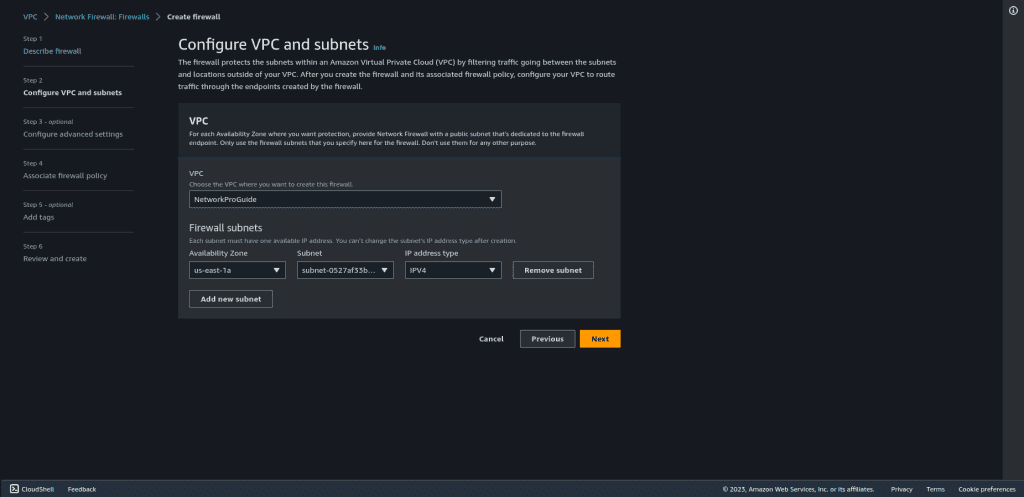
Configure the advanced settings as per your needs. (I have disabled the delete protection but you can enable it.)

Select “Create and associate an empty firewall policy” in the firewall policy.
Give the name to the firewall policy and leave other things as default.
Then click on “Next.”
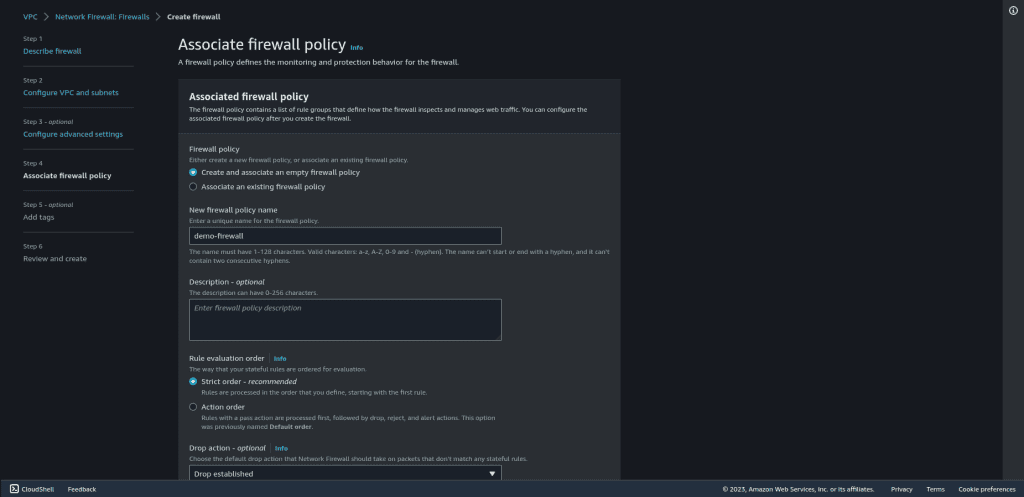
Review the firewall and click on “Create firewall.”
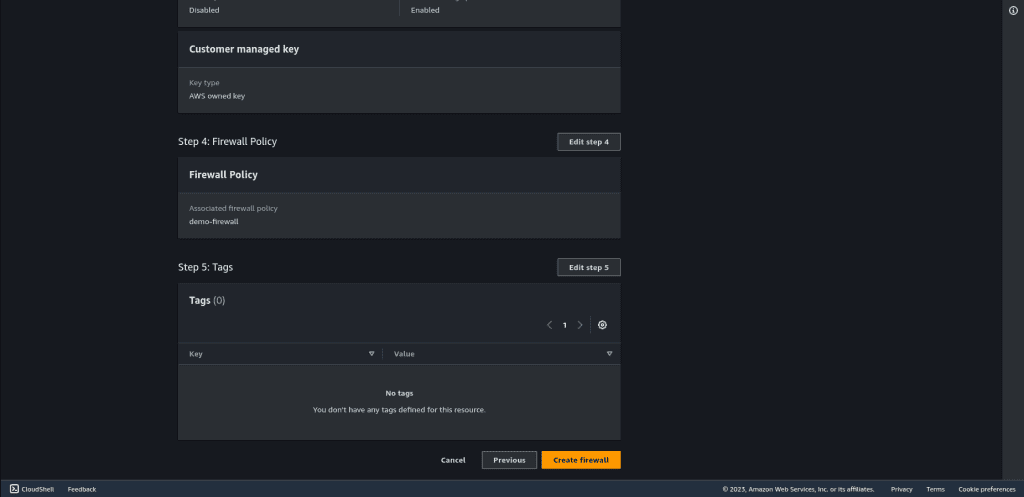
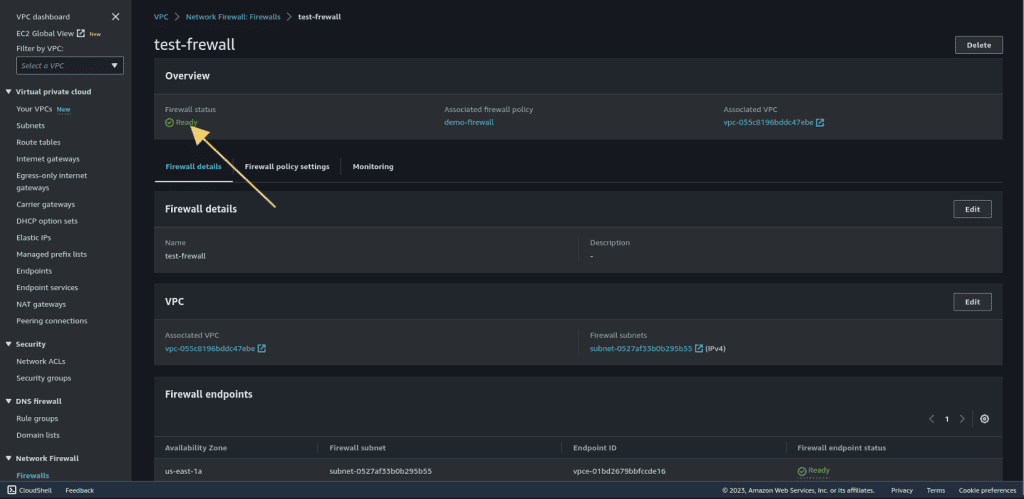
Wait for the firewall status to be changed to “Ready.” It can take some minutes.
Step 2: Creating a Stateless Rule Group:
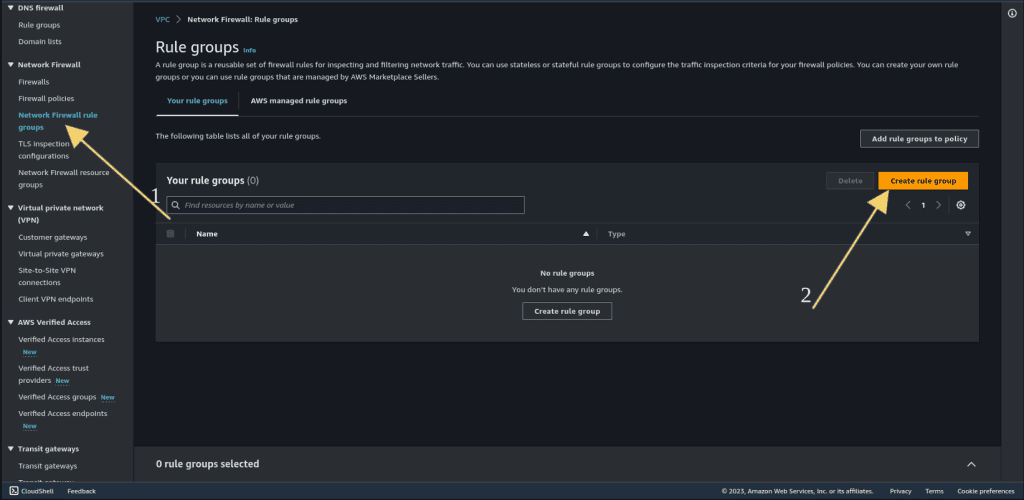
Click on “Network Firewall rule groups.”
Then click on “Create rule group.”
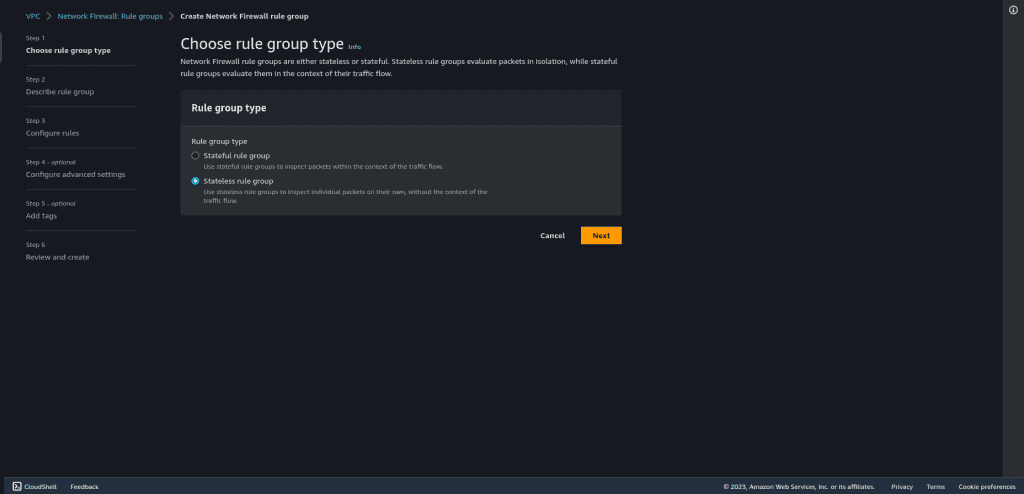
Select “Stateless rules group” as a rule group type.
Then click on “Next.”
Provide a name for your stateless rule group.
Provide the capacity for your rules.
Then click on “Next.”
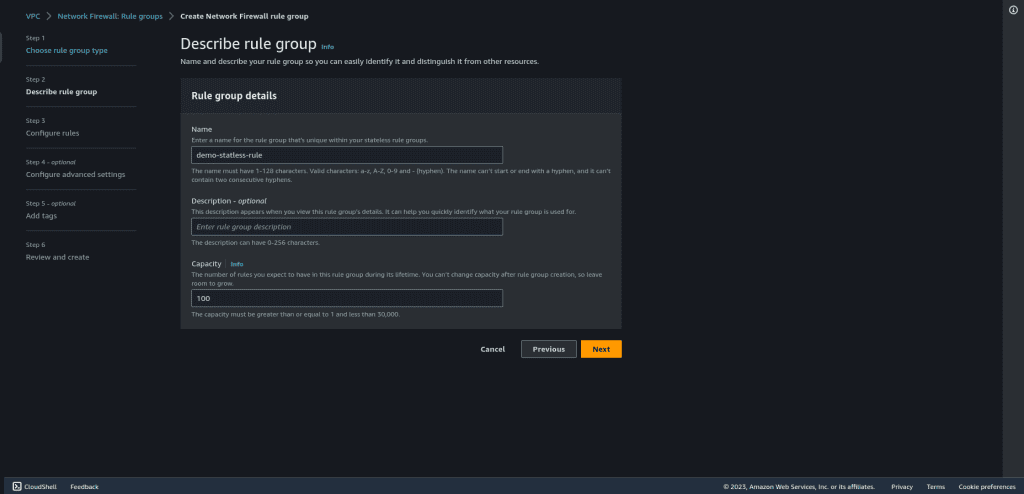
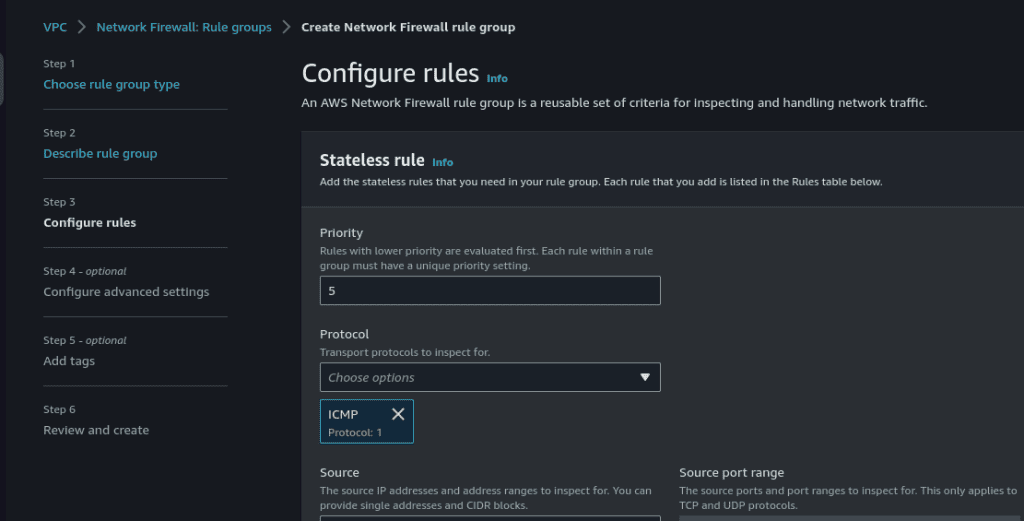
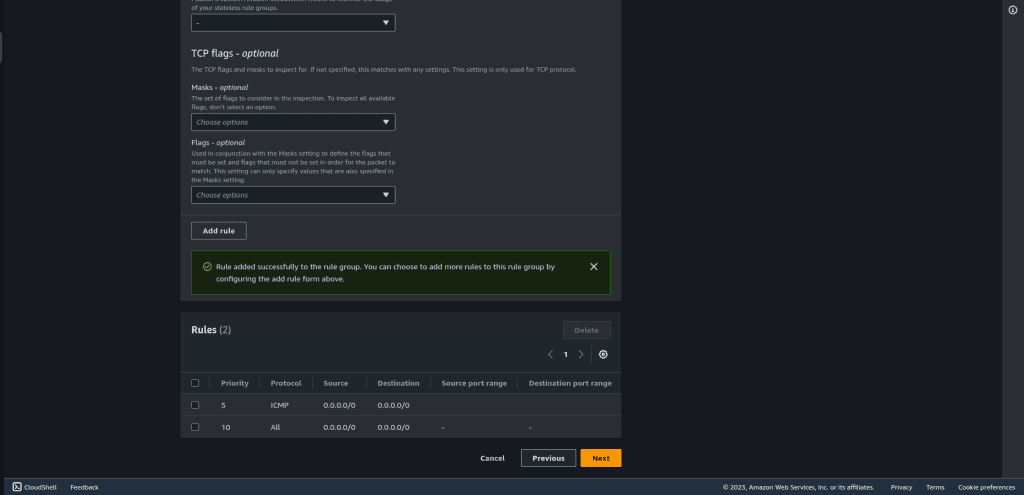
Now it’s time to add the rules, you can add your own rules as per your requirements or can follow them with me.
Set the priority as 5 so that we can insert rules later as well.
Select the protocol as ICMP, as we are going to drop all ICMP traffic from 0.0.0.0/0 to 0.0.0.0/0
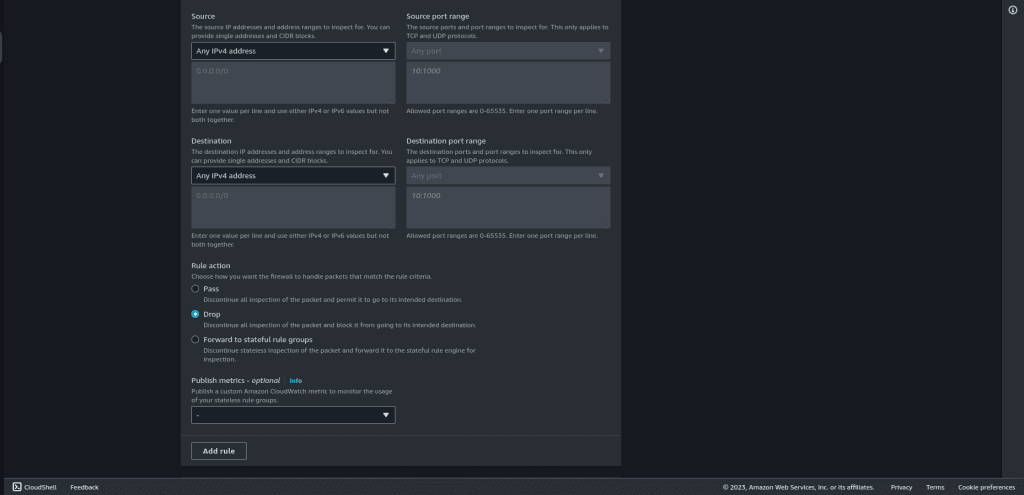
Select the source and destination as “Any IPv4 address.”
Select the rule action as “Drop” and click on “Add rule.”
Add another rule that will pass all the traffic to a stateful rule group.
Set the priority as 10.
Select the protocol as “All.”
Select the source and destination as “Any IPv4 address.”
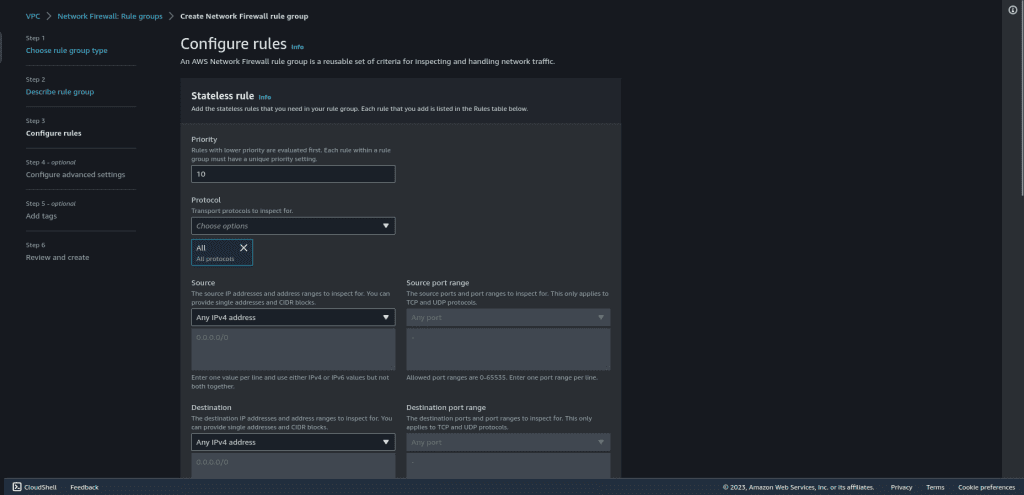
In the rule action select “Forward to stateful rule groups.”
Then click on “Add rule.”

There are two rules for the stateless rule group and we are just creating that now. If you want to create more then you can add as per your need.
Then click on “Next.”
Leave other settings as default.
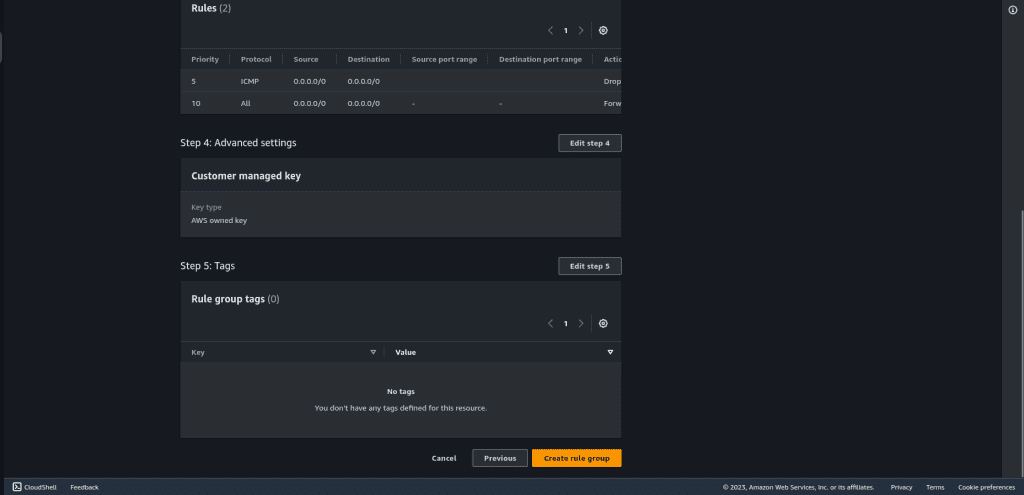
Then review the settings and click on “Create rule group.”
Step 3: Creating a Stateful Rule Group:
Click on ‘Create rule group.”
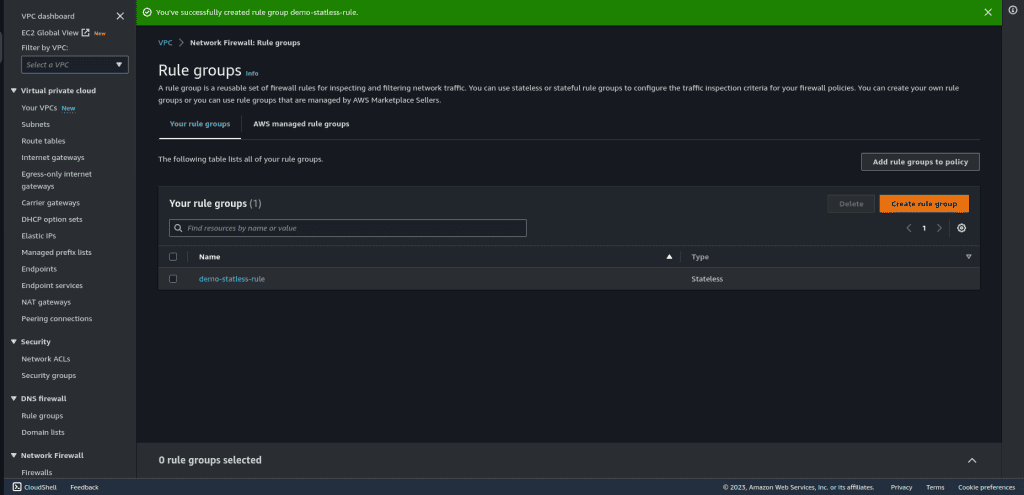
Select “Stateful rule group.”
Select “Suricata compatible rule string” as a rule group format.
Then click on “Next.”
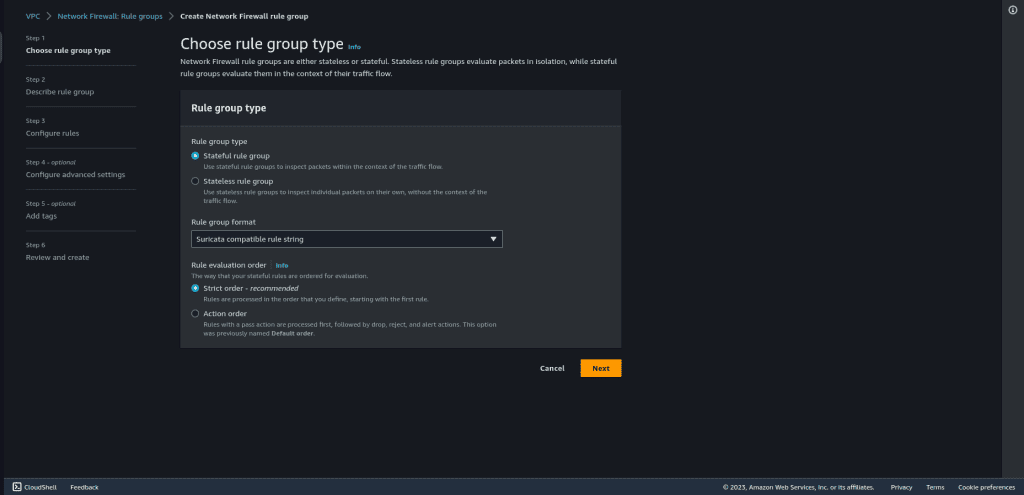
Provide a name for your stateless rule group.
Provide the capacity for your rules.
Then click on “Next.”

Leave other things as default.
Paste your Suricata-compatible rule string. You can learn about it here.
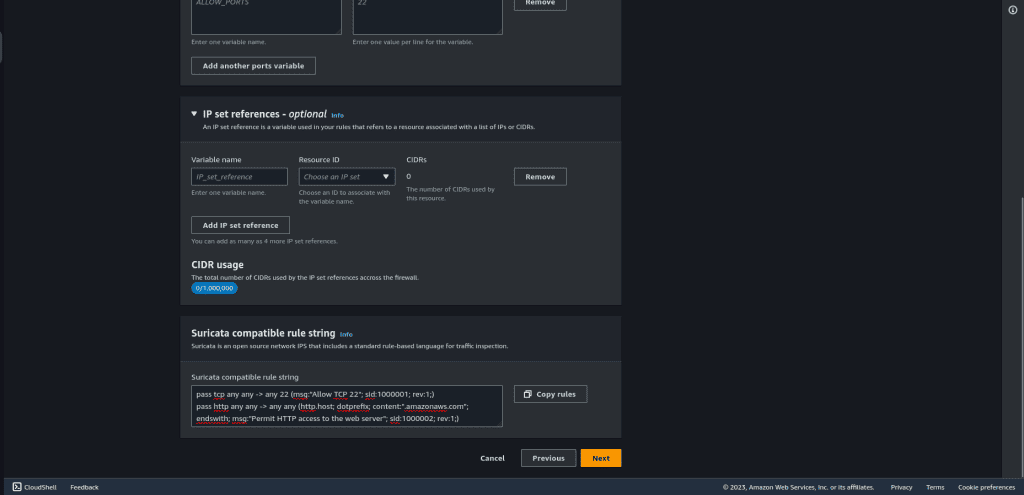
Here is the code that I have used:
pass tcp any any -> any 22 (msg:"Allow TCP 22"; sid:1000001; rev:1;)pass http any any -> any any (http.host; content:."amazonaws.com"; msg:"Permit HTTP access to the web server"; sid:1000002; rev:1;)pass tls any any -> any any (tls.sni; content:"networkproguide.com"; msg:"Permit HTTPS access to networkproguide.com"; sid:1000003; rev:1;)drop tcp any any -> any any (flow:established,to_server; msg:"Deny all other TCP traffic"; sid:1000004; rev:1;)
Here the first rule is about allowing SSH. The second is for allowing the HTTP traffic so that I can access my web server or the browser. And the third rule is for connecting to aws.amazon.com from my web server. The fourth is to drop anything else, which is the TCP traffic
Click on “Next.”
Leave all other settings as default.
Review the rules and click on “Create rule group.”
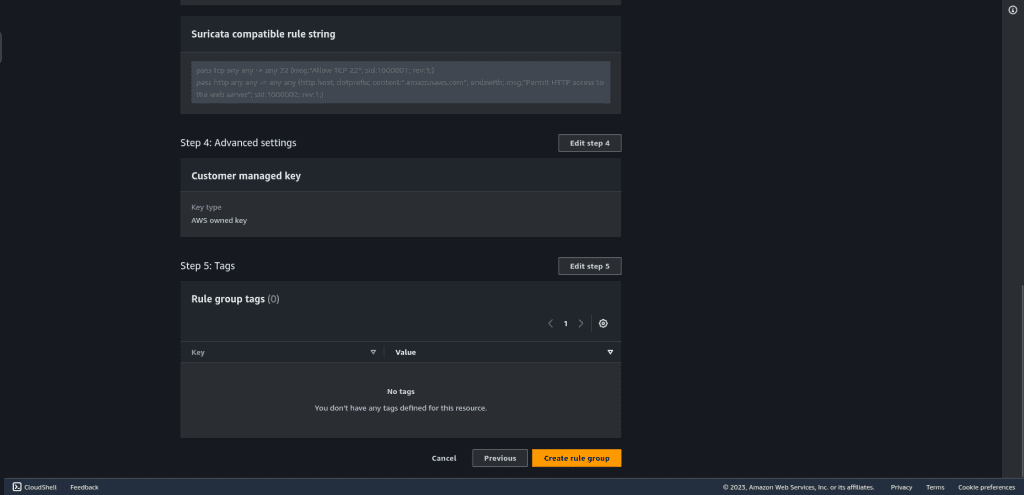
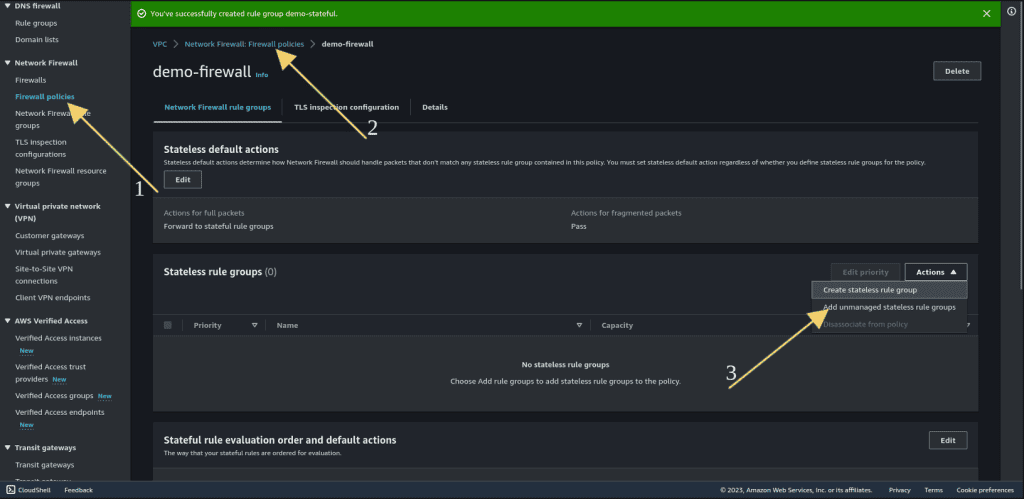
Go to firewall policies.
Select the firewall policy that we have created.
Click on “Actions.”
Then click on “Add unmanaged stateless rule groups.”
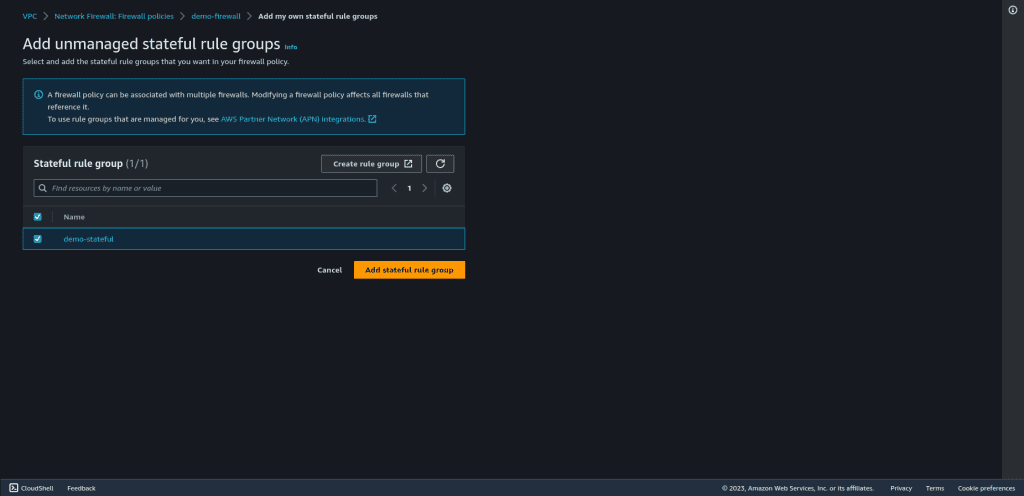
Select the stateless rule groups that you have created.
Click on “Add stateless rule group.”

Also, add the stateful rule groups similar to the above.
Step 4: Modifying Route Tables
Go to the firewall and navigate to the firewall details.
Copy the firewall endpoint ID.

Public Subnet Route Table.
Select the public subnet route table.
Edit the route table and add a new route.
Point the route to the firewall endpoint you created earlier. This ensures that all traffic leaving the public subnet is directed through the AWS Network Firewall.

Firewall Subnet Route Table.
Select the route table associated with your firewall subnet.
Edit the route table and add a new route.
Set the destination as 0.0.0.0/0 to cover all outbound internet traffic.
Configure this route to direct traffic through the Internet Gateway.
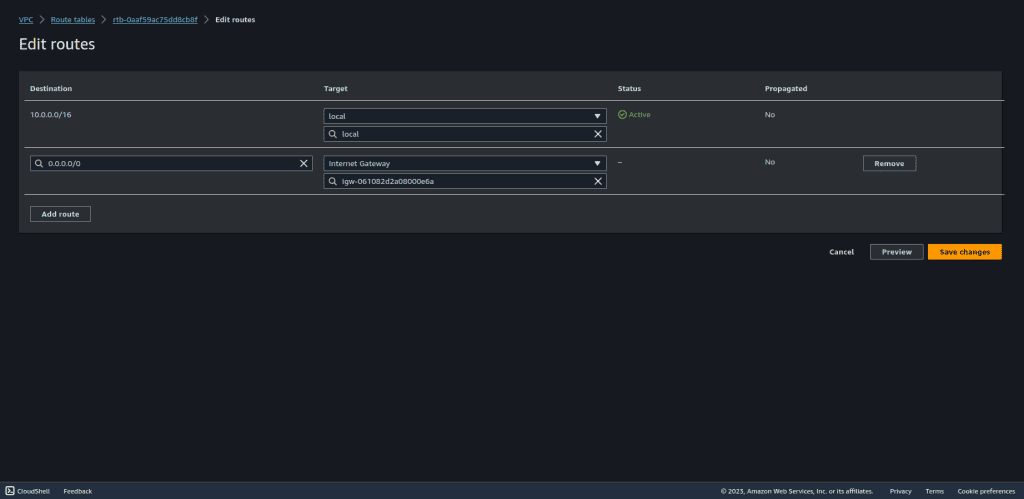
Ingress Traffic Route (Route table of Internet gateway).
To configure the ingress route for the Internet Gateway, go to “Route Tables” in the VPC Dashboard.
Create a new route table specifically for ingress traffic from the Internet Gateway.
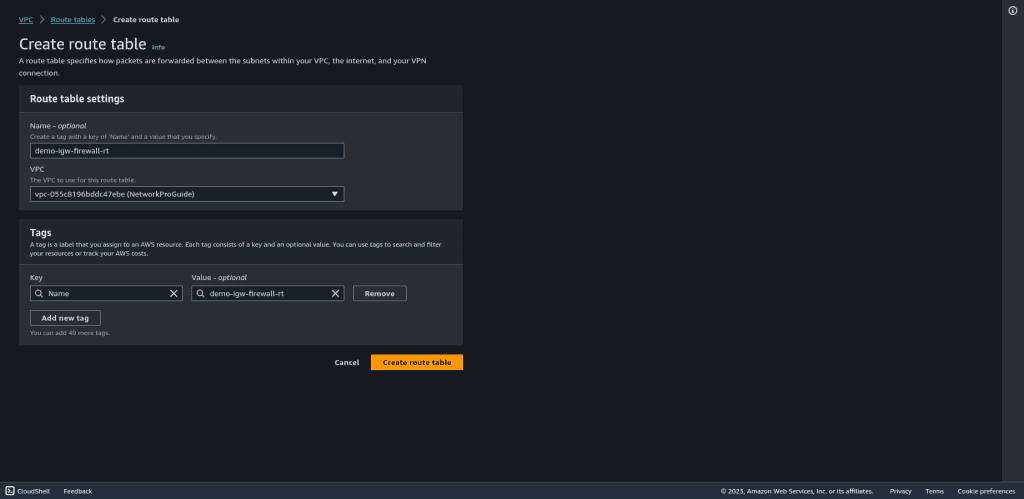
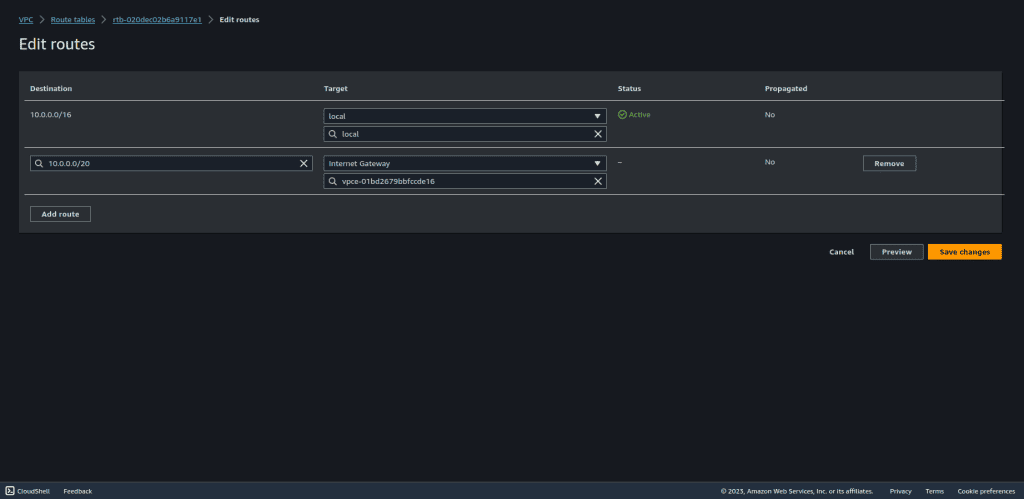
In this route table, set the destination as the CIDR block of your protected subnet (web server subnet).
Configure the target to route this traffic through the firewall endpoint.
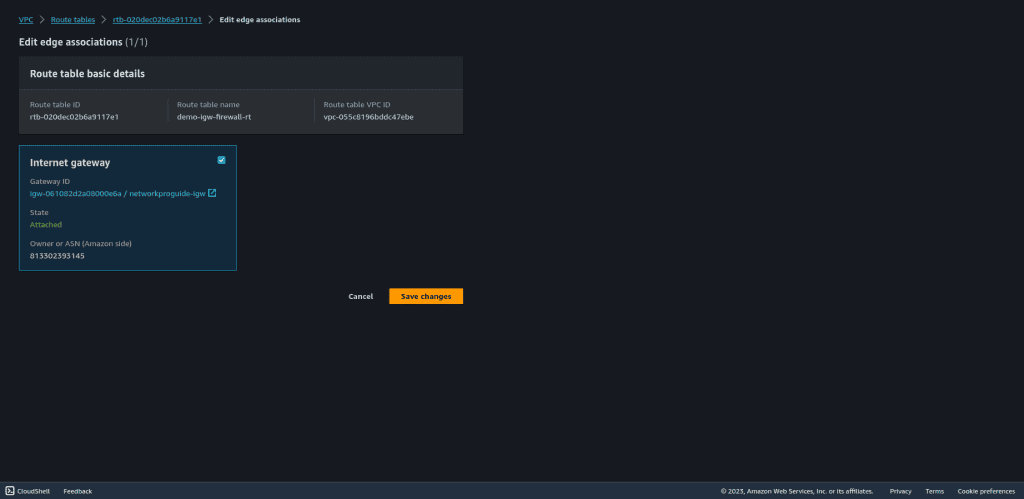
Go to the “Edge association” and click on “Edit edge association.”
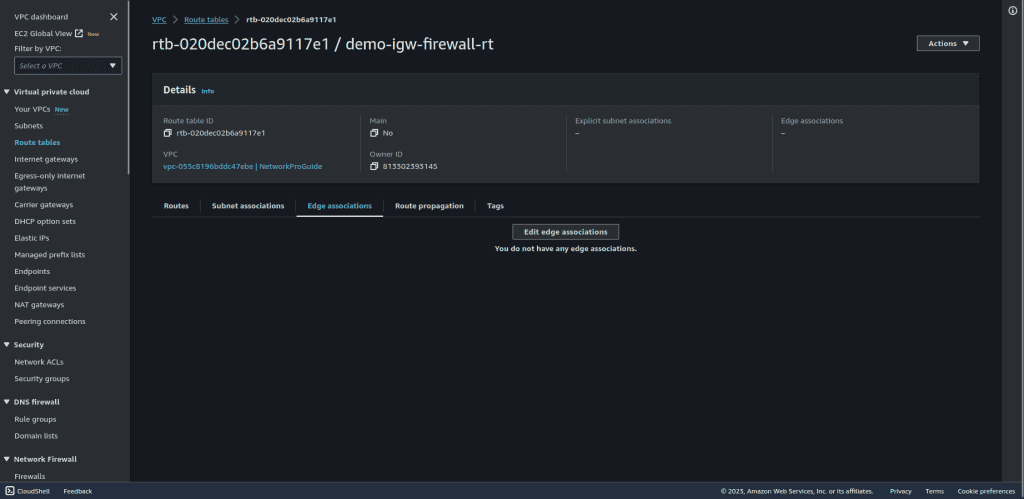
Select the internet gateway to attach this route table to an internet gateway.
Step 5: Testing the Firewall Rules
Trying to access the EC2 with the IP address:

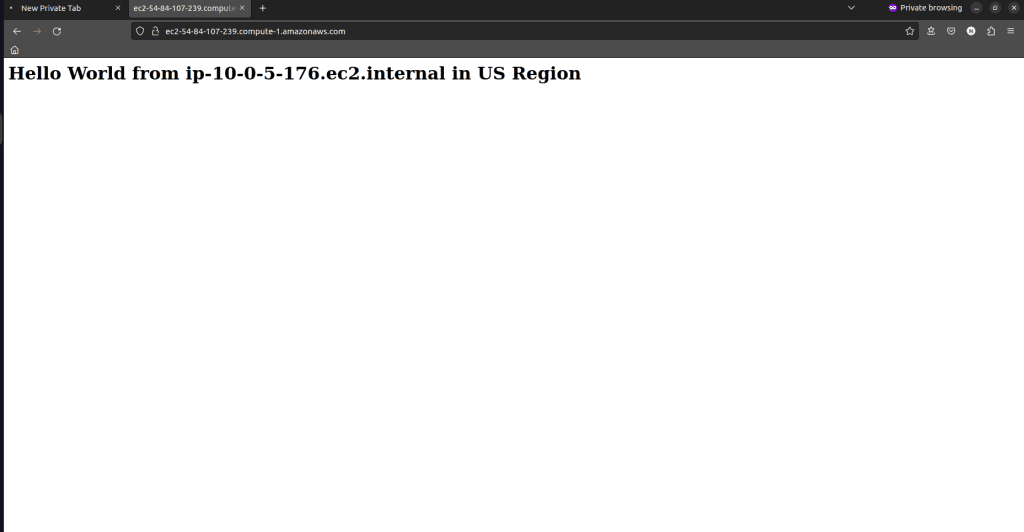
Trying to access the EC2 with the public IPv4 DNS:
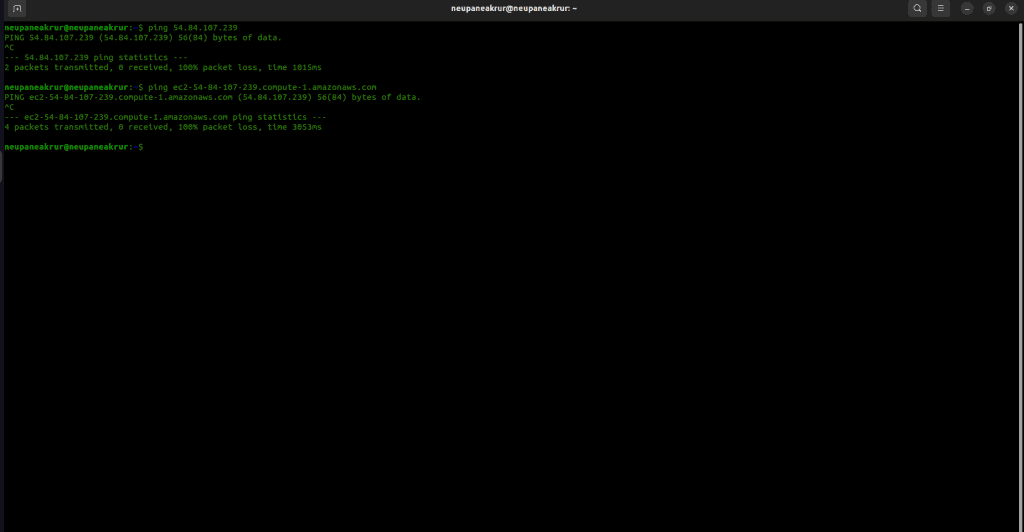
Attempt to ping the web server from a local machine. It should be blocked due to the stateless rule that blocks ICMP (ping) requests.
Use the web server to access aws.amazon.com via HTTPS. It should work because the stateful rule permits access to this specific domain over HTTPS.


