How to Upgrade F5 BIG-IP Software
Life doesn’t stop once you buy your network equipment and install it in your network. You need to monitor your vendor software update notices since many times vulnerabilities are present in a certain version and vendors usually provide fixes through new software versions.
Some devices receive new updates regularly, some barely receive any, but we need to make sure we are familiar with our device software upgrade process. In this tutorial, we will step through how to upgrade a standalone F5 BIG-IP load balancer. The process of upgrading an active/standby cluster is very similar to this one.
Upgrading F5 BIG-IP devices step-by-step
F5 BIG-IP devices and software are quite unified in terms of software upgrade procedure, so this tutorial should be more-or-less applicable to your situation. However, I recommend reading the related articles published by F5, since minor differences could be applied. For example, some hardware versions won’t be supported to run a specific software version and beyond. An example release notes document from F5 can be found here.
Also the upgrade process of active/standby clusters should be the same, the only difference is that you need to switch roles (from standby to active) once you finish with one device.
Prerequisites
- You have a working F5 BIG-IP device with valid license
- You have connectivity to your device via browser and optionally via ssh / console cable
- You have Administrator rights and login credentials
- You have a user account at My.F5.com
Step 1. Verify your current BIG-IP software.
Login to your BIG-IP, and navigate to System / Software Management / Image List. You will see your currently installed image version, where it is installed, and that it is active and default for boot. Also notice the Import button, we will use that button later in the procedure.

Step 2. Download the BIG-IP software.
In this example, we are running with software version 16.1.3.1. We need to make sure we review the release notes and security recommendations from F5, so we can decide which software we want to download from their site. Sometimes it’s better to stay one or two minor versions behind the latest, let other people find the unknown bugs.
Visit MyF5 website’s Download section: https://my.f5.com/manage/s/downloads
You need to have an account in order to download software, but you don’t need a valid service contract.
Select the Product Family as BIG-IP, select the appropriate software major version, then the Release.

Select the software image (ISO) and pick the Download location closest to you for better download speed. You can download the appropriate md5 file related to the ISO, so you can verify your download is not corrupted.
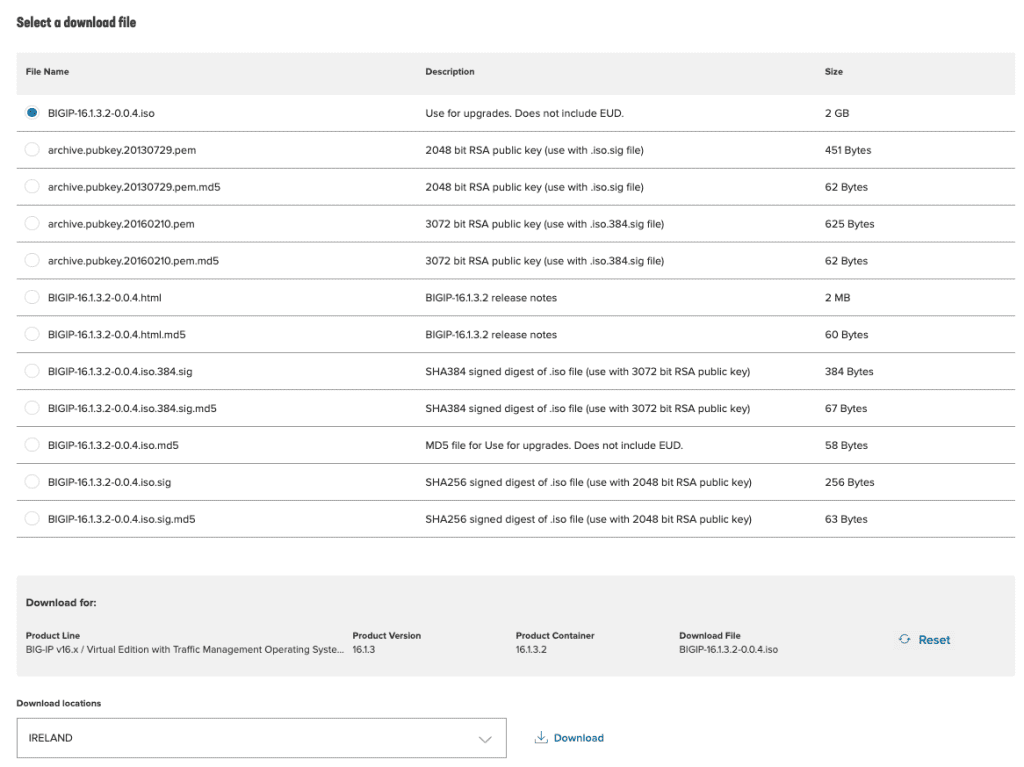
Step 3. Import the ISO image to the BIG-IP appliance.
Once you have the right ISO file, visit System / Software Management / Image List, and click on the Import button. Select the ISO file from your computer, and click Import.
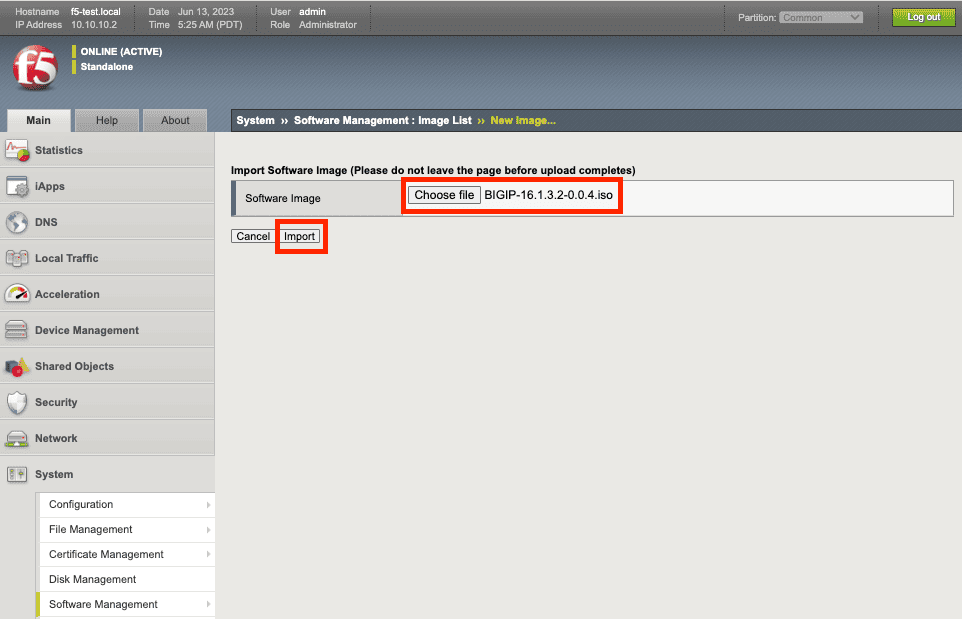
The upload of the ISO file will start, please note that you have to stay on that page until the upload is finished, do not navigate away. Depending on your location/connection type it could take a while, since these ISO files are usually large (2+ gigabytes). You will see a progress bar, so you know where the upload is at the moment.

Once the upload is finished, it will return to the main System / Software Management / Image List page, and you should see the new software under Available Images. So far we haven’t done the upgrade, we just copied the ISO to the device.

Step 4. Install the new software to a new boot location.
Select the uploaded ISO file with the checkbox, and click Install. A new popup window will appear, where you need to select the appropriate Disk (HD1 in our case) and you have to specify the new Volume set name, where you want to install the new software. In our case we put 2, so eventually it will be installed on the HD1.2 location.

The install process will start, and if you refresh the page (here you can refresh, unlike on the software upload page), you will see a progress bar. Again, this can be a slow process, so expect 10 or even 20 minutes.
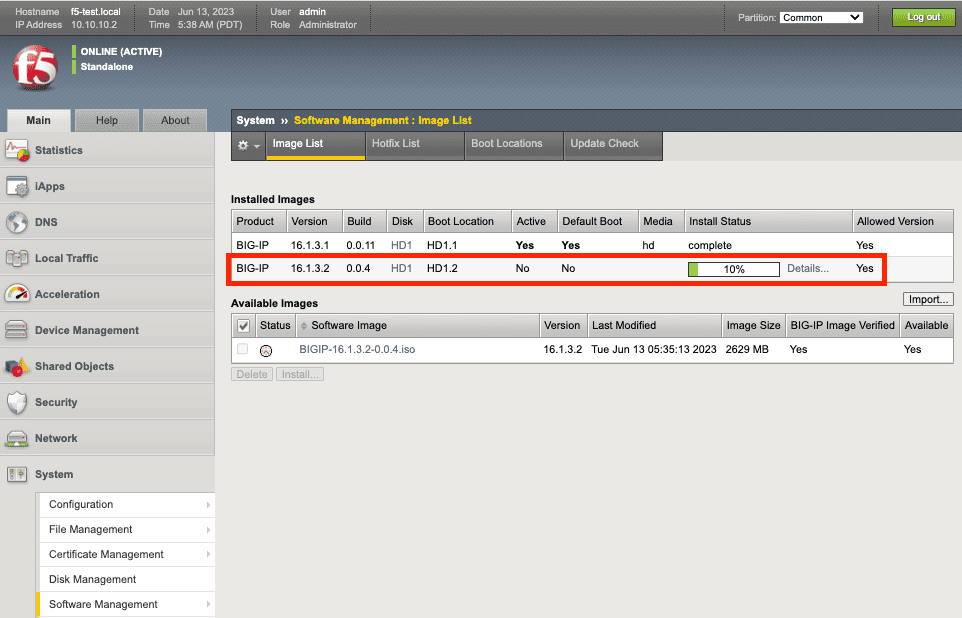
Once the install process is done, you will see status ‘Install completed’. Now you have 2 boot locations, each containing a different software version. Notice that the old software is still Active and Default Boot.
Step 5. Reactive license before booting into the new software version.
Licensing a BIG-IP device is a much broader topic, and out of the scope of this article. However, since we need to reactivate the license before booting the device into the new software, I have to cover some basics.
Service Check Date: Located in the BIG-IP license and is the same as the date the license was last activated or the date the service contract for the device expires, whichever date is earlier. You can check your Service Check Date with the following command from the TMOS Shell (you need to connect to the device via ssh):
show sys license | grep "Service Check Date"
License Check Date: The license check date is a static date built into the software for BIG-IP systems. It’s predefined by F5 for each software version. The following link contains all BIG-IP Software License Check Dates: https://my.f5.com/manage/s/article/K7727
Why is this important for us? I quote here the above article:
“If the service check date is missing or is earlier than the license check date, the system will fail to load the configuration when you attempt to boot into the upgraded boot location.”
Reactivating the license means the device will connect to F5 License Server, and it will check your license validity, and if everything is ok, it will update your Service Check Date with the current date. Since the License Check Date is constant, reactivating the license means your Service Check Date will become a later date, so it will successfully boot into the upgraded boot partition.
For reactivation, go to System / License and press the Reactivate button. This process causes traffic disruption, so please execute it in a timeslot when your users can tolerate traffic drops for a couple of minutes. After successful reactivation, the device is back to operational and Service Check Date should be the current date.
Step 6. Set the new boot location and reboot.
Our device is still running with the old software, so we need to change the boot location settings, so after a reboot, the device will come up with the new software version.
Go to Software Management / Boot Locations. You will see the two (or in your case more) boot locations.

Click on the new boot location that we just created in Step 4. On this page you will see the software versions we’ll upgrade from and to, if we activate this boot location. Make sure you check the Source Volume is the currently active one (HD1.1 in our case, might be different on your device), also make sure you select Install Configuration: Yes.
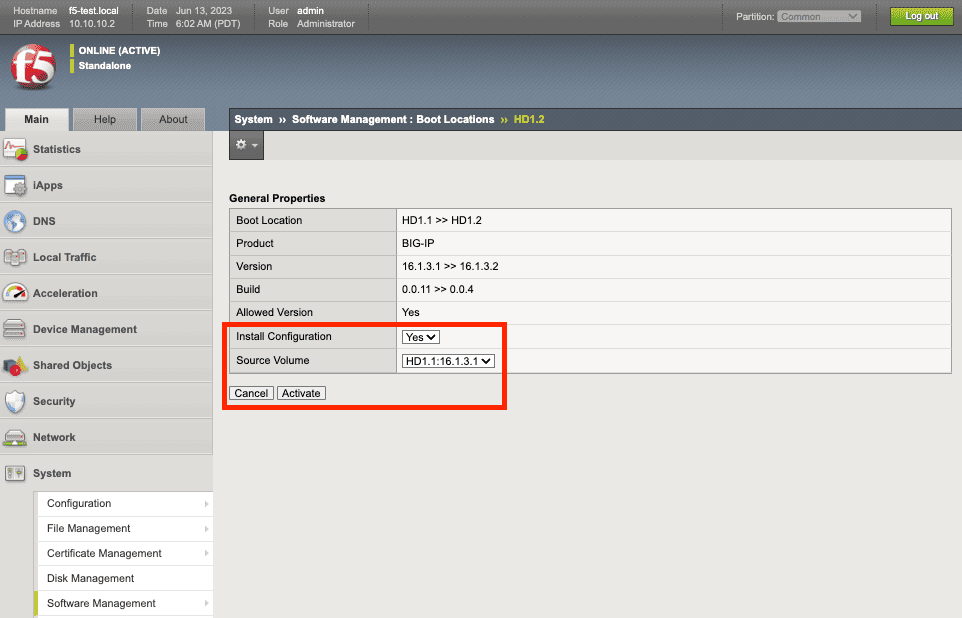
If you check and everything is set up on this page, you can hit Activate. This will cause a full device restart, so make sure you execute this in a change window where traffic disruption is acceptable from the users. However, if you have an active/standby setup, this upgrade is a no-impact activity for your users.
Step 7. Wait until reboot finishes and check software and configuration.
After hitting the Activate button from the previous step, the BIG-IP will reboot. You will be logged out and you will see an informative page about the current status.
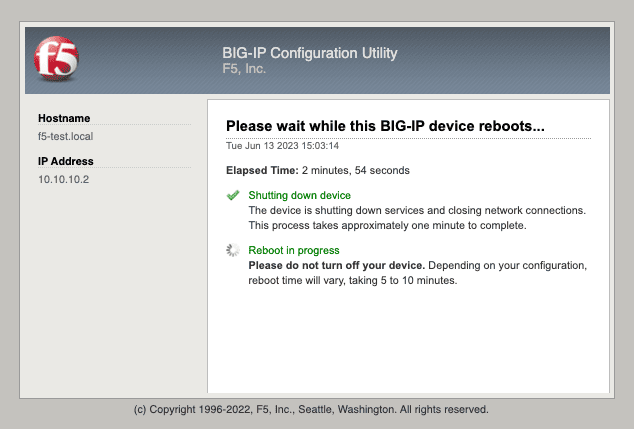
The reboot might take some time, you can expect from 5 to even 10-15 minutes until the device is back. If it takes longer than 15 minutes, make sure you check your console or ssh connection to the device for more information. Once finished with the reboot, you will receive the login page.

After login, you can go to the System / Software Management / Image List page to verify the currently Active and Default Boot location, which should be the one with the new software. Make sure you check your BIG-IP configuration (virtual servers, pools, etc) to ensure that everything is in place and test various connections, depending on your BIG-IP setup, to verify everything works correctly.
Related: F5 BIG-IP CLI Commands Cheat Sheet
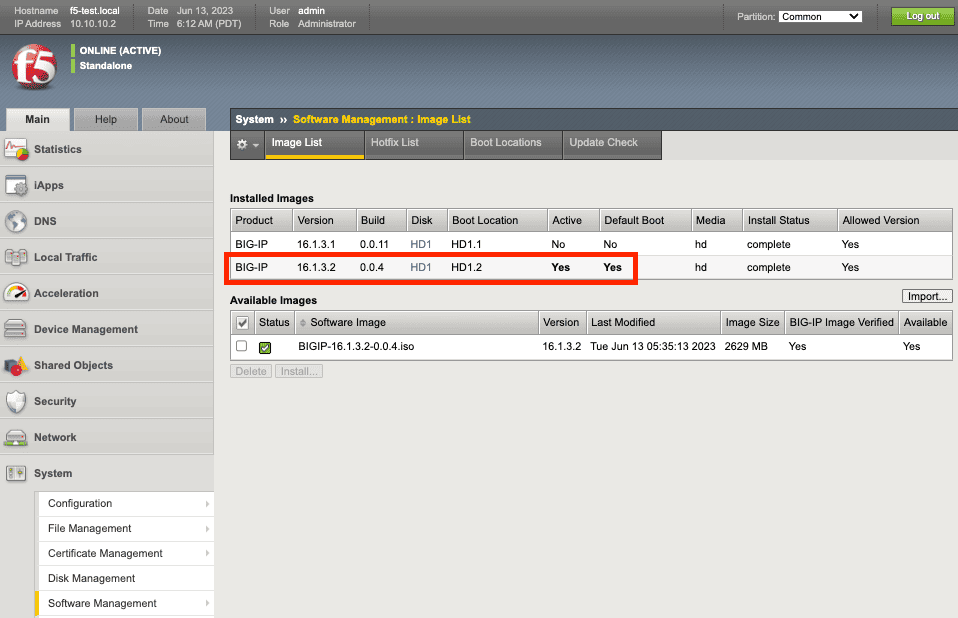
The upgrade is done, enjoy your new BIG-IP software with less vulnerabilities and more features!
Sources
https://my.f5.com/manage/s/article/K167
https://my.f5.com/manage/s/article/K84554955
https://my.f5.com/manage/s/article/K51113020
https://my.f5.com/manage/s/article/K7727


