Connecting Multiple VPCs with AWS Transit Gateway
Managing and connecting the multiple VPCs is challenging and Amazon Web Services (AWS) recognized these complexities and introduced a powerful solution known as AWS Transit Gateway. When dealing with multiple VPCs, establishing full-mesh connectivity between them using traditional VPC peering connections can become complicated. Each VPC would need a separate connection to every other VPC, leading to an impractical number of peering connections.
AWS Transit Gateway is a solution to simplify complex network architectures. This service allows customers to interconnect thousands of cloud VPCs and on-premises networks seamlessly. Unlike VPC peering, Transit Gateway is not limited to one-to-one connections, offering a more scalable and efficient solution.
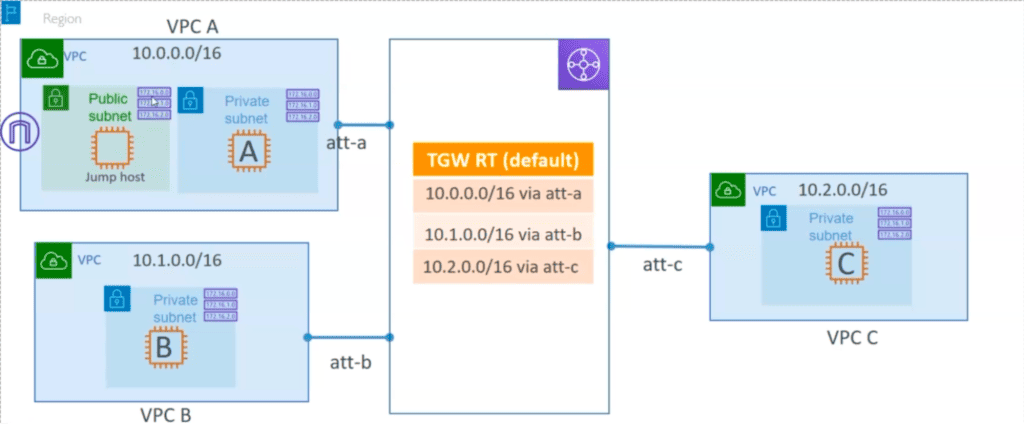
In this guide, I will walk you through the process of setting up AWS Transit Gateway. Below is the topology and architecture diagram that we will be working with.
Implementing AWS Transit Gateway (Step by Step)
Follow these steps carefully to implement AWS Transit Gateway in your AWS environment.
Prerequisites
Before you start the setup process, ensure you have the following:
- An AWS account with the necessary permissions to create and manage resources.
- At least 3 VPCs with a private subnet in two VPCs and a Public and Private Subnet in one VPC.
- 3 EC2 instances in all 3 private subnets.
Here VPC A has 2 subnets, one public (attached to internet gateway) and another private, and other 2 VPCs have just private subnets.
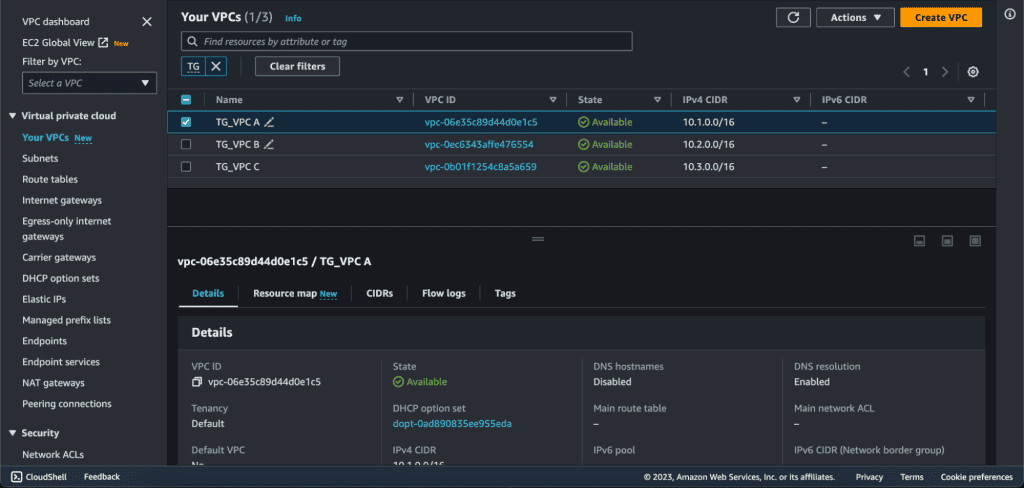
Step 1: Creating Multiple VPCs and Subnets
Follow our guide on Creating a VPC in AWS if you need help setting up your initial VPCs and subnets.
Step 2: Launch a Bastion Host (Jump Server)
A Bastion host is a publicly accessible server located in a public subnet that acts as a bridge between your local machine and private instances in a Virtual Private Cloud (VPC). It serves as a secure entry point for accessing private instances in a controlled way.
In the EC2 Dashboard, select “Launch Instance” to create a new EC2 instance.
Choose an appropriate Amazon Machine Image (AMI) for your jump host.
Configure the instance details, including the public subnet, instance type, and any additional storage or tags. Choose the VPC A and Public Subnet for it.
Configure the security group for the jump host. Ensure that it allows incoming SSH (port 22) traffic from your IP address.
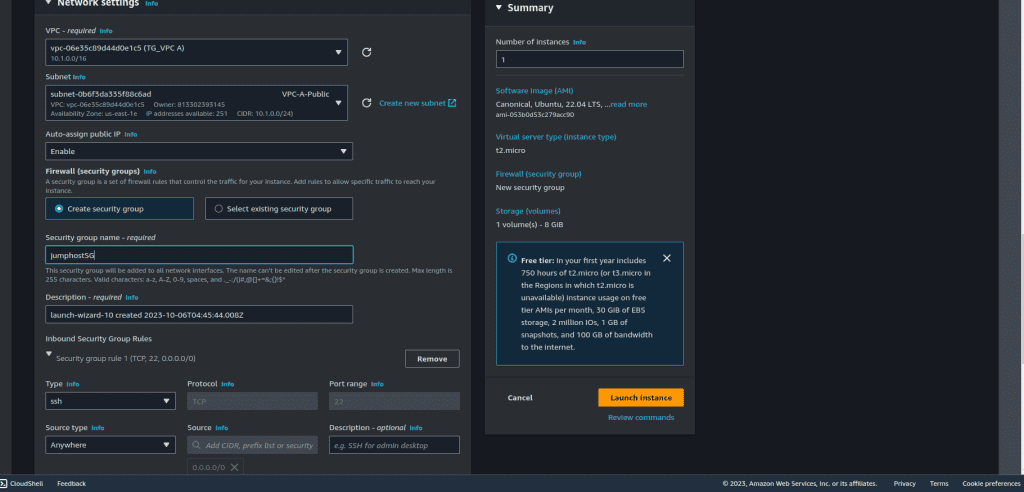
Launch the bastion host instance.
Step 3: Launching EC2 Instances in the Private Subnet
Now Launch all 3 private instances on 3 different private subnets.
Let’s first launch the private instance in VPC A in the private subnet.
In the EC2 Dashboard, select “Launch Instance” to create a new EC2 instance.
Configure the instance details, such as name, instance type, etc.
Create and Download the key pair on your machine. We will need that later.
Configure the instance details and select the private subnet you created.
Complete the instance setup, including security groups and key pairs, as needed. Allow SSH Access from Bastion Host.
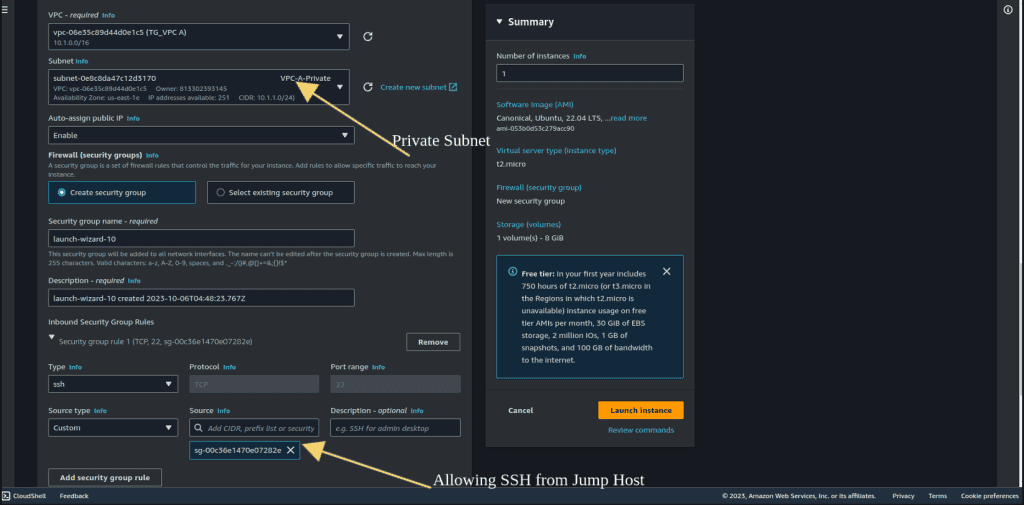
Launch the EC2 instance.
Also launch the instances in the Private subnet in VPC B and VPC C.

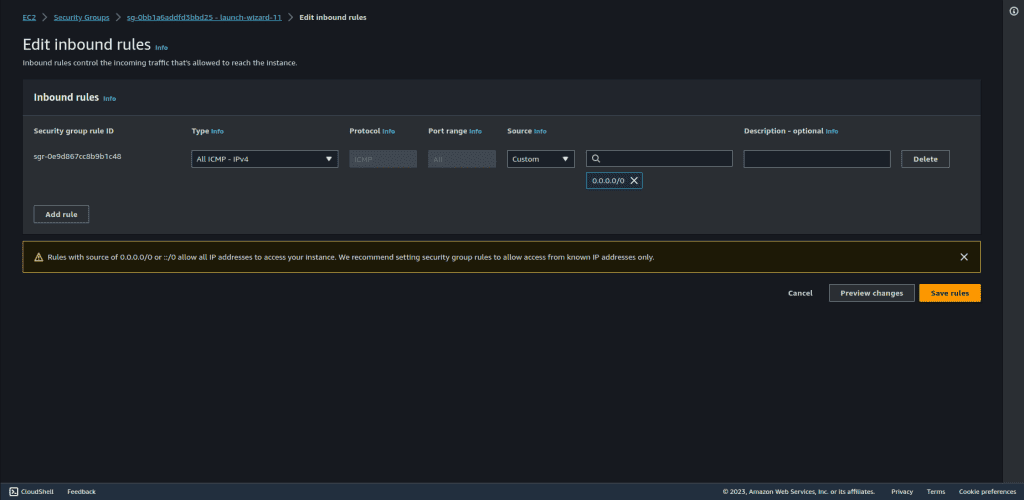
Allow ICMP for SSH access in the security group, while launching the private instances in VPC B and VPC C. (You can allow the traffic based on your needs and requirements.)
Step 4: Configure the SSH Access
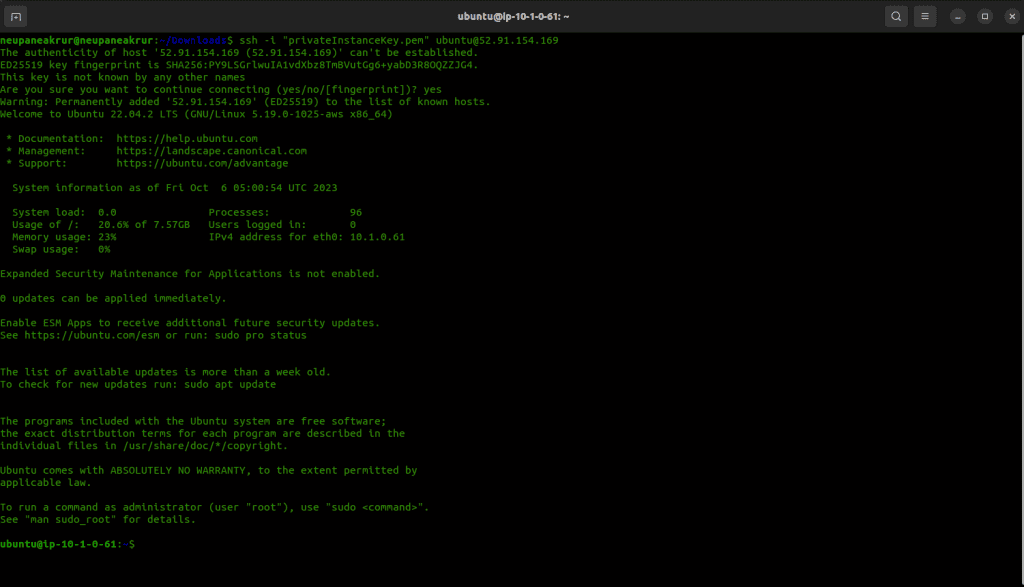
On your local machine, open a terminal and use the SSH key pair associated with your bastion host to connect.
Replace /path/to/your/keypair.pem with the path to your SSH private key file and bastion-host-public-ip with the Elastic IP of your bastion host.
ssh -i /path/to/your/keypair.pem ec2-user@jump-host-public-ip
Step 5: SSH into Private Instances
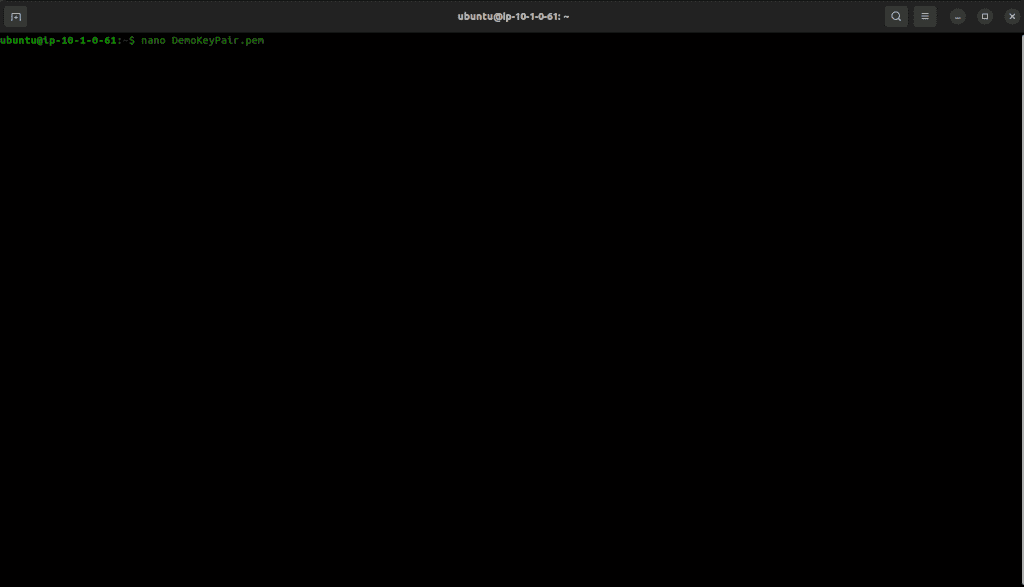
Create a new file named DemoKeyPair.pem in the instance.
nano DemoKeyPair.pem
Paste the content of the key pair of your Private EC2 instance in the editor.
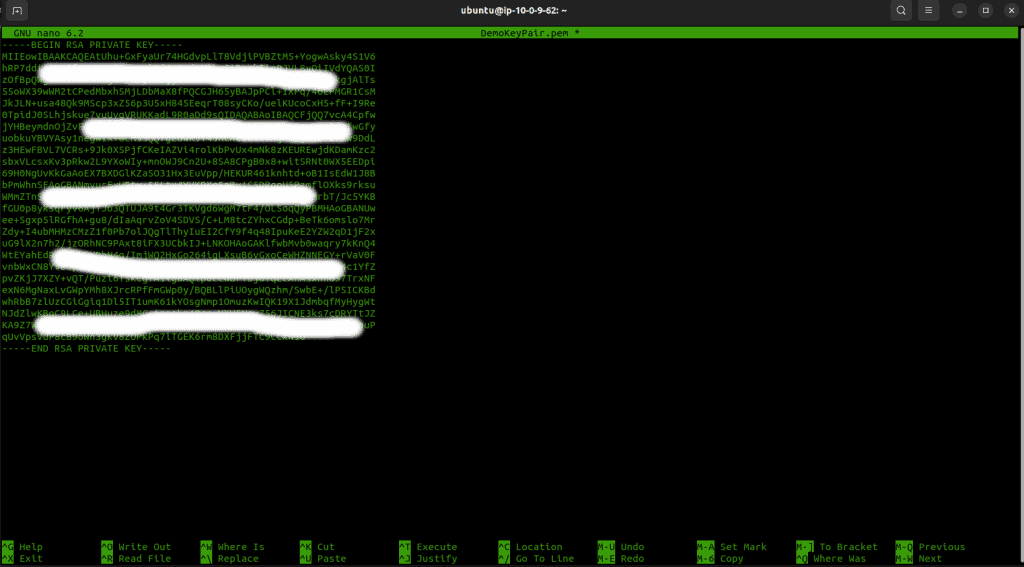
Save it. (Ctrl + X, then Yes)
Change the ownership of the pem file:
chmod 0400 DemoKeyPair.pem
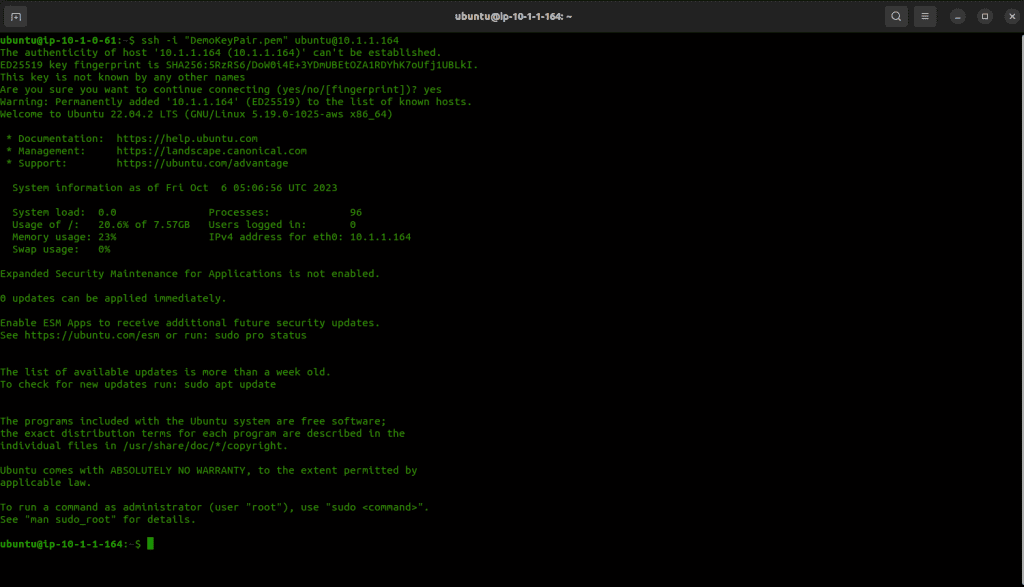
After that, use SSH agent forwarding to securely access your private instances:
ssh -i "DemoKeyPair.pem" ubuntu@private-instance-private-ip
Replace private-instance-private-ip with the private IP address of the target private instance and the privateInstanceKey.pem with the pem file name.
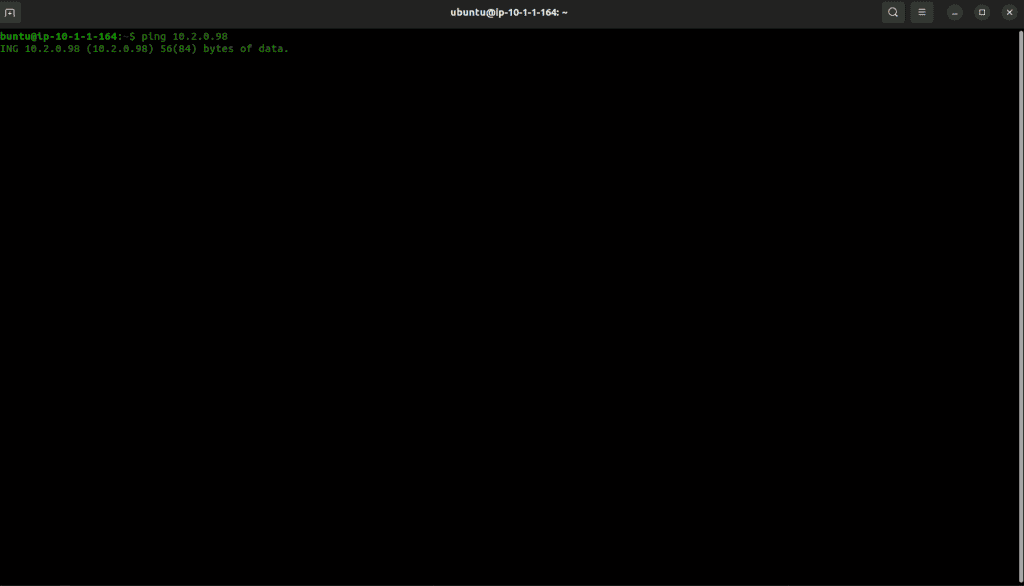
Let’s try to ping the VPC B private instance from its private IP.
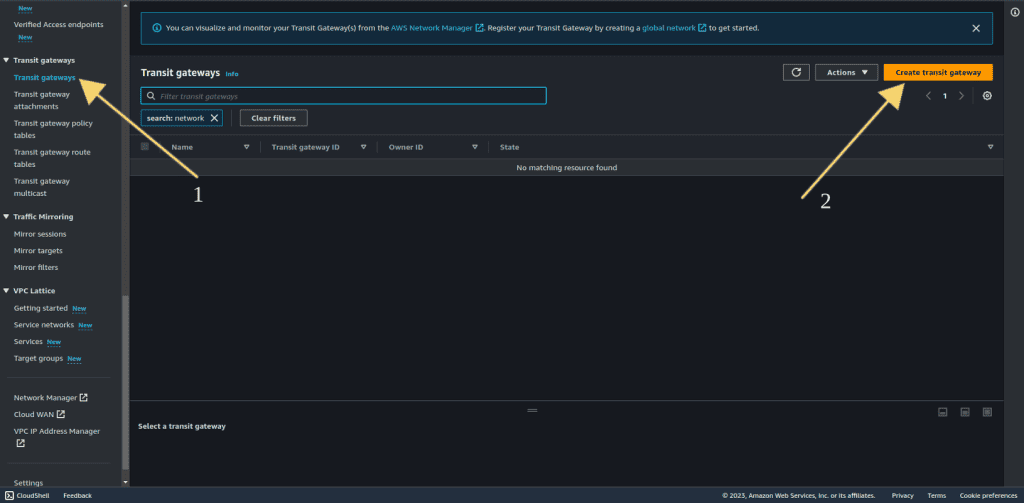
Step 5: Creating the AWS Transit Gateway
From the AWS Management Console, navigate to the “Services” menu.
Select “VPC,” and click on “Transit Gateway from the left sidebar.
Click the “Create Transit Gateway” button.
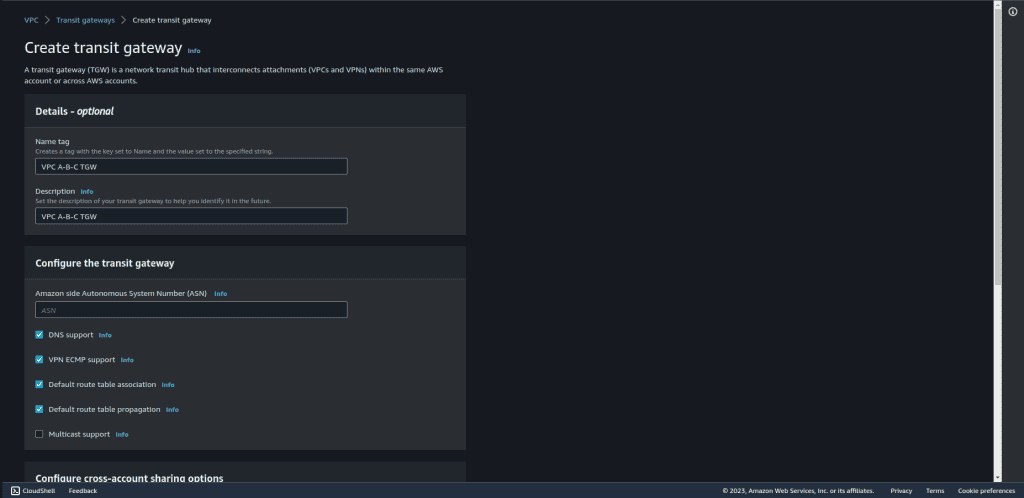
Give the name to the Transit Gateway. Provide the description.
Leave all other settings as default and click on “Create transit gateway.”
Wait for a couple of minutes until the state is changed to “Available.”

Step 6: Creating Transit Gateway Attachments
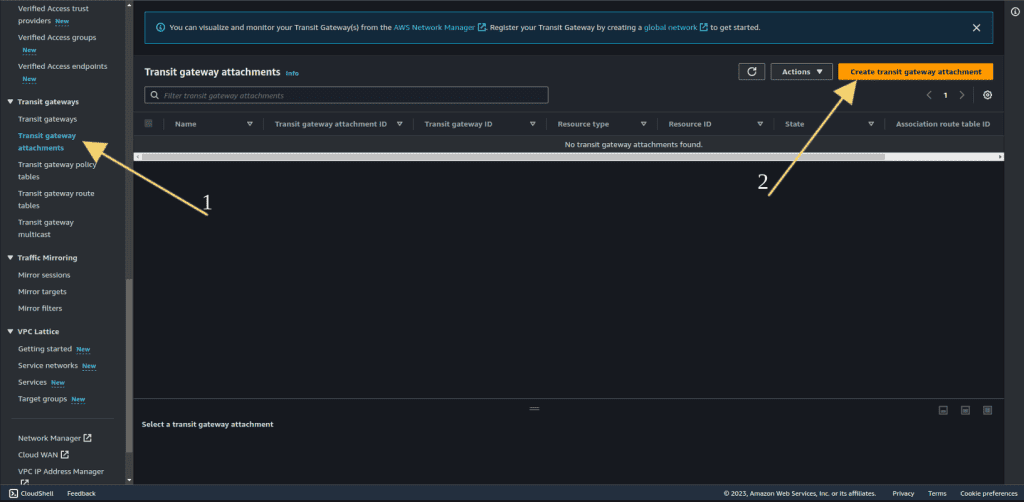
Click on “Transit gateway attachment.”
Then click on “Create transit gateway attachment.”
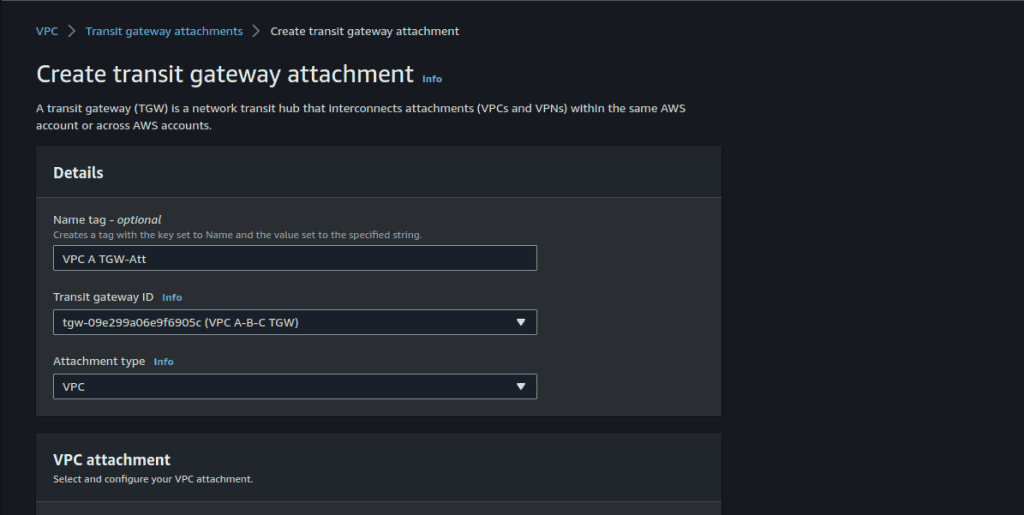
Give the name to the attachment.
Select the VPC A and the private subnet.
Important Note:
How the transit gateway works is that for multiple AZs, you have to select the corresponding subnet. That means if you are selecting AZ 1A, all the subnets in that AZ can communicate with the transit gateway.
If you have subnets that are in different AZs and you don’t select that AZ at this moment, then transit gateway communication cannot happen with those subnets.

If you have subnets in different AZs then select that AZ also.
Click on “Create transit gateway attachment.”
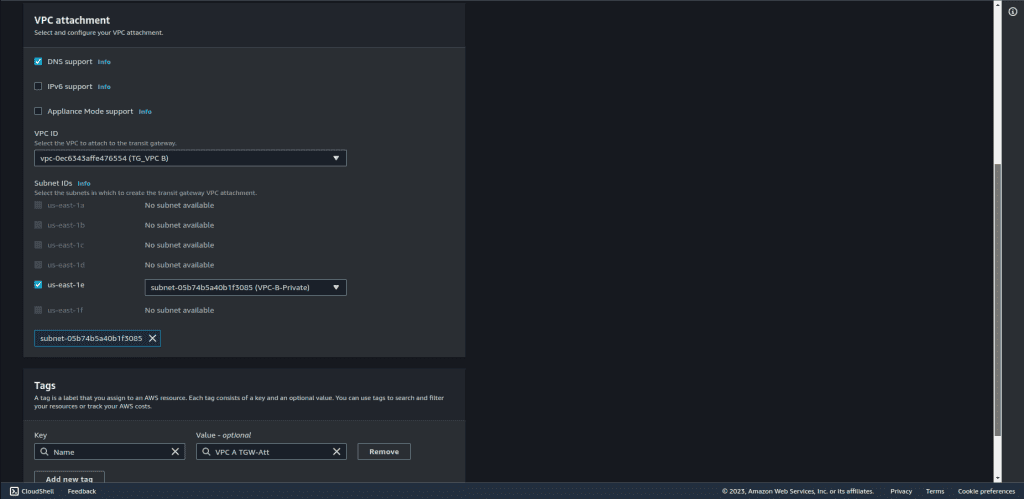
Now, let’s create the same attachment but for VPC B. Repeat the same process as above and select VPC B.
Also, create the same attachment but for VPC C. Repeat the same process as above and select VPC C.
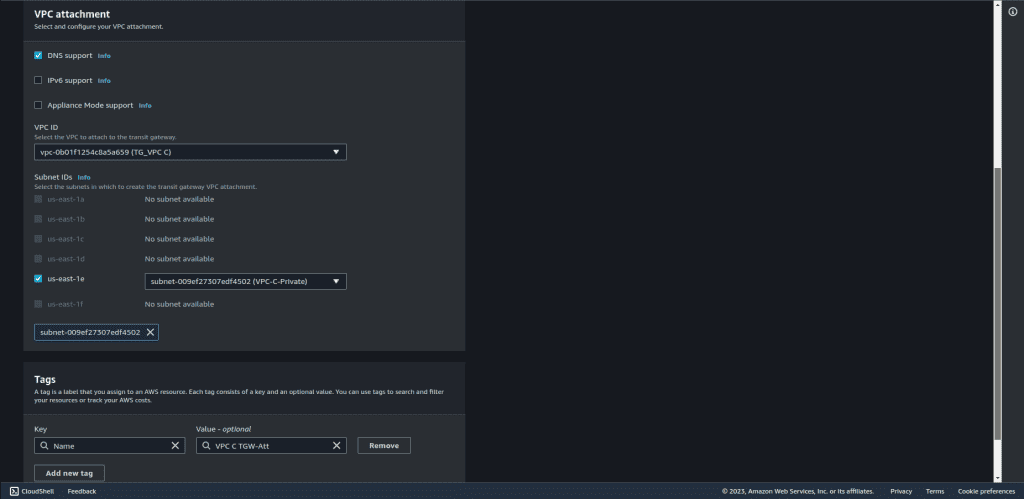
If you have more VPC, then repeat those same steps for all VPC.
The Transit gateway route table will get these 3 VPC attachments associated and propagated automatically.
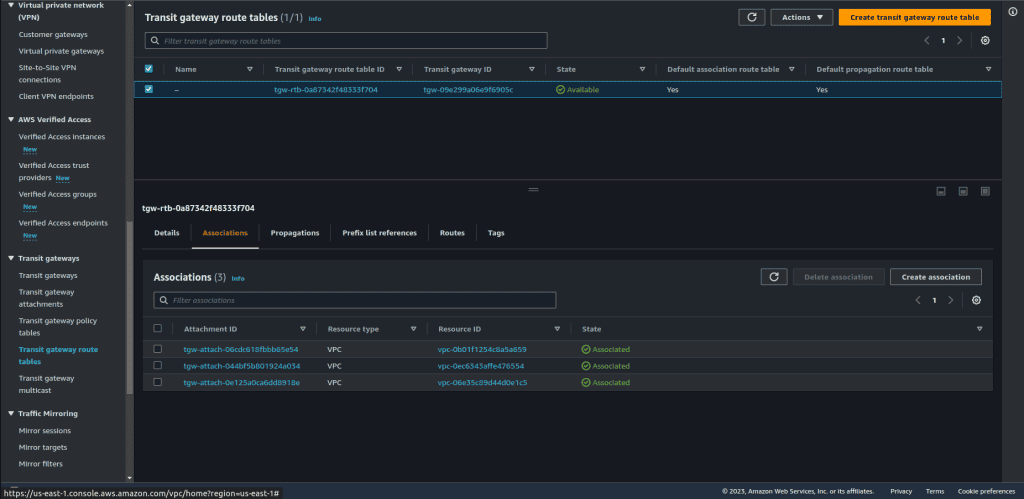
You can also see all three routes in the routes tab. The route type is propagated which means that from VPCs these routes are propagated to the default route table. This will allow communication from any VPC to any VPC.

Step 7: Modifying Private Subnet Route Tables
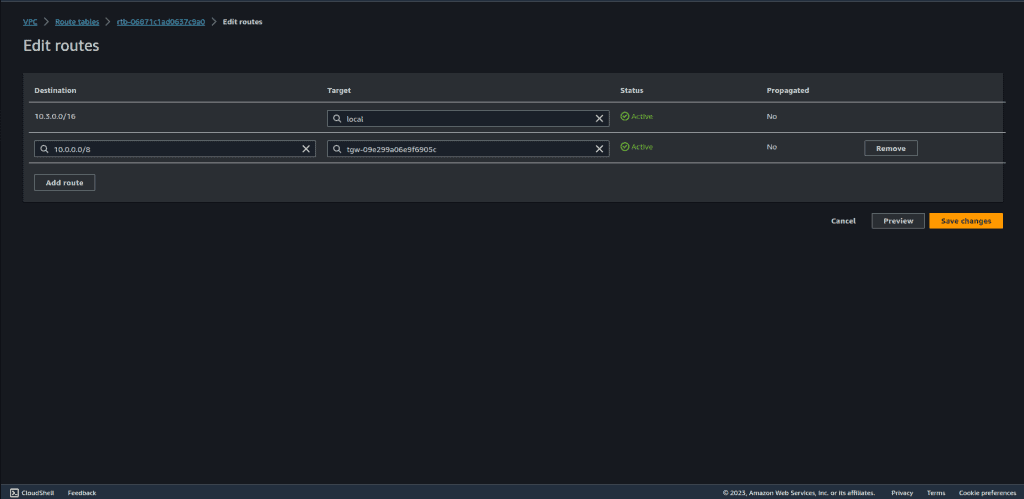
Now at last we need to modify the route tables for the private subnet manually.
Go to the VPC Dashboard, and select “Route Tables” in the navigation pane.
Locate the route tables associated with your private subnets. Let’s first do it for the VPC A private subnet.
Select the VPC A private route table.
Click on “Routes” and then “Edit routes.”
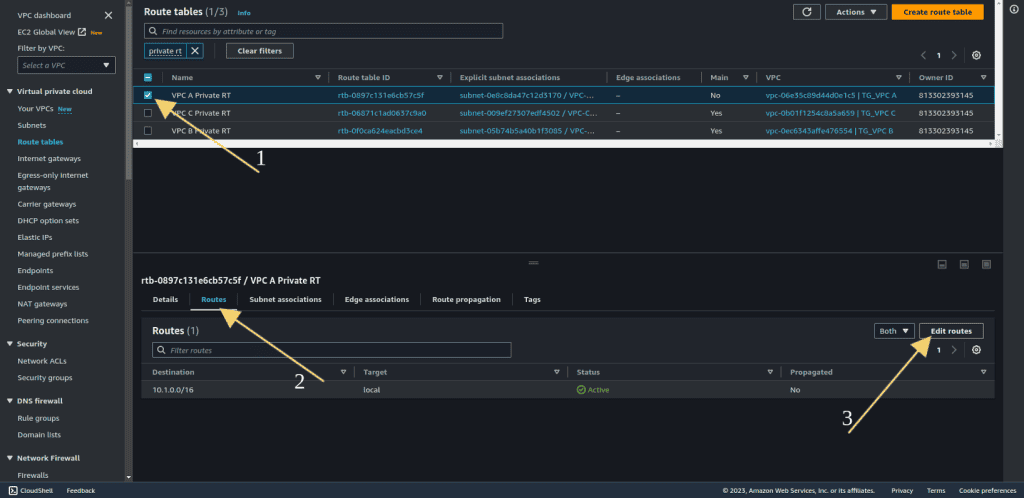
Select 10.0.0.0/8 at designation, because it’s a super set of all these three VPC CIDRs.
Also search the transit gateway at target and select the transit gateway that we have created.
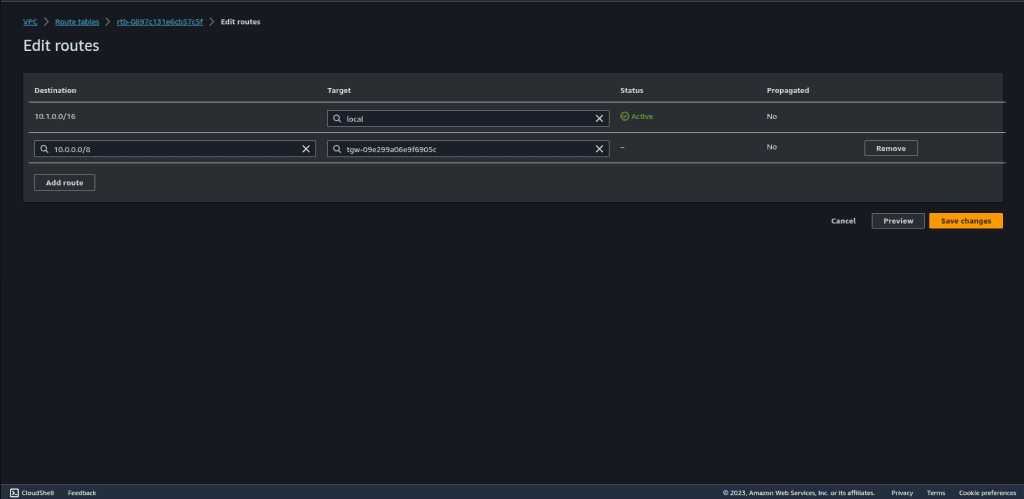
Click on “Save Changes.”
Do the same for the VPC B private route table.
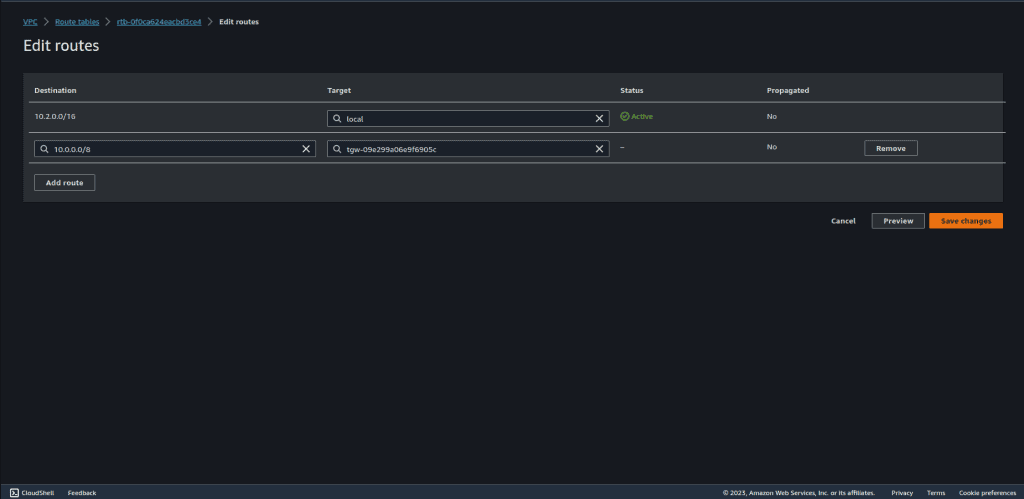
Also do it for the VPC C private route table.
Step 8: Testing the connection
Let’s check the connection to the VPC B private subnet from the VPC A private subnet.
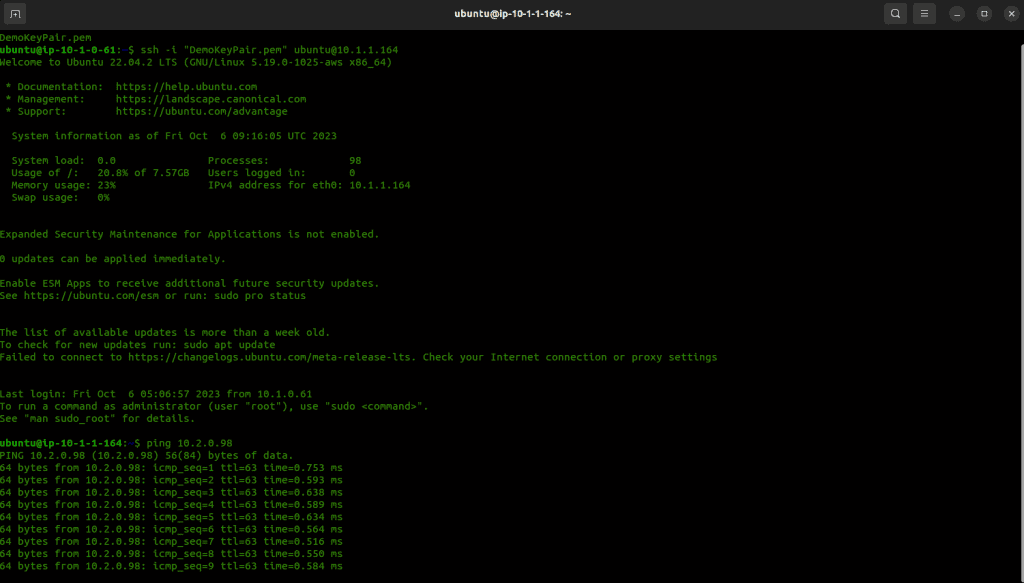
Congratulations! Your AWS Transit Gateway is now set up and configured to connect your VPCs seamlessly.


