Configuring Route 53 DNS in AWS: Public DNS & Private DNS
Amazon Web Services (AWS) provides a powerful and flexible Domain Name System (DNS) service called Amazon Route 53. Route 53 allows you to manage public and private DNS records, making it an essential component for hosting your applications and services in the cloud. In this article, we’ll go through the process of configuring Route 53 DNS for both public and private scenarios, with detailed steps and explanations along the way.
Public DNS Configuration
Public DNS is an essential component of any web-based application or service that needs to be accessible over the Internet. It translates human-readable domain names (e.g., www.example.com) into IP addresses that computers understand. When a user enters a domain name in a web browser, the DNS system resolves the domain name to the corresponding IP address, which allows the browser to establish a connection with the appropriate server.
Step 1: Creating Route 53 in AWS
Sign in to the AWS Console.
Search “Route 53” in the search box.
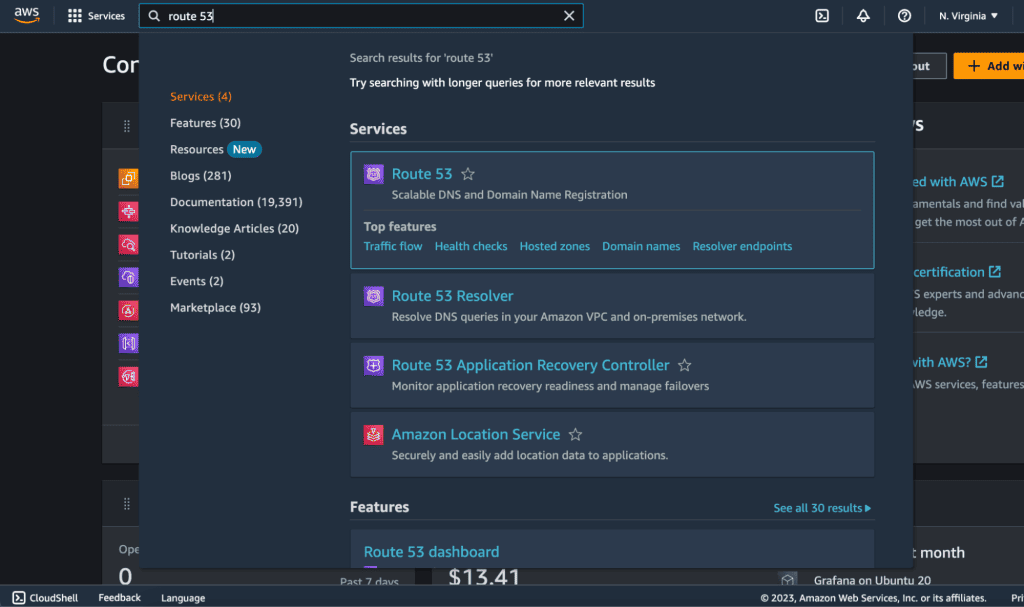
You will see the dashboard for the Route 53 service.
Click the “Create Hosted Zone” button in the Route 53 dashboard.
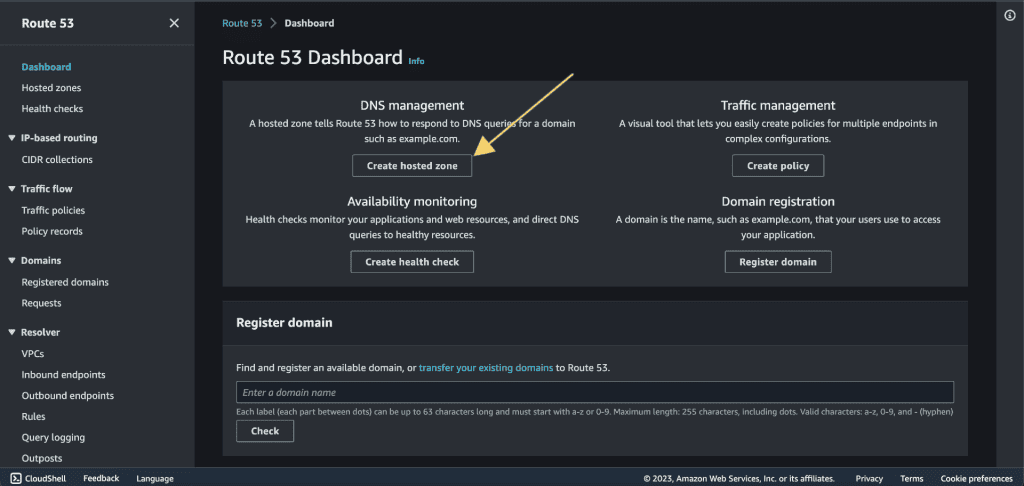
Enter your domain name (e.g., example.com) in the “Domain Name” field.
Select the type “Public hosted zone.”
Click on “Create hosted zone.”

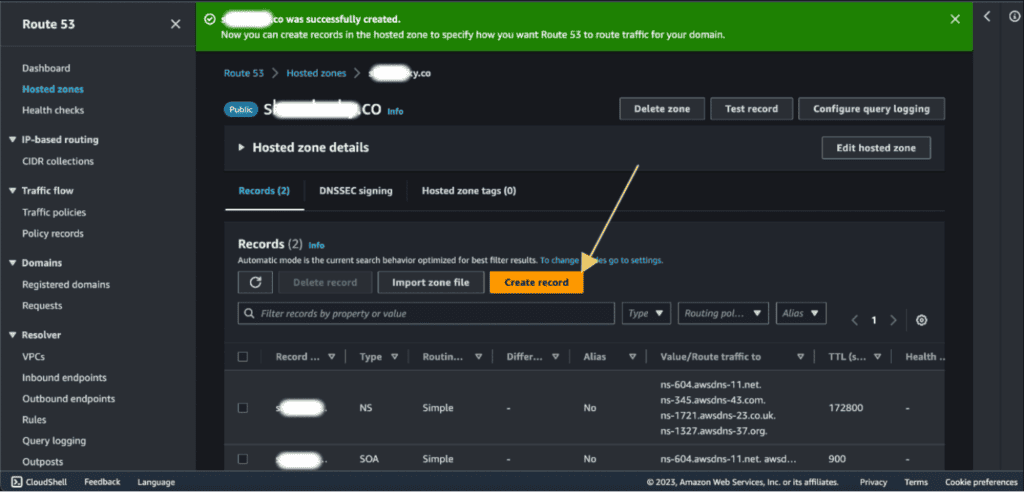
The hosted zone is created successfully.

(Route 53 will provide you with four nameservers. These nameservers need to be updated in the DNS settings of your domain registrar to delegate DNS management to Route 53.)
Copy the nameserver. (We need to update these nameservers in the domain registrar site.)
Step 2: Configuring Domain Registrar with Amazon Route 53 Nameservers
Go to your domain registrar’s website. (e.g. godaddy.com, porkbun.com, etc…)
Go to the “Authorized Namerver” or “Nameserver” section in your registrar website and paste those DNS values there.

It can take up to 48 hours to change your nameserver. You can check your nameserver status from dnschecker.org. (In most cases it gets updated after a few hours.)

After your nameserver has been updated, go back to the AWS Route 53.
Click on “Create Record.”
Step 3: Associating an EC2 IP Address with a DNS Record in AWS Route 53
Now, leave the “Record name” blank, “Record type” as A, and add the instance IP address in “Value.”

(Note: You can click on Info on the side of different options and values to know more about it.)
You can create various types of DNS records within your hosted zone. These records define how your domain name maps to different resources, such as IP addresses or other domains.
AWS offers a range of routing policies in its Route 53 service to cater to diverse application needs. These policies include Simple routing, which directs traffic to a single resource; Weighted routing, enabling load balancing based on assigned weights; Latency-Based routing for optimizing user experience by directing traffic to the lowest-latency resource; Geolocation routing, which considers the geographic location of users for localized content delivery; and more.
Time to Live (TTL) is the duration for which DNS resolvers cache the DNS records.
Lower TTL values are suitable for rapidly changing resources but might lead to increased DNS query load.
Now click on “Create records”. It will create the record. You can click on the “View Status” button at the top right to see the status. Wait for the status to be changed to “INSYC.”

You can now access the EC2 instance from your domain name.

Step 4: Associating a Load Balancer with a DNS Record in AWS Route 53
Click on “Create Record.”
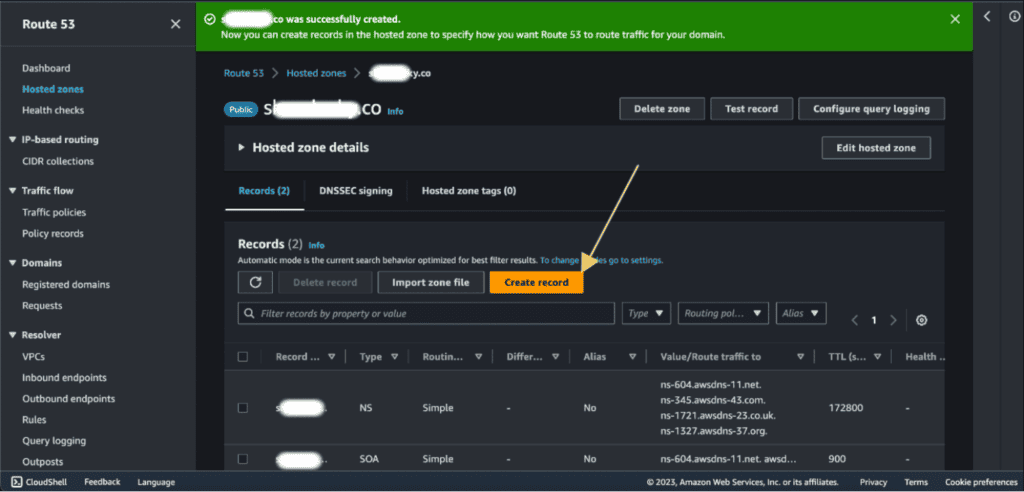
Now, leave the “Record name” blank. (As we will be adding a root domain record.)
“Record type” as A.
Enable “Alias”. (If you want to route traffic from the root domain to an AWS resource like an Application Load Balancer or CloudFront distribution, you should use an alias record.)
Select the endpoint as “Alias to Application and Classic Load Balancer.”
Choose the region in which your AWS ALB is located.
Select the ALB from that region.
Leave routing policy as default and you can also evaluate target health (optional).

If you want to add a subdomain (e.g. www.yourdomain.com or test.yourdomain.com etc.) in an Application Load Balancer DNS name then select the Record type as CNAME and paste the DNS name given by ALB in value.
Copy the DNS name that Application Load Balancer gives when you create it. (If you don’t know how to create an ALB then check out our article Building a Multi-Tier Application with VPC and Load Balancing.)
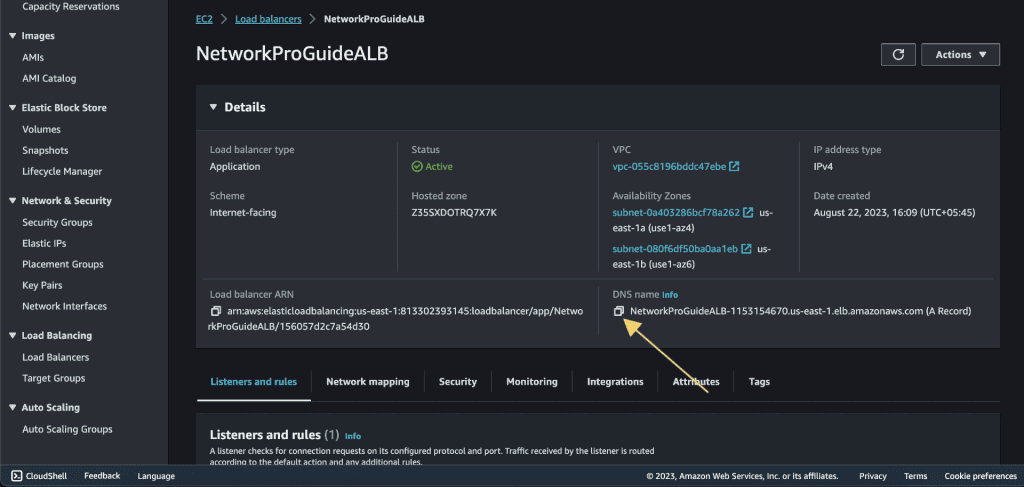
Now click on “Create records.” It will create the record.
You can click on the “View Status” button at the top right to see the status. Wait for the status to be changed to “INSYC.”
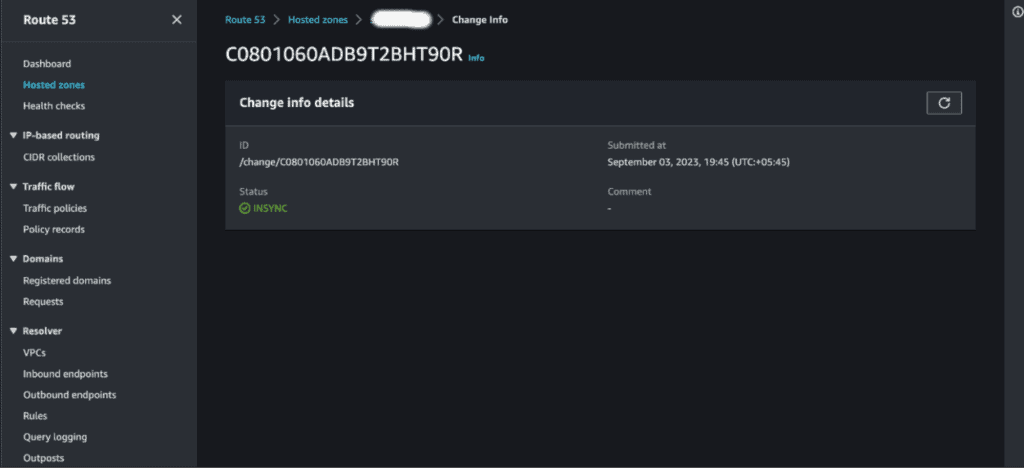
You can now access the ALB from your domain name.

Private DNS Configuration in AWS
Private DNS is used within an AWS VPC to resolve domain names for internal resources. It ensures that communication within your VPC uses recognizable domain names instead of IP addresses, making it easier to manage services and resources within your network.
Step 1. Create Private Hosted Zone
Navigate to the Route 53 dashboard.
Click on the “Create Hosted Zone” button.
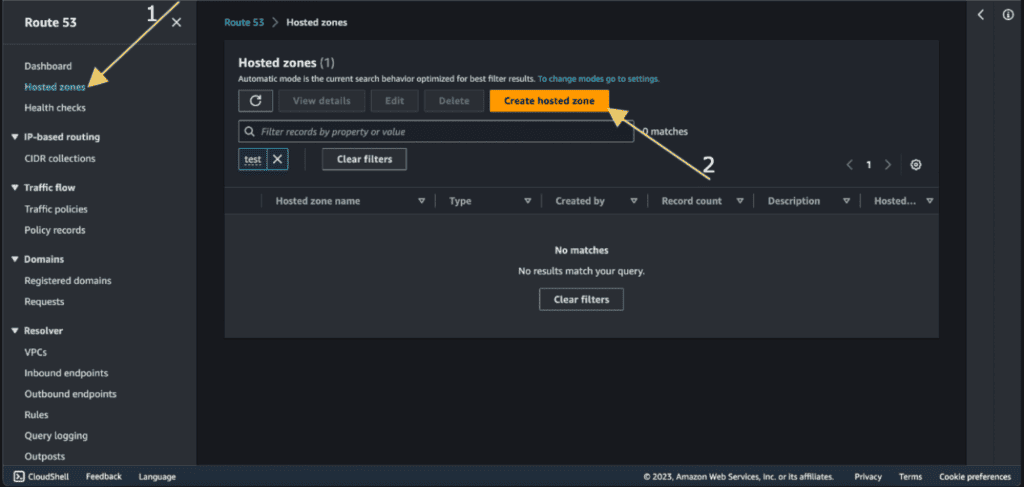
Give the domain name to your private hosted zone.
Select “Private hosted zone” to create a zone that will only resolve within your VPC.

Select the Region.
Choose the VPC(s) that you want to associate with the private hosted zone.
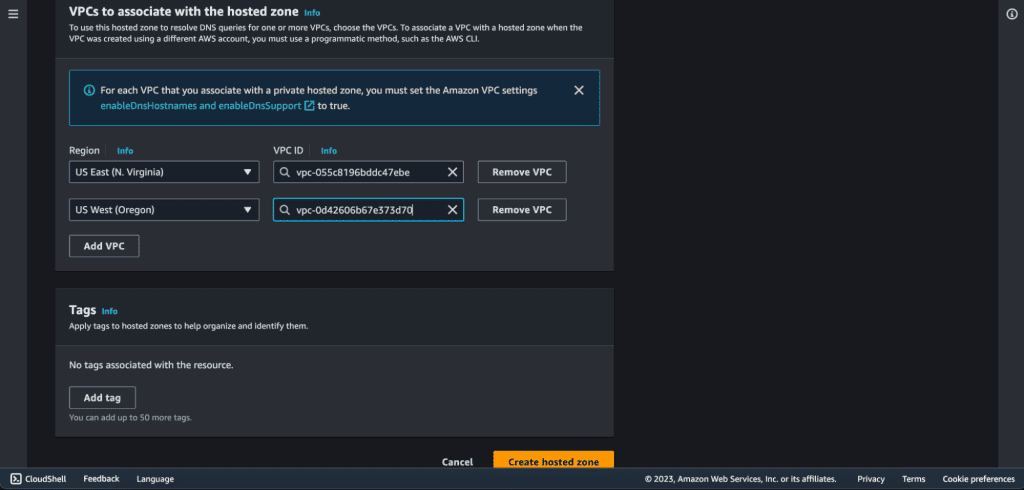
Click on “Create hosted zone.”
Your local hosted zone with the private domain name is created.
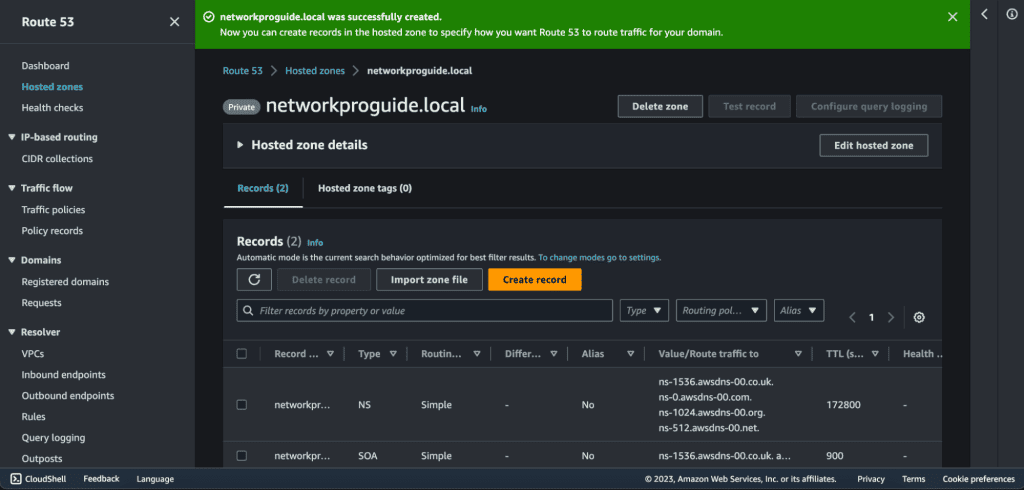
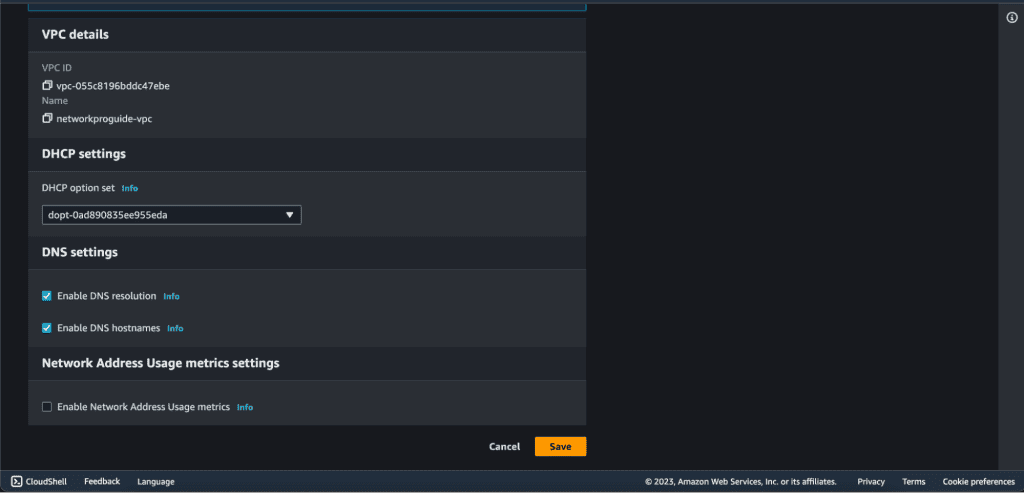
Step 2. Enable DNS Resolution and Hostname in VPC
Now you can create the DNS records that map domain names to resources within your VPC. It will allow you to use custom domain names for your internal services, making them more secure and user-friendly.
In your VPC settings, ensure that DNS resolution and DNS hostnames are enabled. This allows instances within the VPC to resolve domain names using the private hosted zone.
