How to Control AWS Transit Gateway Traffic with VRF
In the AWS centralized transit gateway, traffic is routed among VPCs using the transit gateway default route table. In this scenario, you get full mesh connectivity between all those networking components. But in this case, what’s happening is that now from any VPC, we can reach any other VPC, like from VPC A, I could reach B or C and the other way around.
But maybe in certain scenarios, you don’t want VPC A and VPC C to communicate with each other. To prevent this, you can assign each VPC attachment to the transit gateway to a specific VRF (virtual routing & forwarding). Each VRF has its own customizable route table that controls which other attachments the VPC can reach through the transit gateway.
So you can configure the route tables so that VPC A and VPC C are isolated from each other, while still allowing other VPCs attached to the transit gateway to communicate as needed. Using VRFs provides more granular control over connectivity between VPCs compared to using a single default route table.
Let’s walk through a step-by-step example of how to do this.
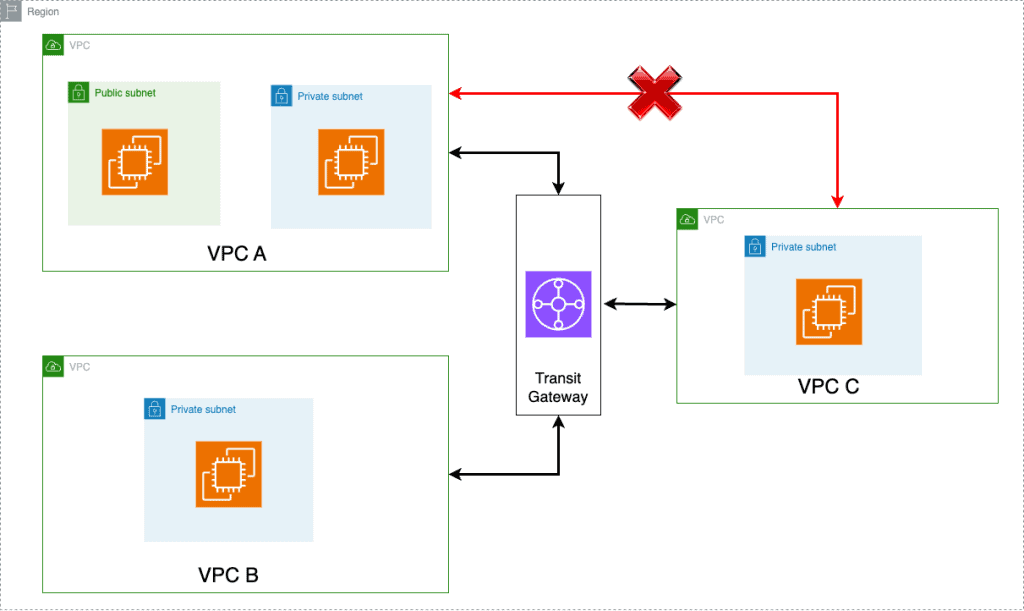
Here in this scenario, we want the communication to happen between VPC A to B and also B to C but not between A to C. We will walk through this diagram and learn how to configure it step by step.
Step 1: Initial Setup
Before diving into the intricacies of AWS Transit Gateway, ensure you have the following prerequisites in place:
Three VPCs set up in your AWS account: VPC A, VPC B, and VPC C. VPC A with at least 2 subnets, one private and another public.
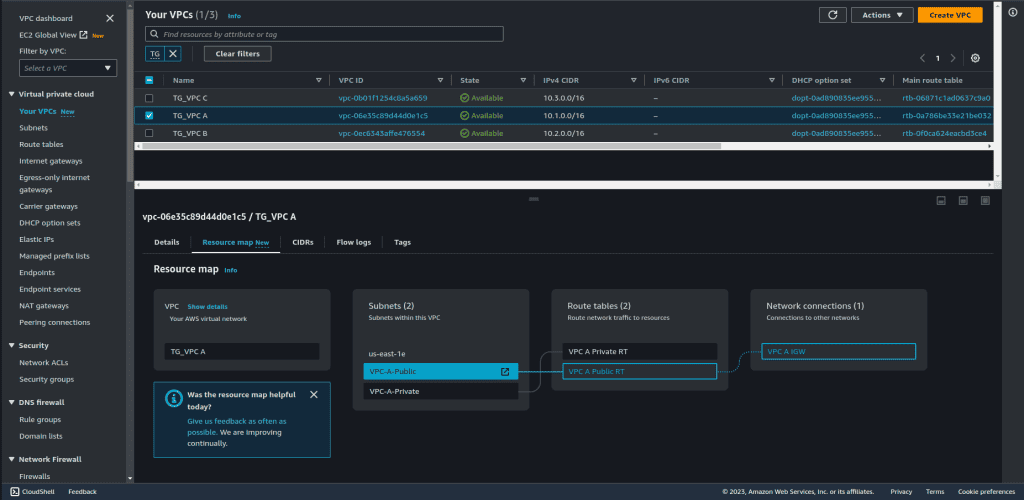
VPC A should also have a jump host and an internet gateway to facilitate remote access.

From the Jump Host, you should be able to ssh to the private instance in that same VPC. i.e VPC A.
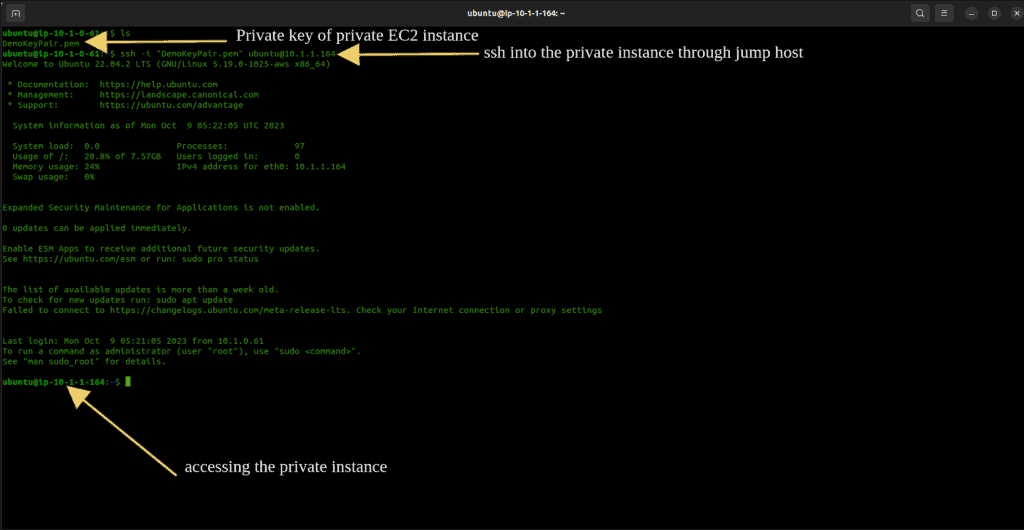
Each VPC should contain at least one EC2 instance in the private subnet.

Here is one jump host in a public subnet and 3 private instances in 3 private subnets.
Ensure you allow ping in the security group of private instances from all sources.
Step 2: Create a Transit Gateway
Let’s start by creating the Transit Gateway that will serve as the central hub for our network connectivity:
From the AWS Management Console, navigate to the “Services” menu.
Select “VPC,” and click on “Transit Gateway from the left sidebar.
Click the “Create Transit Gateway” button.
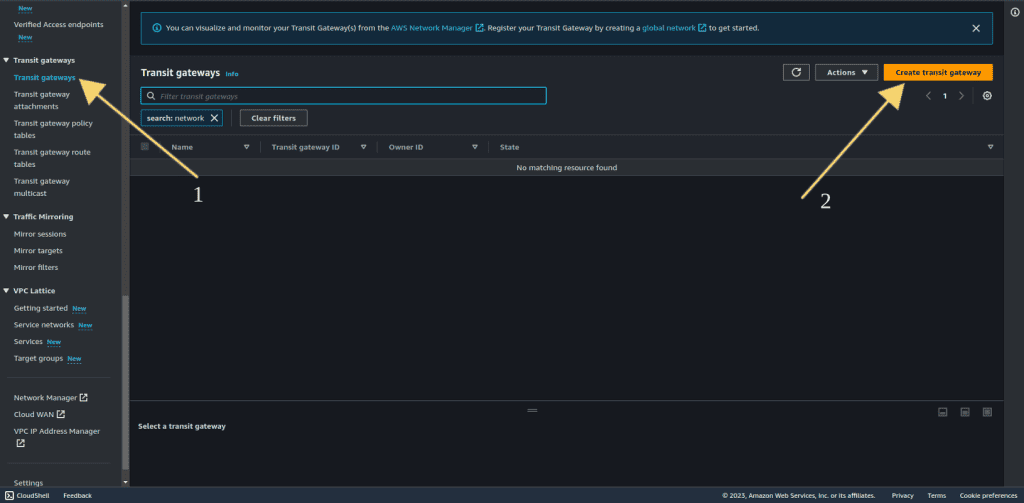
Give the name to the Transit Gateway. Provide the description.
Disable both default route propagation and default route table association.

Leave other things as default and click on “Create transit gateway.”
Wait for a couple of minutes until the state is changed to “Available.”

Step 3: Creating Transit Gateway Attachments
Attachments are the links between your VPCs and the Transit Gateway.
Go to “Transit gateway attachment.”
Click “Create Transit Gateway Attachment.”

Give the name to the transit gateway attachment.
Select the Transit Gateway you just created.
Select the attachment type as “VPC.”
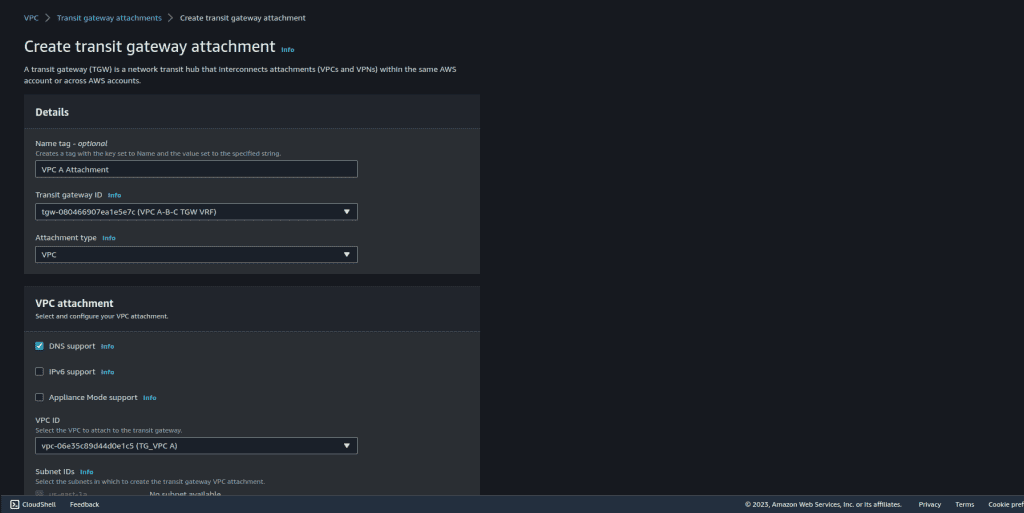
In the VPC attachment section, choose VPC A (The VPC that you want to attach).
Select the private subnet of VPC A.
Click on “Create transit gateway attachment.”
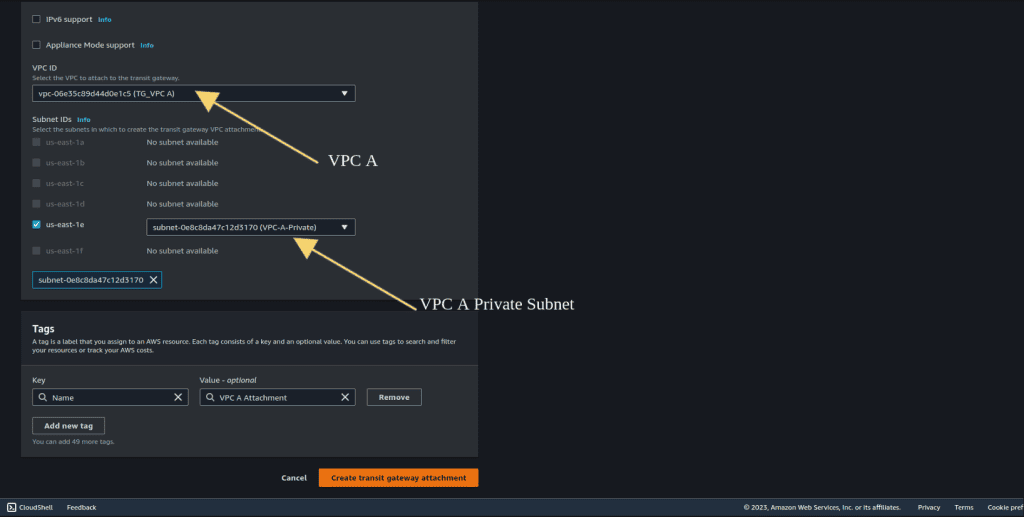
Repeat this process for the other 2 VPCs (B, and C). If you have more VPC then you can also repeat the same process.
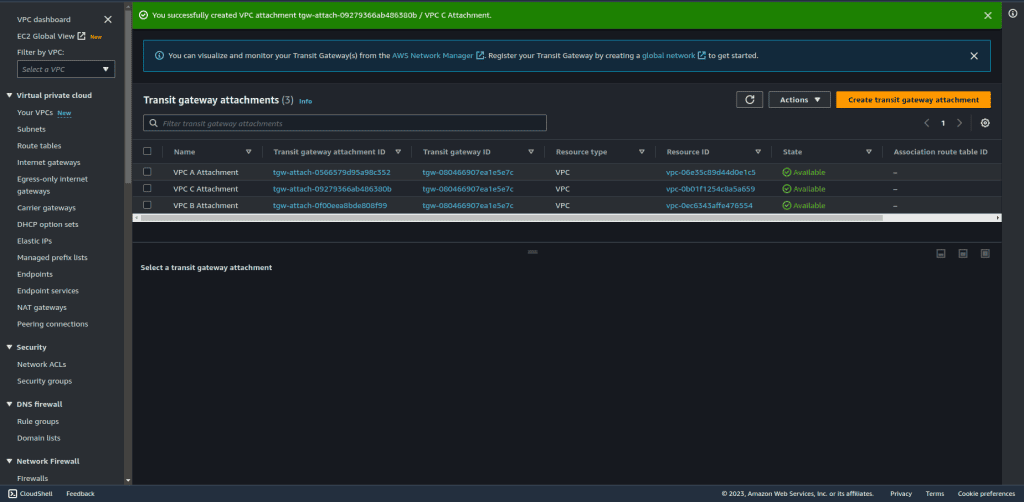
Wait until the state of all 3 attachments is changed to available.
Step 4: Attachment-Specific Route Tables
AWS Transit Gateway allows you to define route tables specific to each attachment, giving you granular control over routing. Here’s how to set up attachment-specific route tables:
Go to “Transit gateway route table.”
Click “Create Transit gateway route table.”
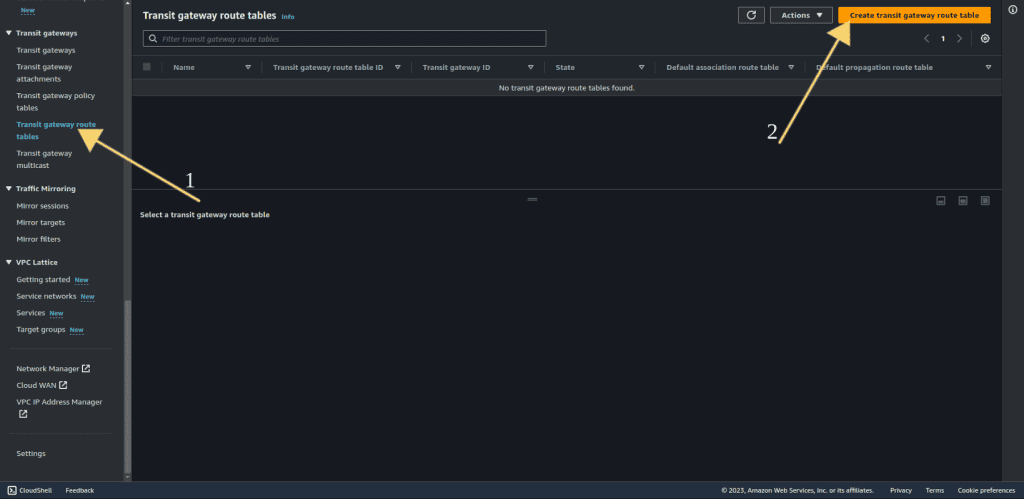
Give the name to the transit gateway route table.
Select the Transit Gateway you just created.
Click on “Create transit gateway route table.”
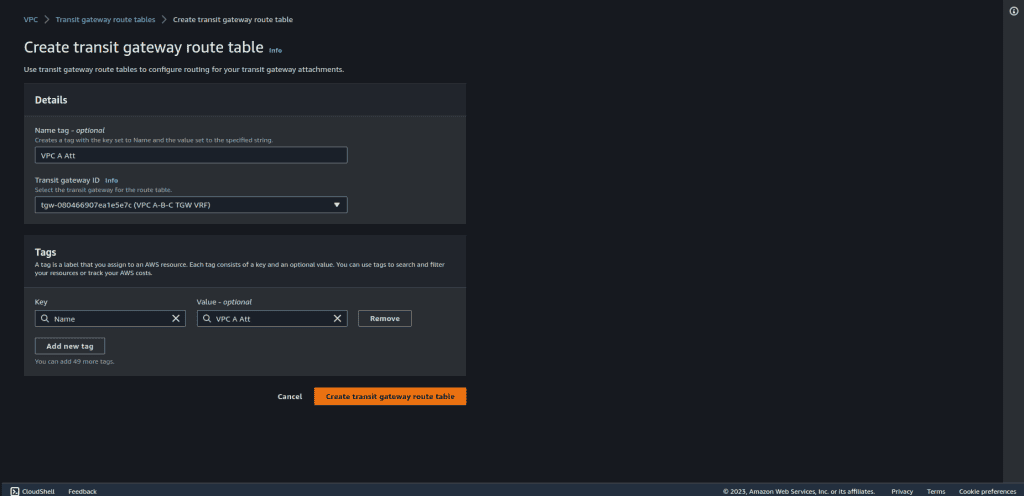
Repeat this process for the other 2 VPCs (B, and C). If you have more VPC then you can also repeat the same process.
Wait until the state of all 3 attachments is changed to available.
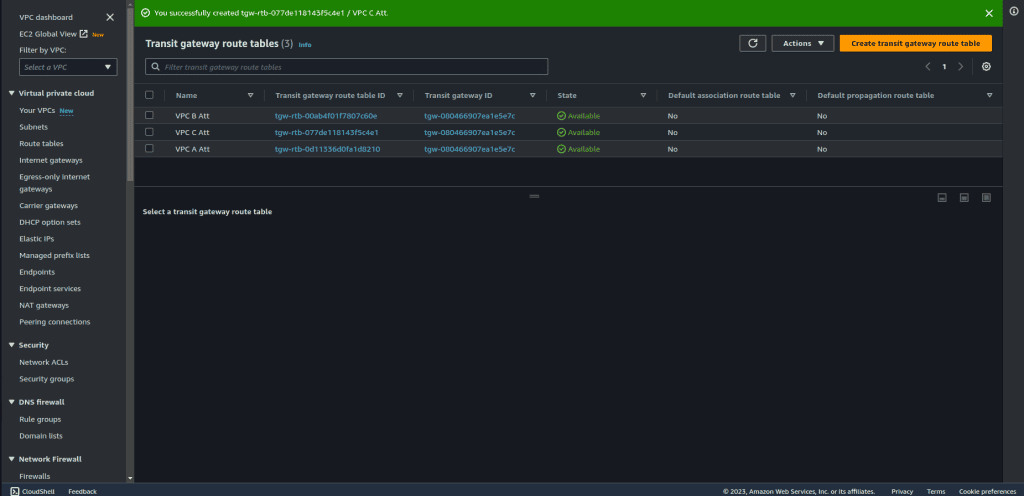
Step 5: Creating Route Table Association
Select the VPC A transit gateway attachment.
Navigate to the association tab.
Click on “Create association.”
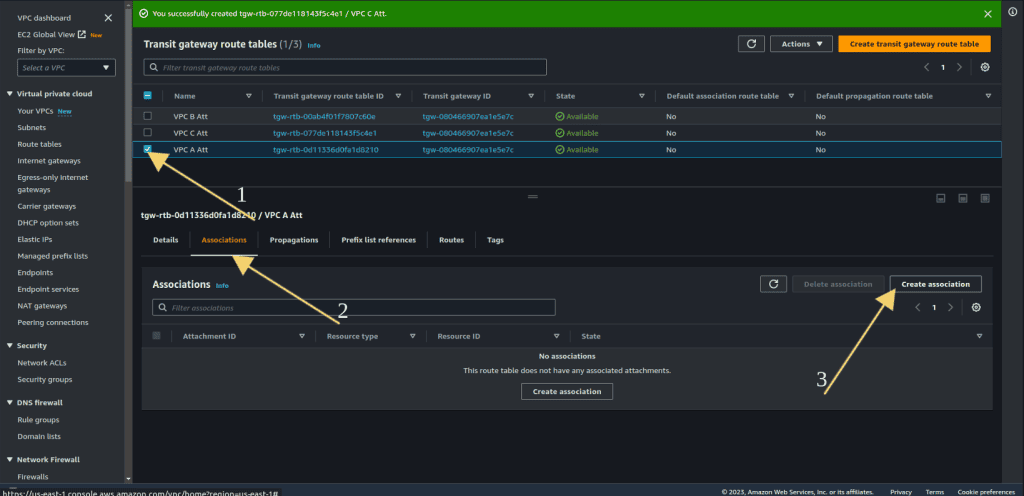
Select “VPC A Attachment” from choose attachment to associate.
Click on “Create association.”

Repeat this process for the other 2 VPCs (B, and C). Select the VPC B and VPC C attachments while creating.
Step 6: Define Propagations
Now we have three route tables, and every route table is associated with the corresponding attachment, but still, this doesn’t tell how to reach other VPCs through this route table. If you look at the propagations, there will be no propagation, which means the VPC CIDR address is not propagated to any other attachment as of yet.
In our case, for VPC A we will have propagation to VPC B only not with VPC C. But we will have a propagation of VPC B to VPC and VPC C. And for VPC C we will have propagation with VPC B only. (You can also define propagations based on your requirements and can create propagation based on that.)
To enable communication between VPC A and VPC B only, we will create a propagation for VPC B in the VPC A attachment route table.
Select the VPC A transit gateway route table.
Navigate to the propagation tab.
Click on “Create propagation.”
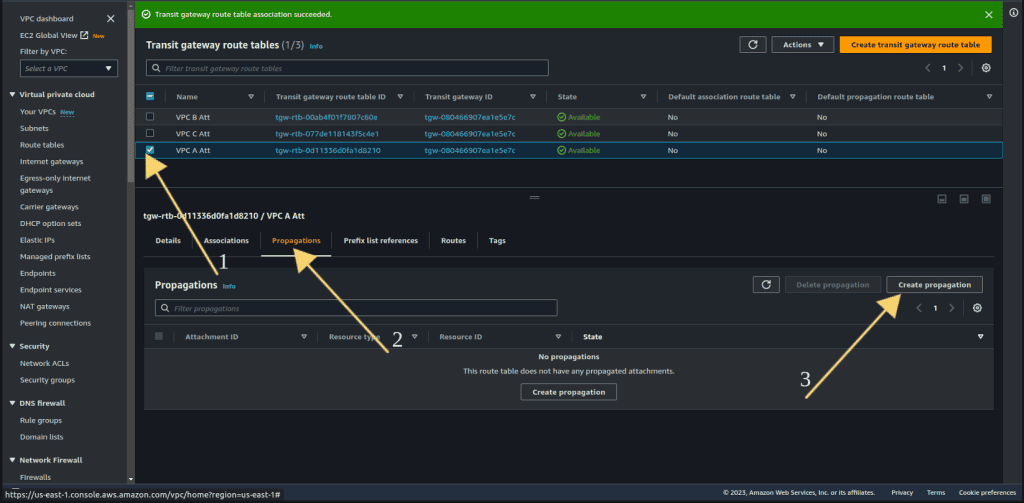
We just want the attachment of VPC A with VPC B so select the VPC B attachment.
Then click on “Create propagation.”

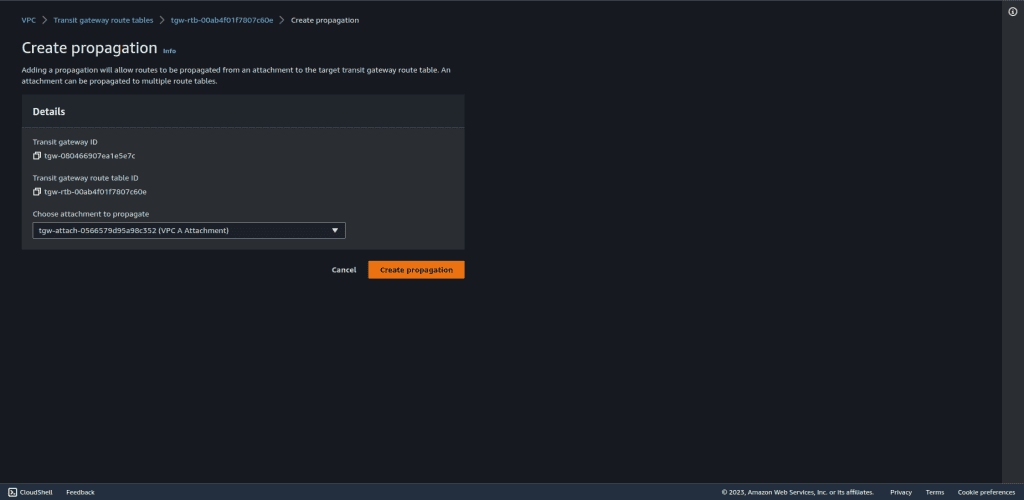
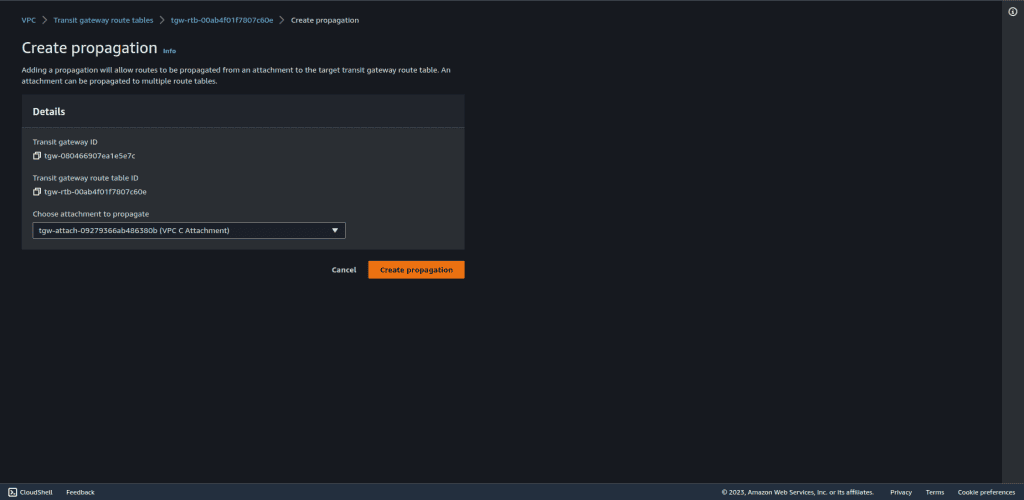
For VPC B, we need to enable communication between VPC A and VPC C. So we will create a propagation for VPC A and C in the VPC B attachment route table.
Select the VPC B transit gateway route table.
Navigate to the propagation tab.
Click on “Create propagation.”
At first, we want an attachment with VPC A, so select the VPC A attachment.
We also want an attachment with VPC C, so create a new attachment and select the VPC C attachment.
For VPC C, we just need to enable communication for VPC B. So we will create a propagation for VPC B in the VPC C attachment route table.
Select the VPC C transit gateway route table.
Navigate to the propagation tab.
Click on “Create propagation.”
We just want the attachment of VPC C with VPC B so select the VPC B attachment.
Then click on “Create propagation.”

Step 7: Configure Subnet Route Tables
Now we need to update the subnet route tables in each VPC to route traffic through the Transit Gateway attachment:
Go to the route table section.

Select the route table for VPC A private subnet.
Navigate to the routes tab.
Click on “Edit routes.”

Select 10.0.0.0/8 at designation, because it’s a superset of all these three VPC CIDRs.
Also, search the transit gateway at target and select the transit gateway that we have created.
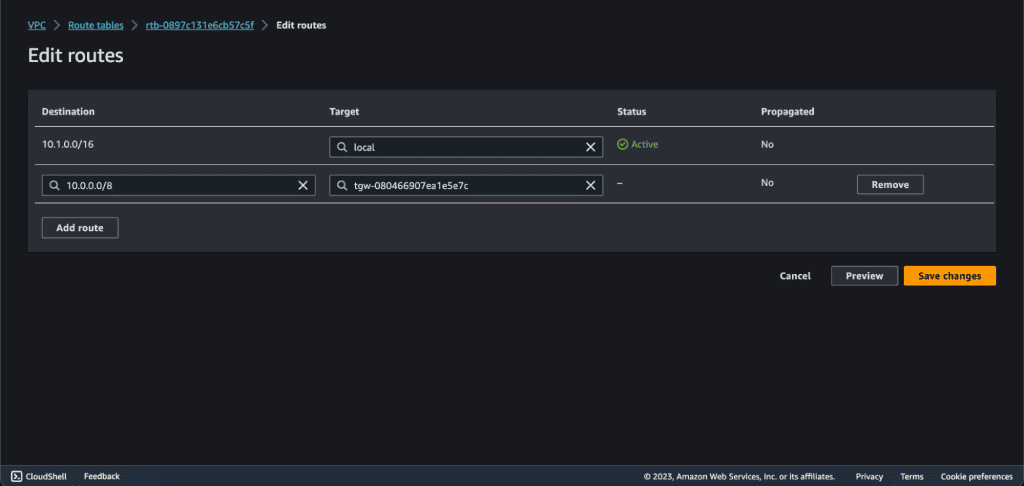
Click on “Save Changes.”
Do the same for the VPC B private route table.

Also, do it for the VPC C private route table.

Step 8: Test the Connection
From an EC2 instance in VPC A, initiate tests to ping instances in VPC B and VPC C. You should be able to ping VPC B but not VPC C, by our configuration.
Let’s check the connection to the VPC B private subnet from the VPC A private subnet.
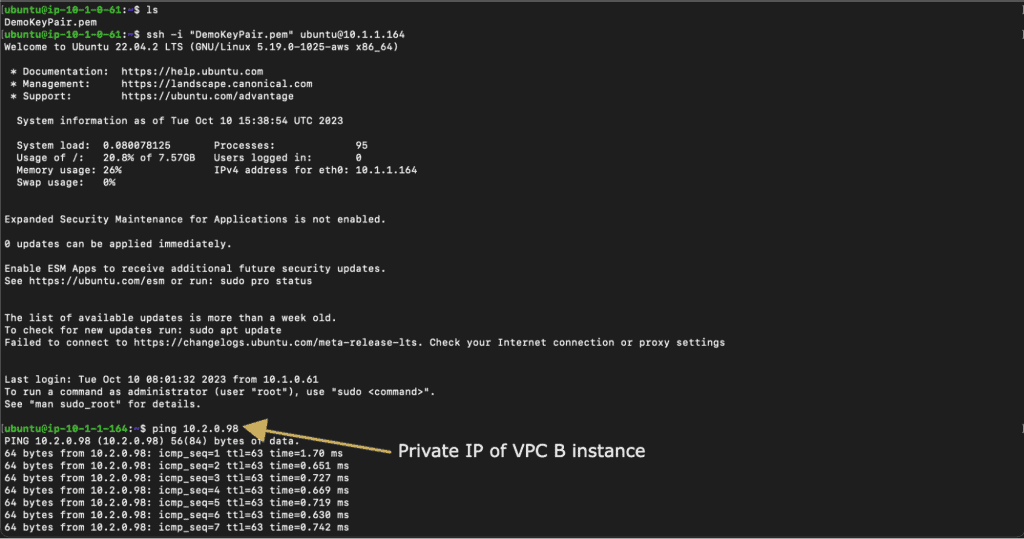
Also, let’s check the connection to the VPC C private subnet from the VPC A private subnet.

Congratulations! Your AWS Transit Gateway with virtual routing and forwarding is now set up and configured to connect your VPCs seamlessly.


