Protect Your Server Against XSS, DDOS, & SQL Injection with AWS WAF
AWS Web Application Firewall (WAF) is a powerful security service offered by Amazon Web Services (AWS) that helps protect your web applications from various online threats. It allows you to create security rules that help filter and protect your web traffic, shielding your applications from common vulnerabilities and attacks.
In this tutorial, we will cover the configuration of AWS WAF to protect against Cross-Site Scripting (XSS) attacks, Distributed Denial of Service (DDoS) attacks, and SQL injection attacks.
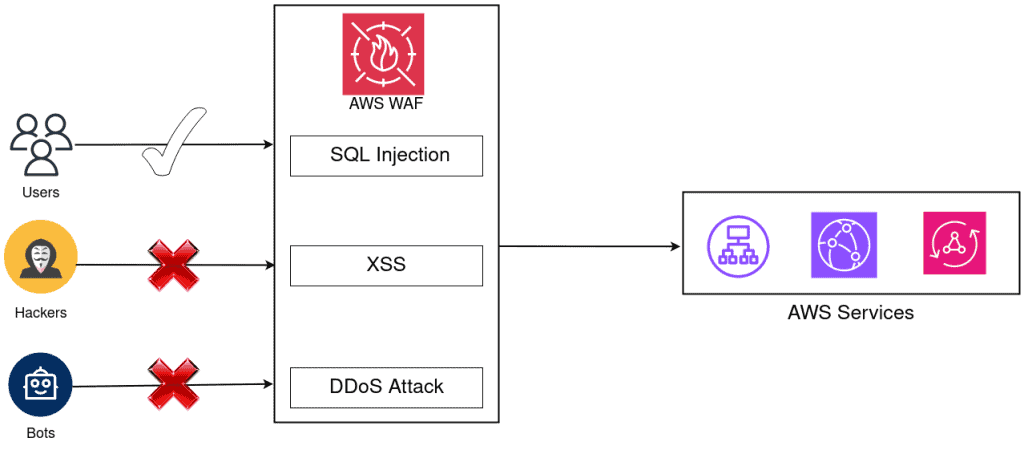
Cross-Site Scripting (XSS) Attack Simulation and Prevention with AWS WAF
Prerequisites
Before you start the setup process, ensure you have the following:
- AWS account: An account with the necessary permissions to create and manage resources.
- EC2 Instances: Website or a Service hosted on pre-existing EC2 instances that you want to accelerate.
- Resource Type:
- Application Load Balancer
- Amazon API Gateway REST API
- Amazon App Runner service
- AWS AppSync GraphQL API
- Amazon Cognito user pool
- AWS Verified Access
- ALB: Application Load Balancer which must be running with a target group.
In this tutorial, we will use ALB but if you have any of the above resource types then it will work.
Step 1: Create a Web ACL for XSS Prevention
Sign in to your AWS Management Console.
Navigate to the AWS WAF service.
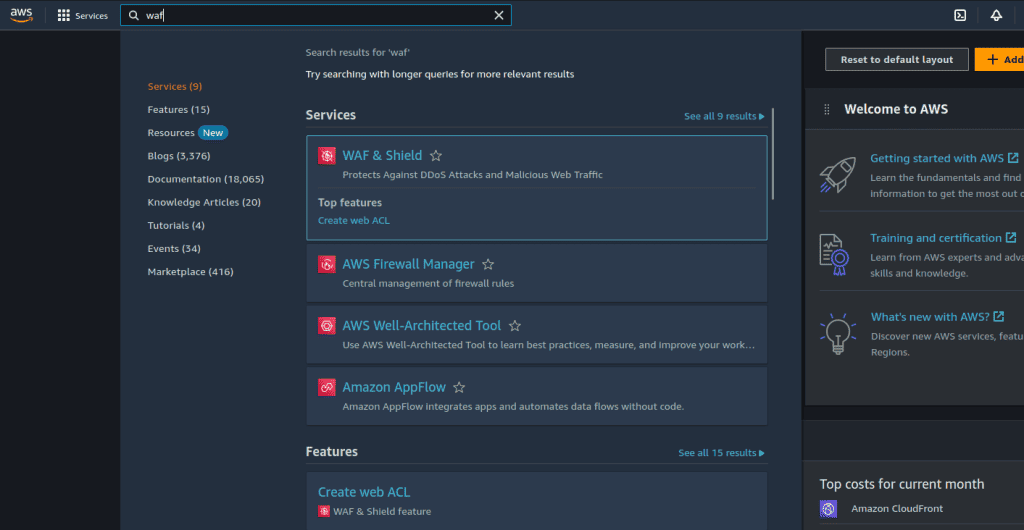
Click on “Web ACLs” in the left-hand menu.
Click the “Create web ACL” button.

Give your WebACL a descriptive name, such as “XSS-Prevention-ACL.”
Also, give the name to your cloudwatch metrics.
Choose the resource type as “Regional resources.” (If you want to add ACL in Cloudfront distribution then you can select “Amazon CloudFront distributions.”)
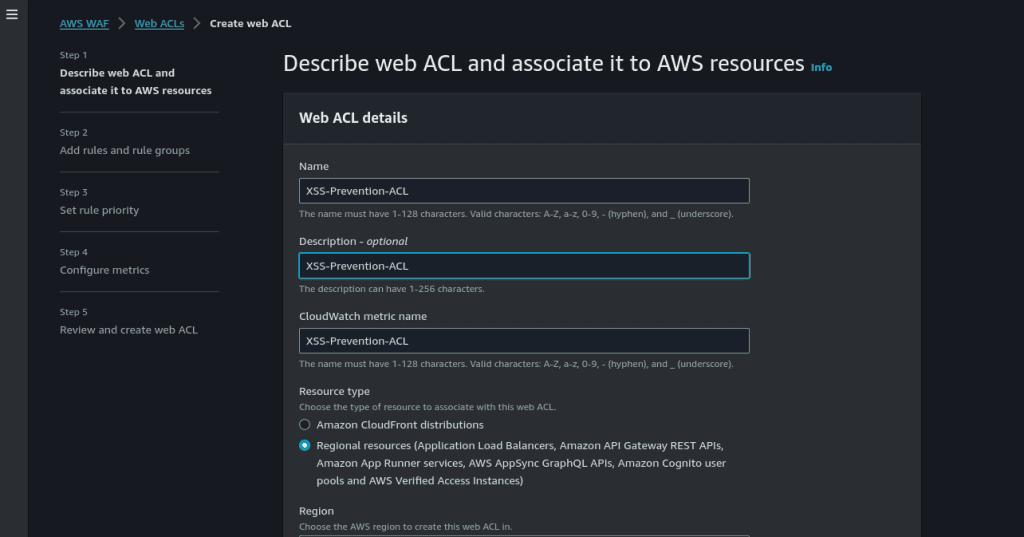
Select the region in which your AWS resource is created.
Click on “Add AWS resources.”
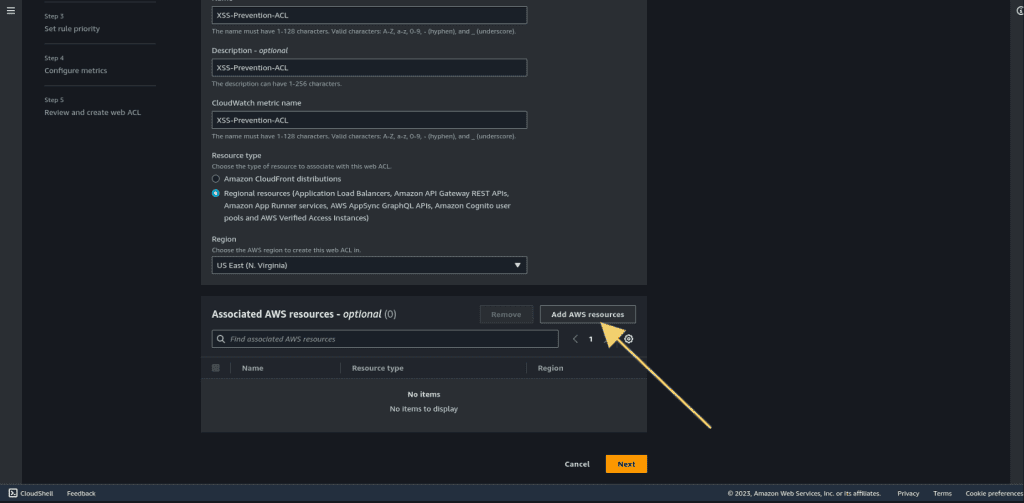
Select the Application Load Balancer. (If you have other resources then select your resources)
Then click on “Add.”
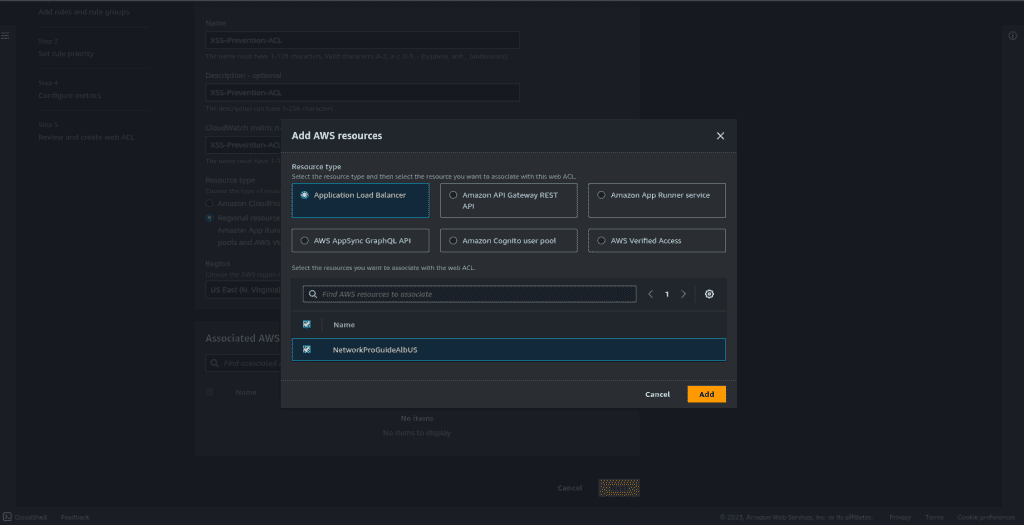
Now click on “Next.”
Step 2: Add the rules and rule groups
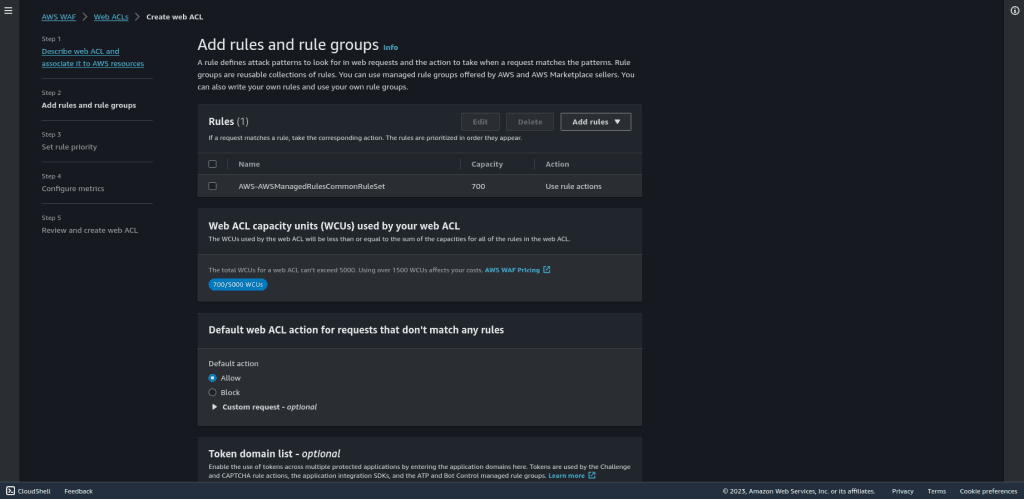
In the “Rules” section, click “Add rules.”
Then select “Add managed rule groups.” (Managed rule groups are the rule groups that are owned by AWS, so we don’t have to specify our own rules.)
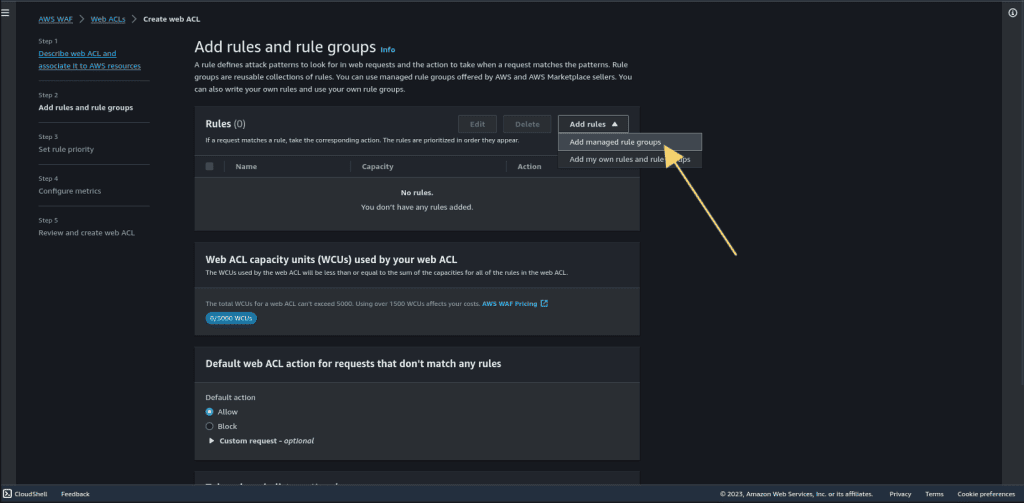
Click on “AWS managed rule group.”
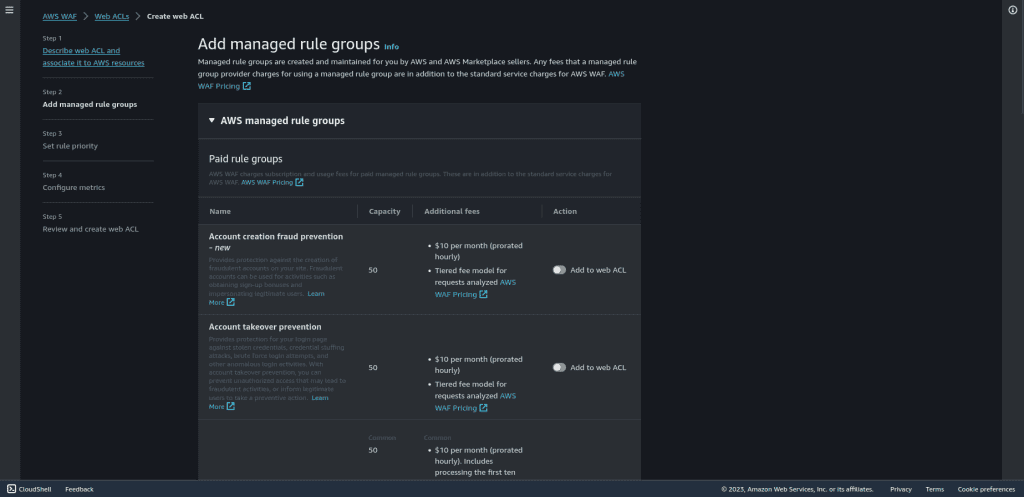
Select “Core rule set.” This rule set has 700+ rules already and it covers OWASP vulnerabilities as well.

Then click on “Add rule.”
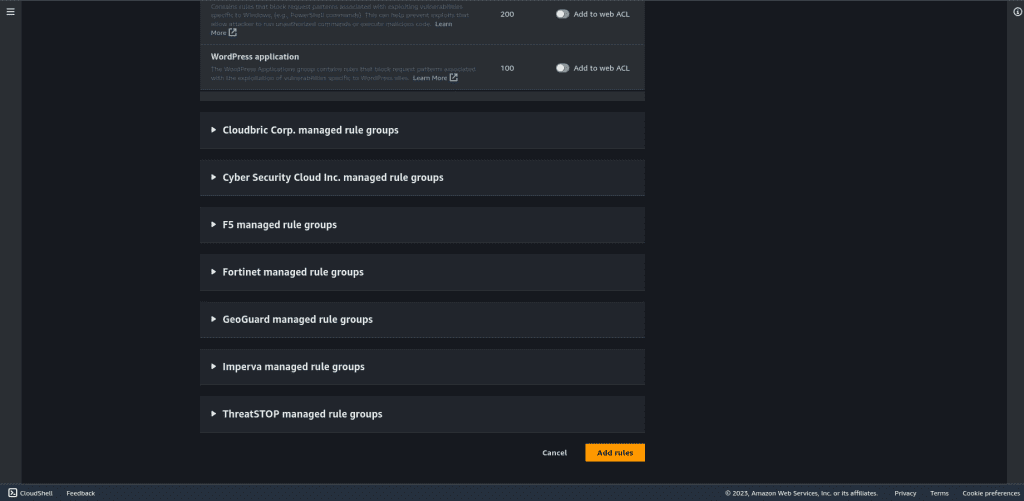
Leave other things as default and click on “Next.”
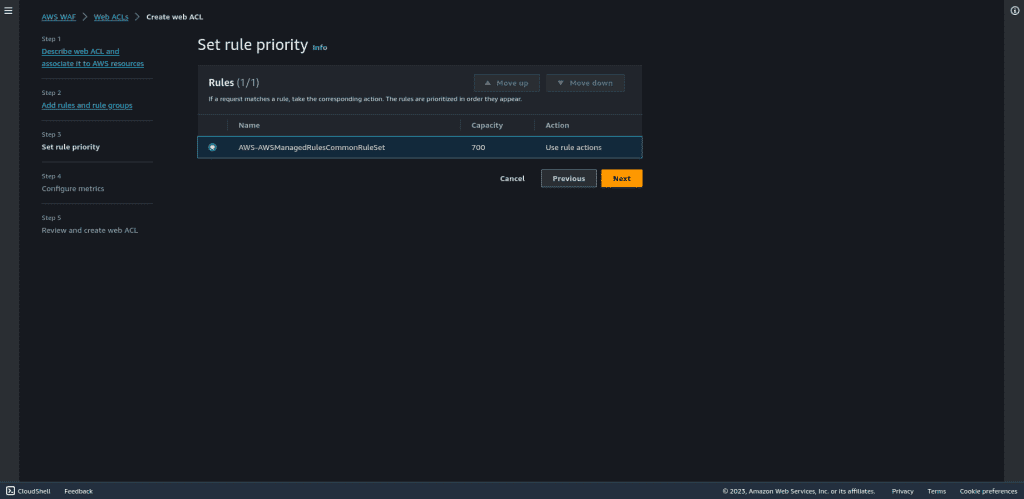
Select the rules in the set rule priority.
Then click on “Next.”
Leave all things as default in configure matrics.
Then click on “Next.”
Review the configuration and then click on “Create web ACL.”
Once you create a web ACL it can take up to one minute for the web ACL to be active.

Step 3: Adding custom rules
Go to the rules section and then click on “Add my own rules and rule groups.”
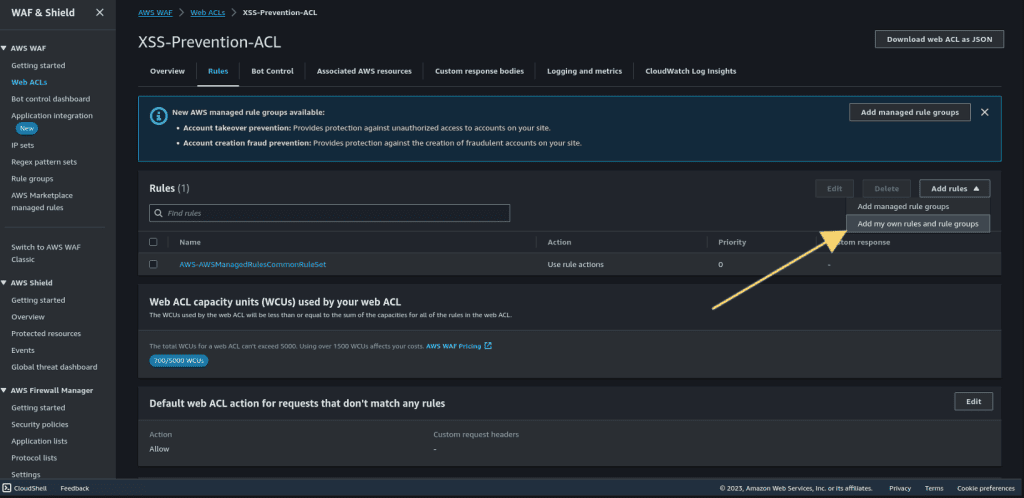
Click on rule builder and give the name
Create conditions for different types of XSS attacks, such as “XSS_CONDITION_1,” “XSS_CONDITION_2,” and so on.
Customize the conditions to target specific patterns or keywords associated with XSS attacks. Also, specify the actions to take when these rules match.
Then click on “Add rule.”
Step 4: Testing the rule
Go to your application load balancer URL or your domain name associated with that ALB.
Add this script to your URL.
<script> alert(” your website is hacked”)</script>
This is just the basic simulation of an XSS attack, in reality, the attacker can put the script to get all the cookies of the currently logged user and display them here, etc.
Here you can see that access is forbidden.
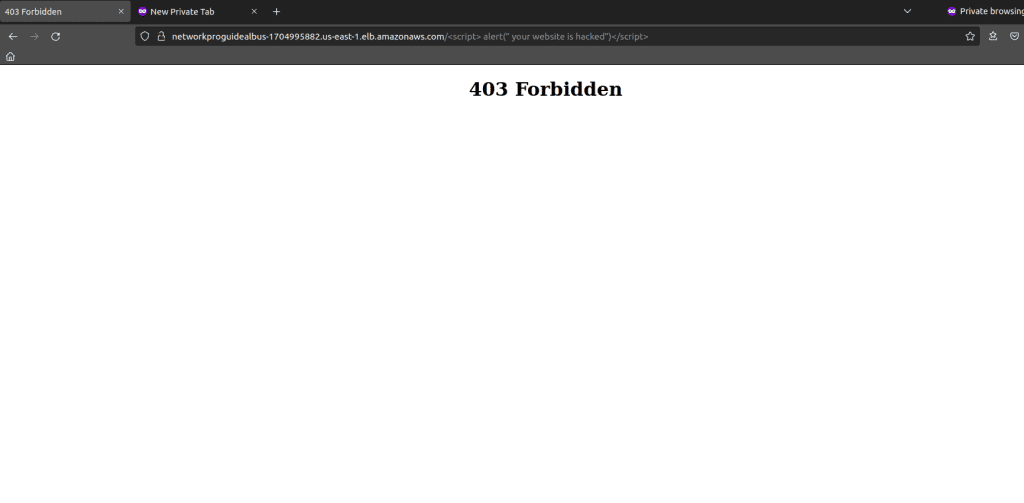
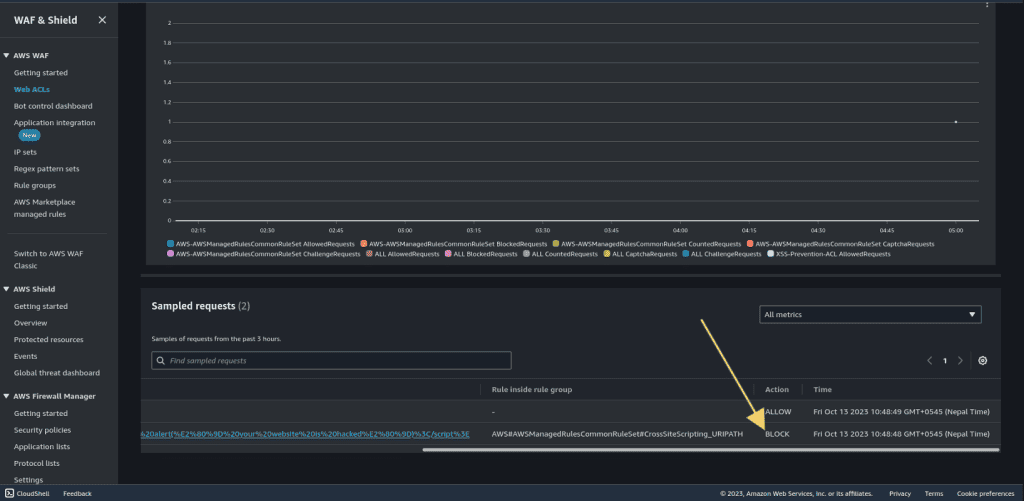
Step 5: Visualizing the attack
Go to the web ACL that we have created.
In the WAF overview, scroll down to the sampled request.
It will show you the URI request that we have done and it was detected and blocked by the WAF.
DDoS Attack Prevention and Simulation with AWS WAF
Prerequisites
Before you start the setup process, ensure you have the following:
- AWS account: An account with the necessary permissions to create and manage resources.
- EC2 Instances: Website or a Service hosted on pre-existing EC2 instances that you want to accelerate
- Resource Type:
- Application Load Balancer
- Amazon API Gateway REST API
- Amazon App Runner service
- AWS AppSync GraphQL API
- Amazon Cognito user pool
- AWS Verified Access
- ALB: Application Load Balancer which must be running with a target group.
In this tutorial, we will use ALB but if you have any of the above resource types then it will work.
Step 1: Create a Web ACL for DDoS Attack prevention.
Sign in to your AWS Management Console.
Navigate to the AWS WAF service.

Click on “Web ACLs” in the left-hand menu.
Click the “Create web ACL” button.

Give your WebACL a descriptive name, such as “DDoS-Prevention-ACL.”
Also, give the name to your cloudwatch metrics.
Choose the resource type as “Regional resources.” (If you want to add ACL in Cloudfront distribution then you can select “Amazon CloudFront distributions.”)
Select the region in which your AWS resource is created.

Click on “Add AWS resources.”
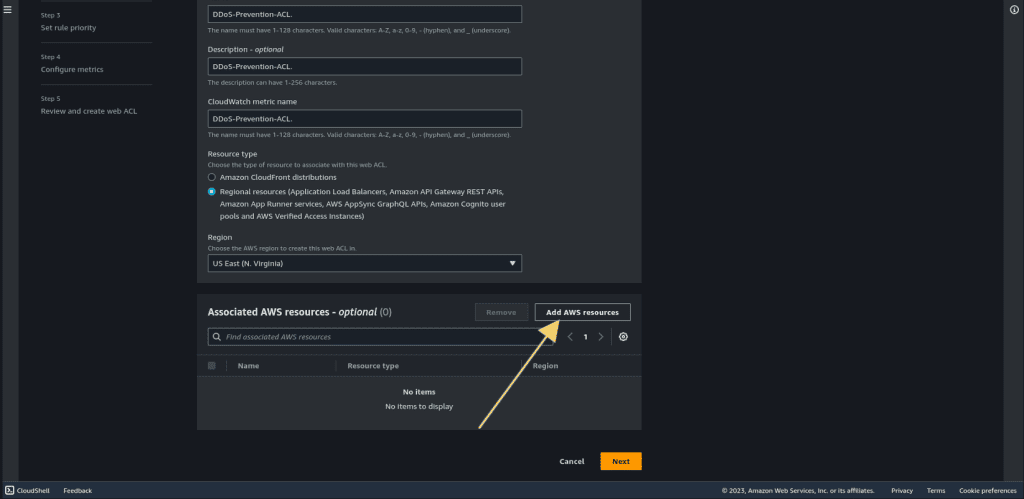
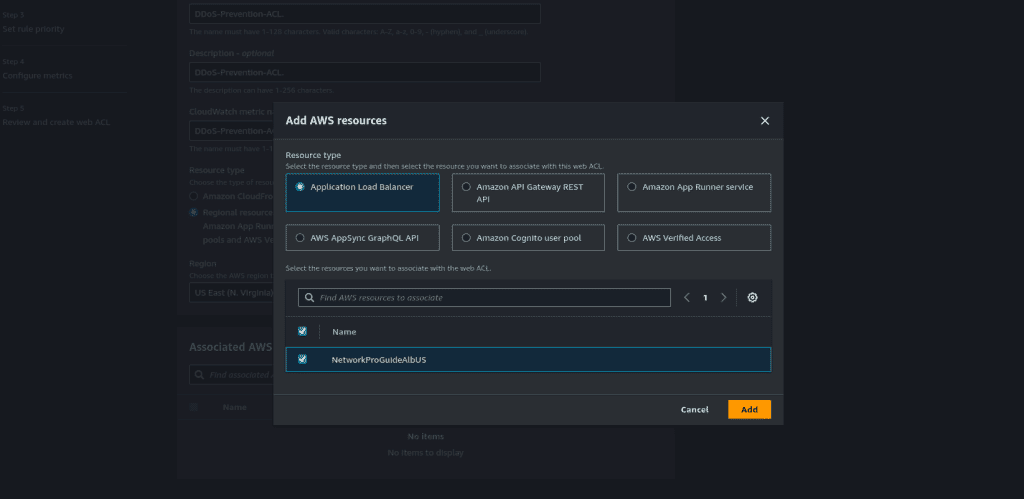
Select the Application Load Balancer. (If you have other resources then select your resources)
Then click on “Add.”
Now click on “Next.”
Step 2: Configure Rate-Based Rules
In the “Rules” section, click “Add rules.”
Then select “Add my own rules and rule group.” (Managed rule groups are the rule groups that are owned by AWS, so we don’t have to specify our own rules.)
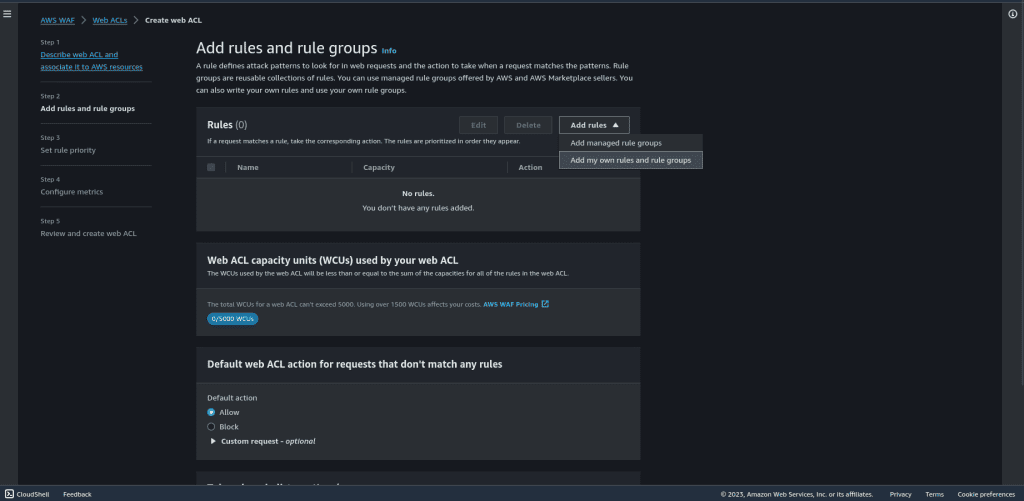
Select “Rule Builder.”
Give the name of the rule.
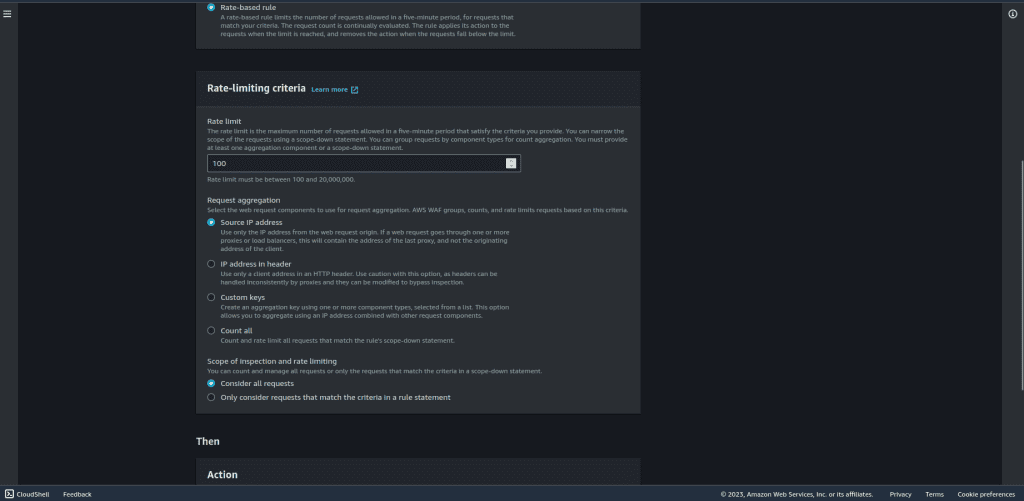
Select “Rate-based rule” in the type.

In the rate-limiting criteria, add the value for the rate limit (number of requests in 5 minutes of time duration), select “Source IP address” as request aggregation, and select “Consider all requests” on the Scope of inspection and rate limiting.
In the “Then” section, choose “Block” in action. Leave other things as default.
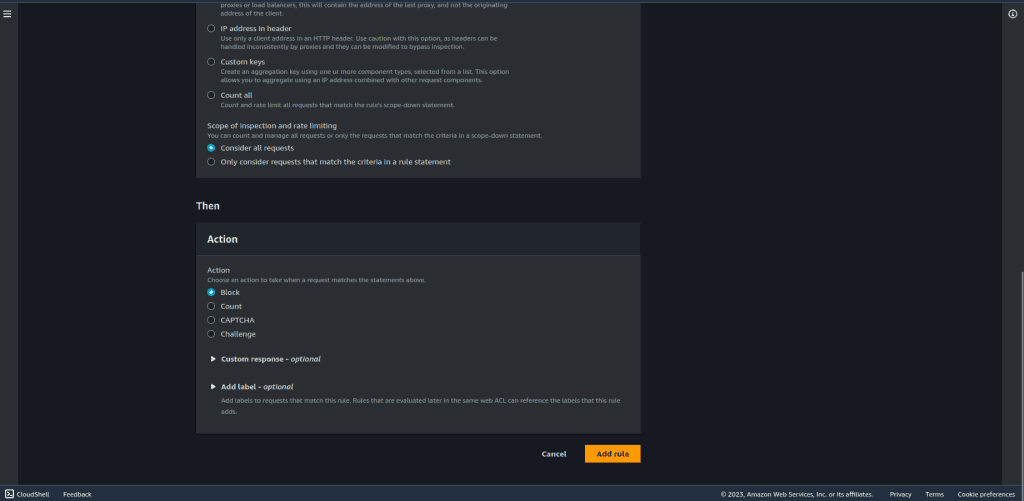
Click on “Add rule.”
Leave other things as default and click on “Next.”
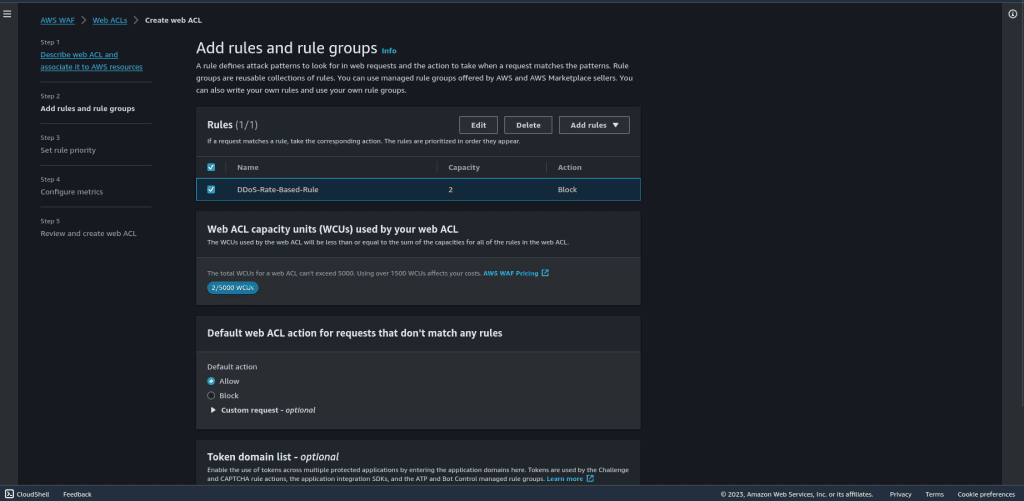
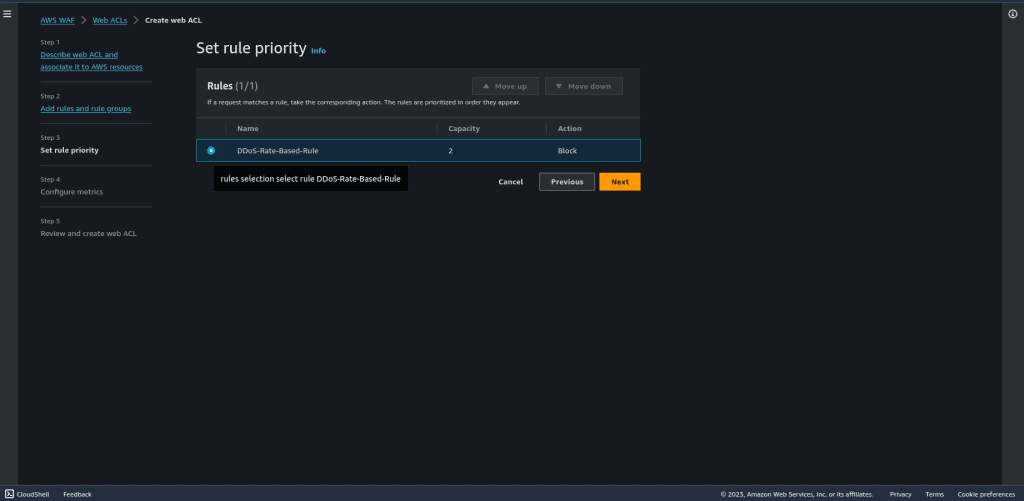
Select the rules in the set rule priority.
Then click on “Next.”
Leave all things as default in configure matrics.
Then click on “Next.”
Review the configuration and then click on “Create web ACL.”
Once you create a web ACL it can take up to one minute for the web ACL to be active.
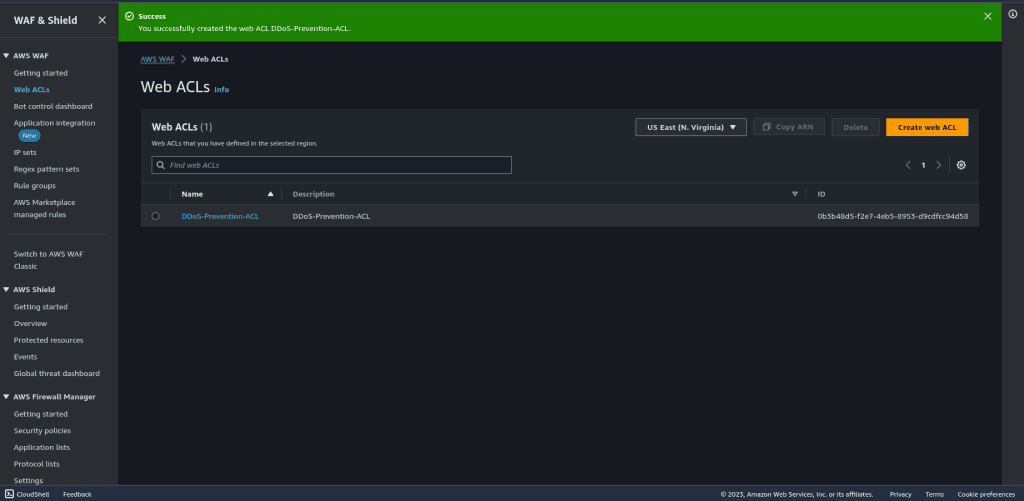
Step 3: Simulate DDoS Attacks
To simulate a DDoS attack, you can use third-party tools.
You can also monitor your AWS WAF logs and metrics to see how the WebACL is mitigating the attack.
You can also adjust your WebACL rules as needed based on the attack simulation results.
SQL Injection Attack Prevention with AWS WAF
Prerequisites
Before you start the setup process, ensure you have the following:
- AWS account: An account with the necessary permissions to create and manage resources.
- EC2 Instances: Website or a Service hosted on pre-existing EC2 instances that you want to accelerate. It must be dynamic with an SQL database.
- Resource Type:
- Application Load Balancer
- Amazon API Gateway REST API
- Amazon App Runner service
- AWS AppSync GraphQL API
- Amazon Cognito user pool
- AWS Verified Access
- ALB: Application Load Balancer which must be running with a target group.
In this tutorial, we will use ALB but if you have any of the above resource types then it will work. In the EC2 instance, I have installed WordPress so that we can simulate the SQL injection attack. You can use your own application.
Step 1: Create a Web ACL for SQL Injection Prevention
Sign in to your AWS Management Console.
Navigate to the AWS WAF service.

Click on “Web ACLs” in the left-hand menu.
Click the “Create web ACL” button.

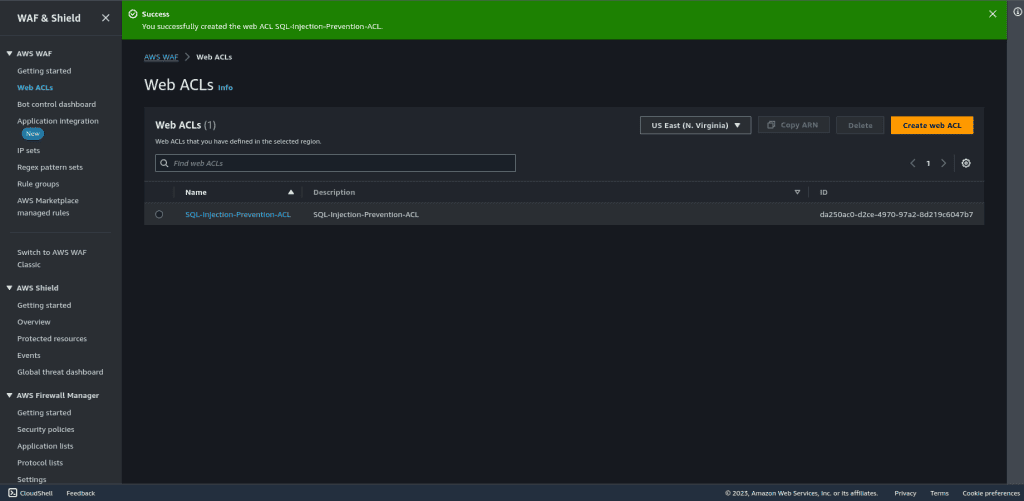
Give your WebACL a descriptive name, such as “SQL-Injection-Prevention-ACL.”
Also, give the name to your cloudwatch metrics.
Choose the resource type as “Regional resources.” (If you want to add ACL in Cloudfront distribution then you can select “Amazon CloudFront distributions.”)
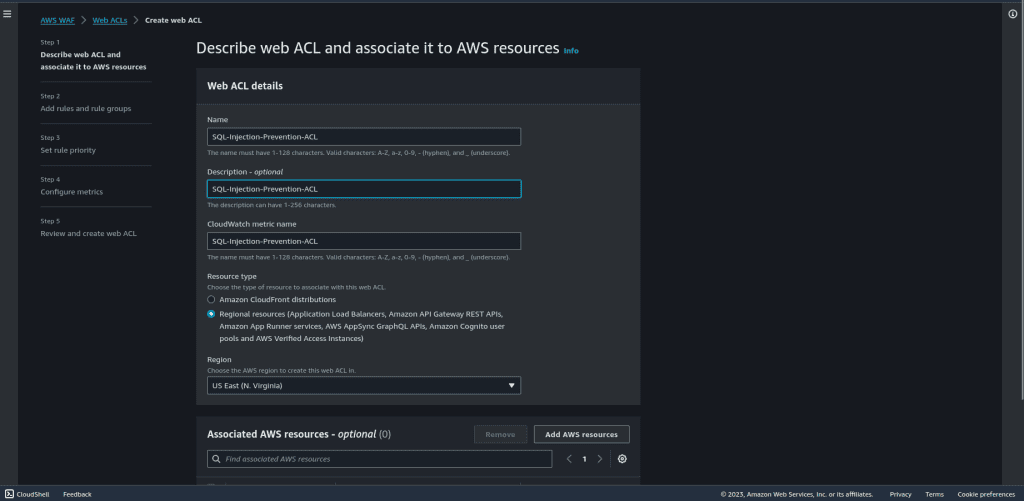
Select the region in which your AWS resource is created.
Click on “Add AWS resources.”
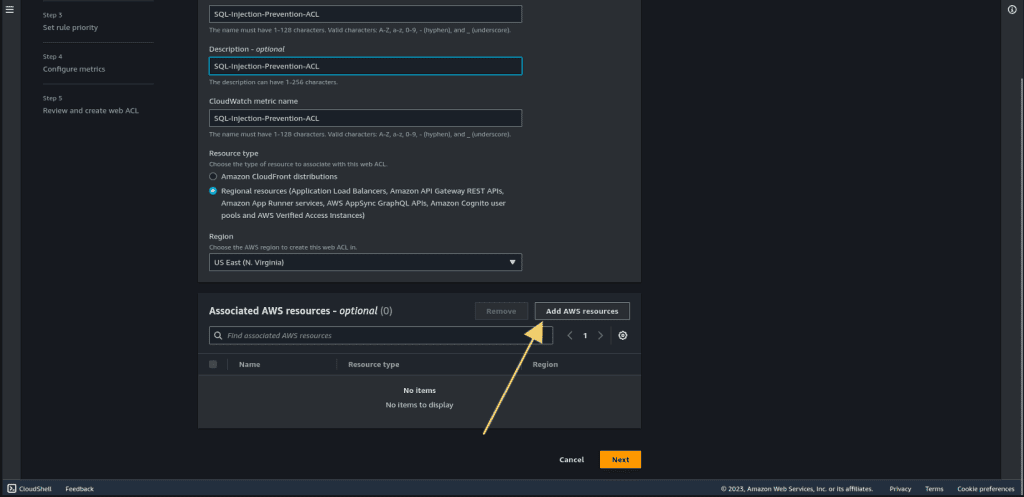
Select the Application Load Balancer. (If you have other resources then select your resources)
Then click on “Add.”
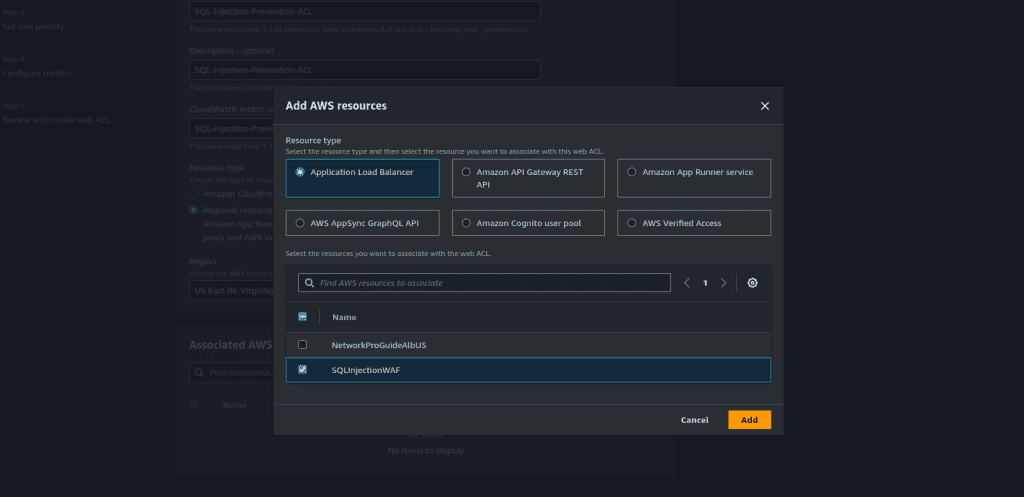
Now click on “Next.”
Step 2: Add the rules and rule groups
In the “Rules” section, click “Add rules.”
Then select “Add managed rule groups.” (Managed rule groups are the rule groups that are owned by AWS, so we don’t have to specify our own rules.)
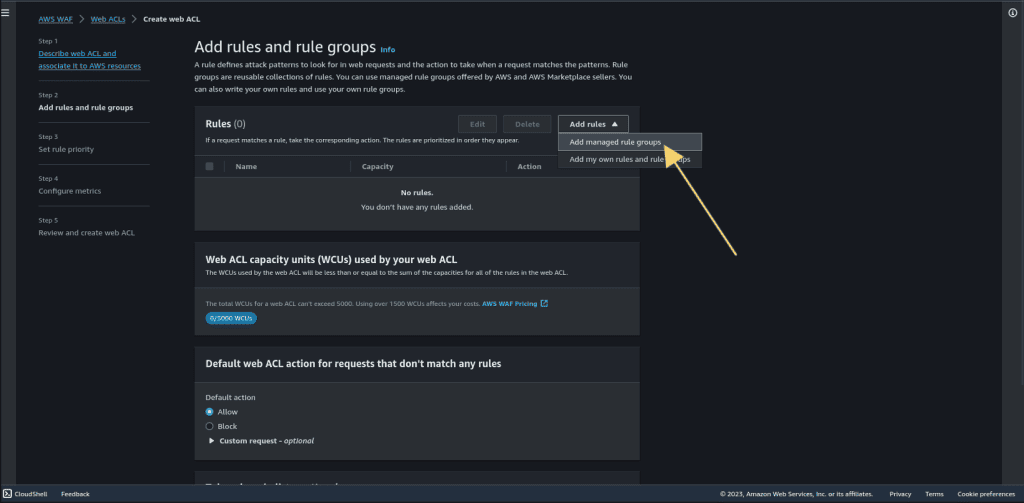
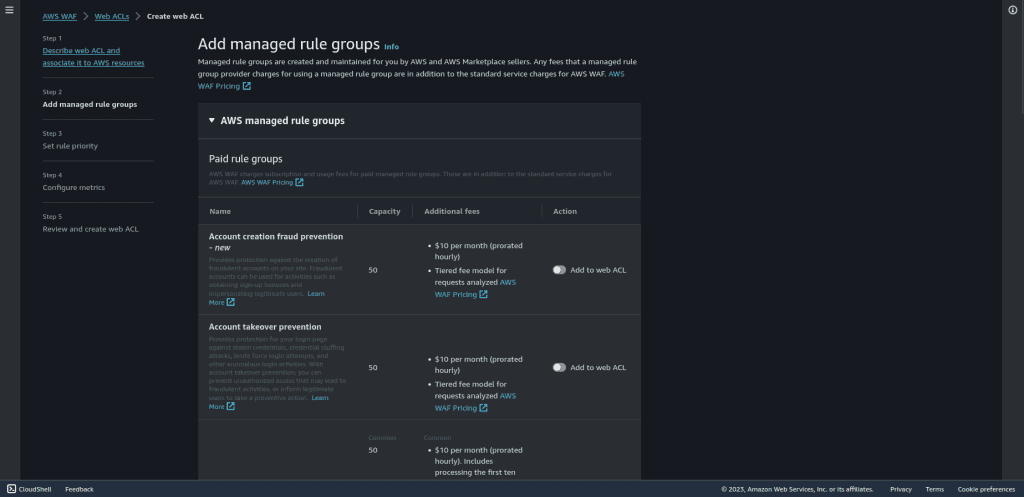
Click on “AWS managed rule group.”
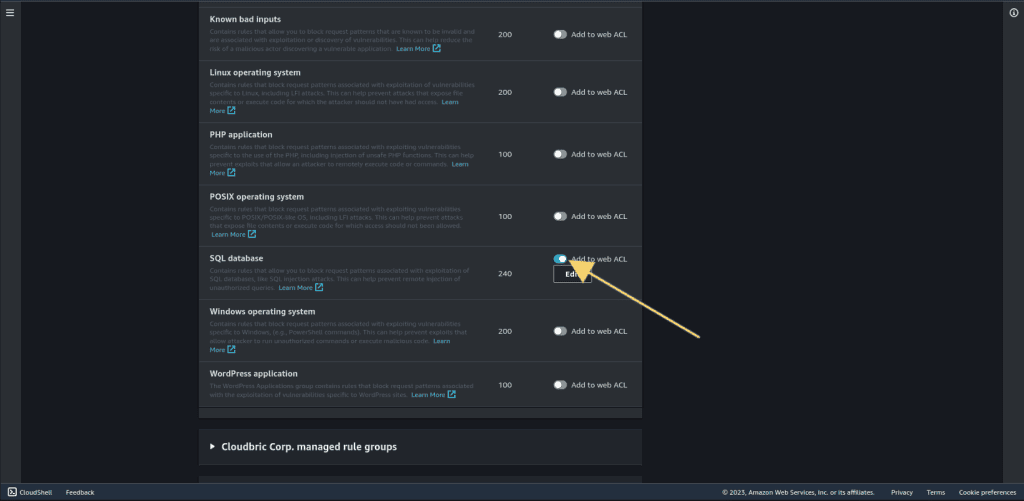
Select “SQL database.”
This rule set has 240 rules which contain rules that allow you to block request patterns associated with exploitation of SQL databases, like SQL injection attacks. This can help prevent the remote injection of unauthorized queries.
Then click on “Add rule.”
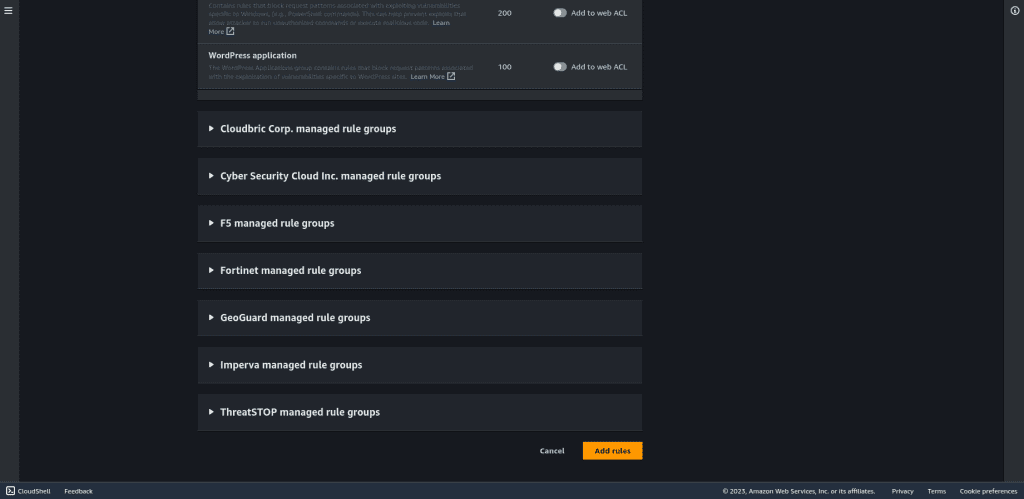
Leave other things as default and click on “Next.”
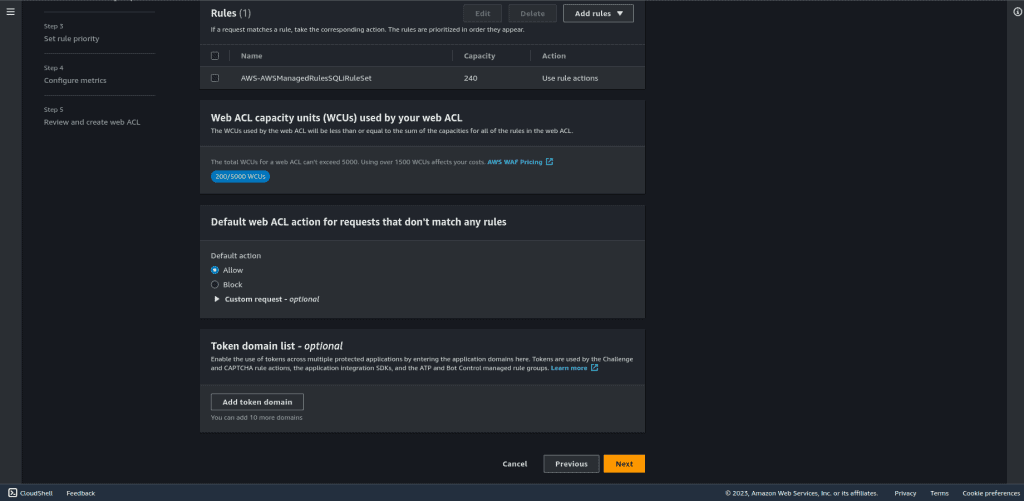
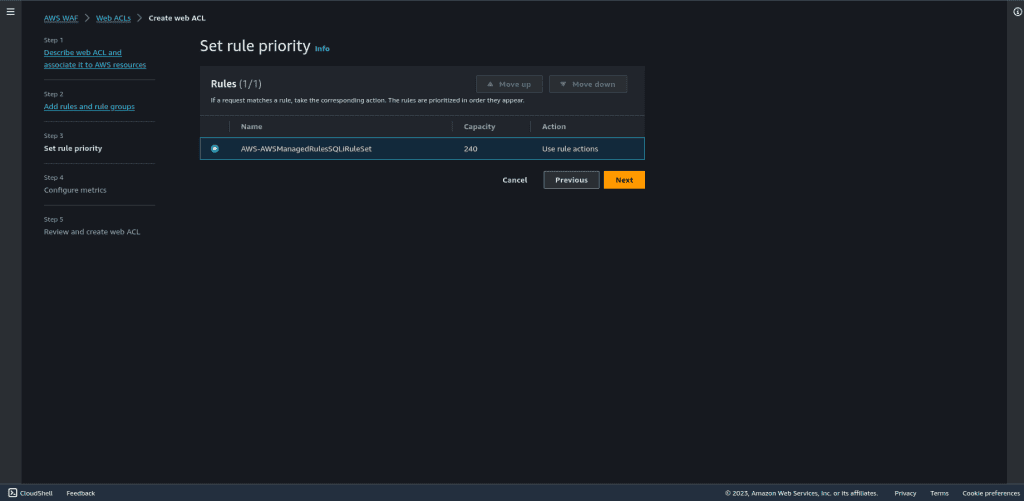
Select the rules in the set rule priority.
Then click on “Next.”
Leave all things as default in configure matrics.
Then click on “Next.”
Review the configuration and then click on “Create web ACL.”

Once you create a web ACL it can take up to one minute for the web ACL to be active.
Step 3: Testing the rule
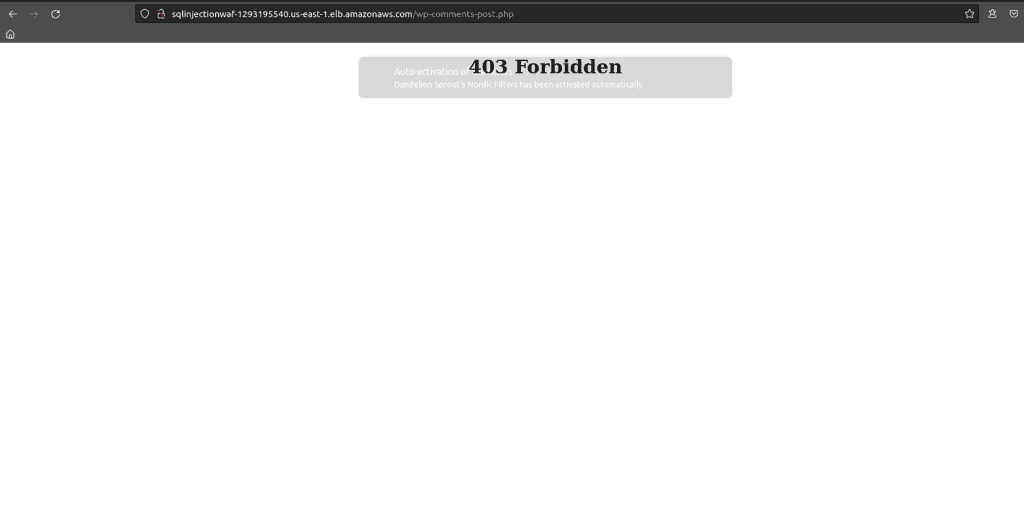
Go to your application load balancer URL or your domain name associated with that ALB. I will try to inject it into the SQL.
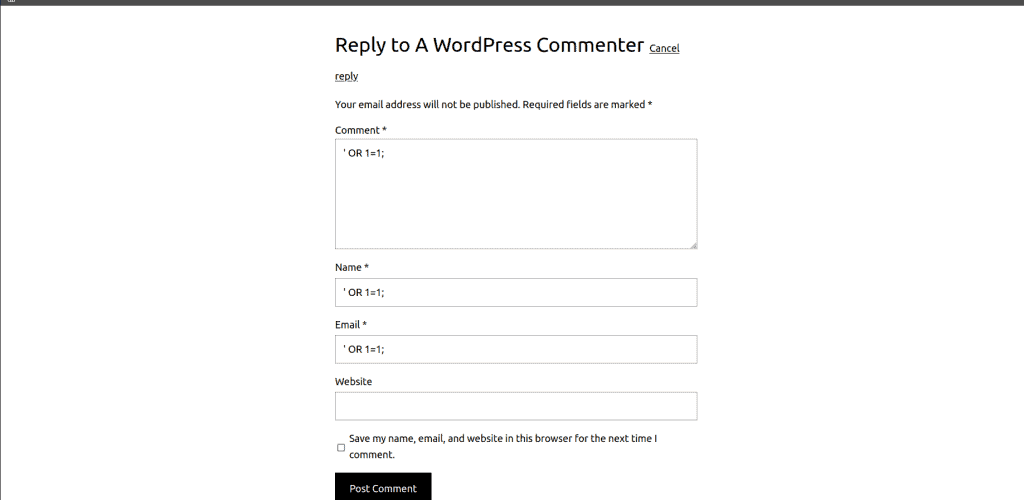
Here you can see that access is forbidden.
By following these steps, you can create and configure AWS WAF to protect your web applications from common vulnerabilities, such as XSS, DDoS, and SQL injection attacks. Regularly monitor your AWS WAF configuration to adapt to evolving threats and ensure the security of your web applications.


