How to Connect AWS Instance and S3 Bucket with PrivateLink
AWS PrivateLink, not to be confused with peering, offers a simple solution to connect to different AWS cloud resources. It enables you to establish private connections between different AWS services and instances without exposing your data to the public internet. Network traffic that uses AWS Private Link doesn’t travel across the public internet.
In this article, we’ll dive into the step-by-step guide on how to set it up and details of when and how to use AWS PrivateLink.
Our Topology

How to setup AWS PrivateLink step-by-step
To set up a private connection between AWS instances and S3 Bucket using PrivateLink, follow these steps:
Step 1: Create an EC2 instance
Log in to the AWS Management Console.
Navigate to the EC2 Dashboard.
Launch an Instance. (Create this first instance on a private subnet.)
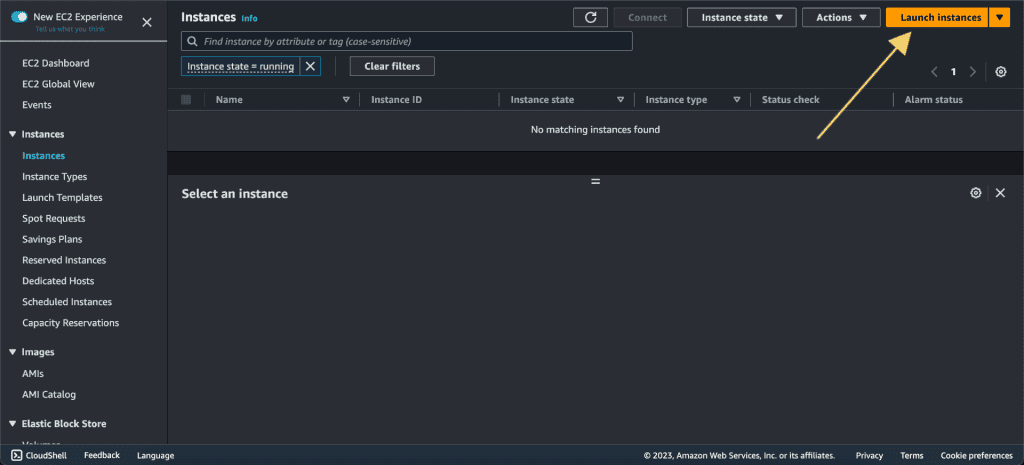
Choose an AMI, instance type, etc based on your requirements.
Choose an existing key pair or create a new one. Download the key pair. We will need it later.
Configure instance details (e.g., VPC, Private subnet, etc).

Create a new security group or use an existing one. Review and Launch.
Again create another instance. (Create this second instance on the public subnet.)
Choose an existing key pair or create a new one to access your instance securely.
Configure the details (e.g, VPC, Public Subnet, etc).
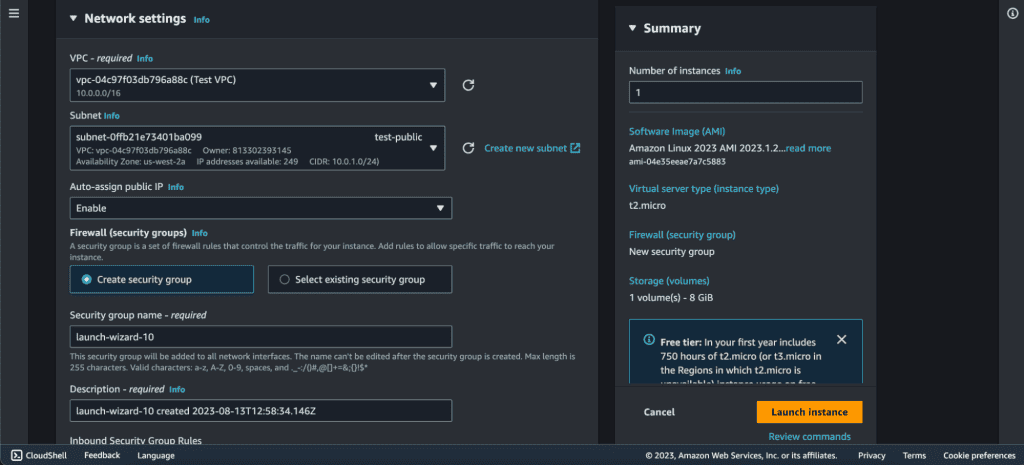
Use the private key of the key pair to connect to the instance via SSH. (Or you can connect it through EC2 instance connect.)

Step 2: Create an S3 bucket
Go to the S3 services.
Click on “Create Bucket.”
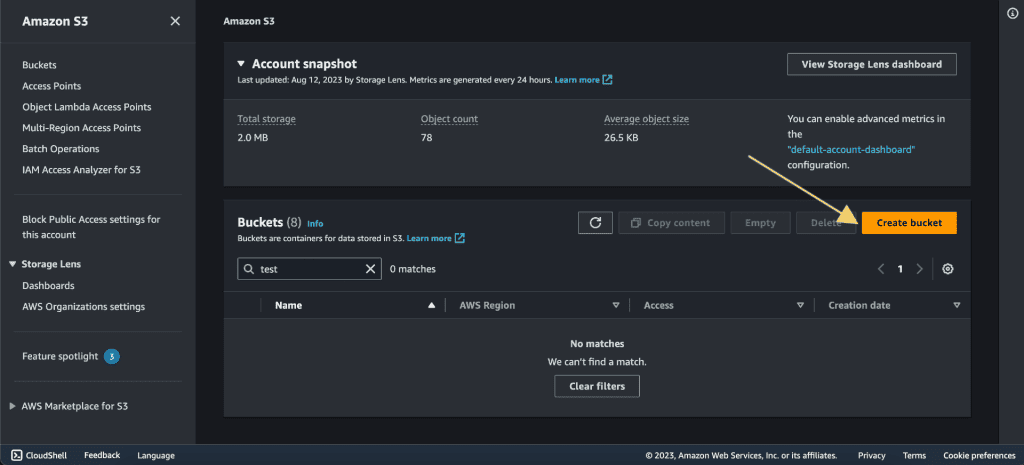
Give the bucket name and choose the region in which your ec2 instance is created.
Click on “Create bucket.”
Step 3: Create a VPC endpoint for Amazon S3
Log in to the AWS Management Console.
Navigate to the VPC Dashboard.
Click on Endpoints.
Click “Endpoints” in the VPC dashboard.
Click “Create Endpoint.”
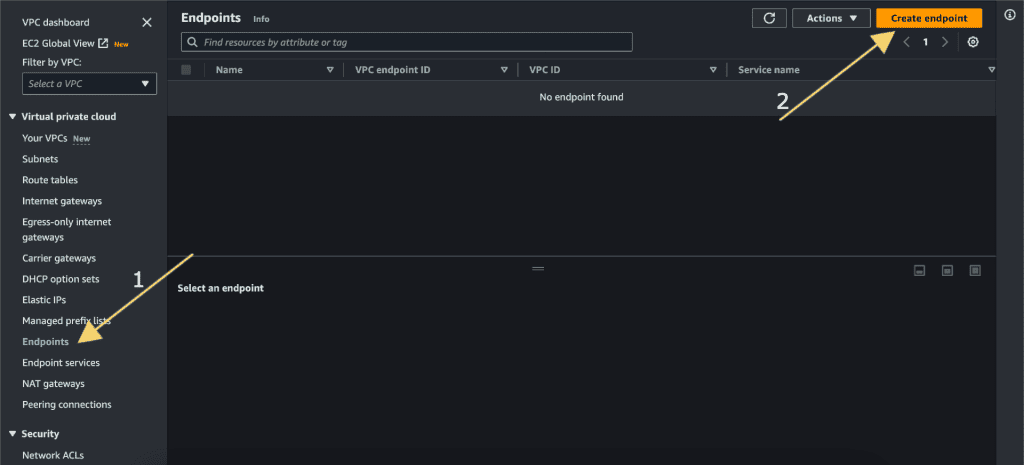
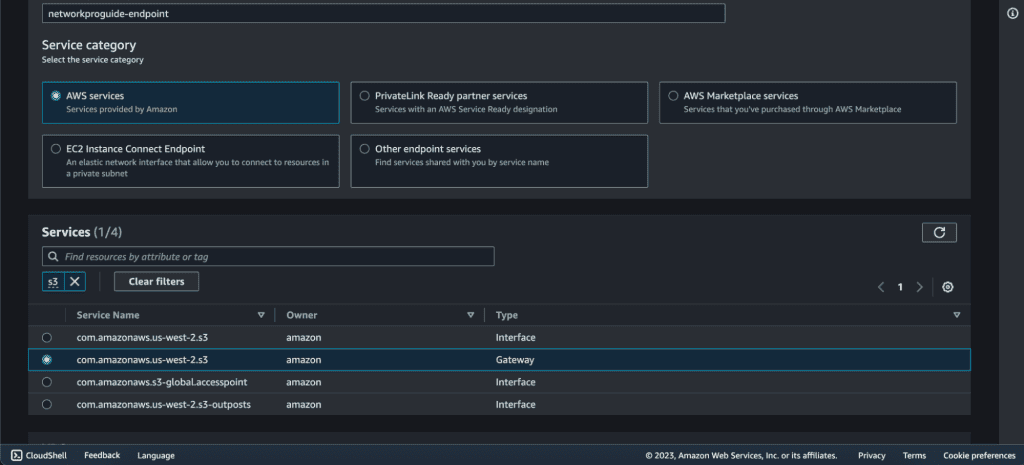
Give the name for the endpoint.
Choose “AWS Service.”

Search “s3” on Services.
Select the com.amazonaws.<region>.ec2 with “Gateway” as type.
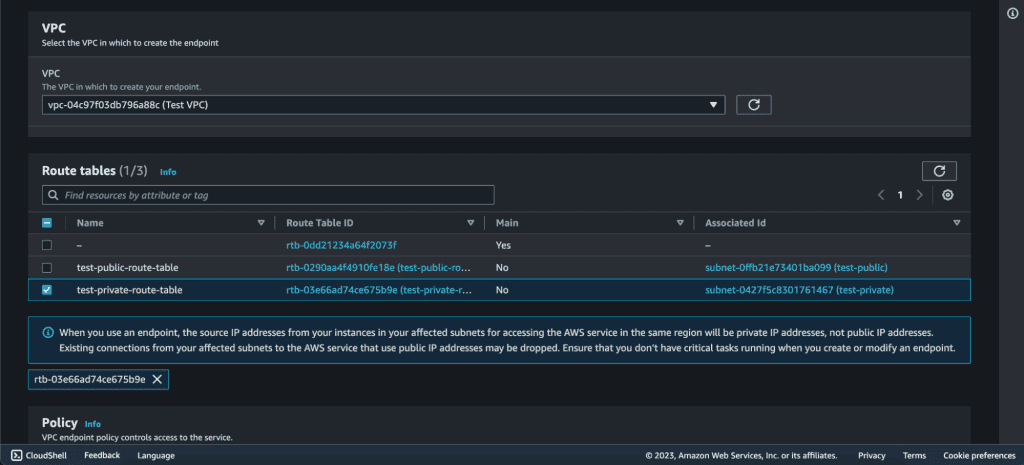
Select the VPC in which your instance is created and also select the Route Table in which you want to attach this endpoint. (You can select the VPC and subnets you want to associate with the endpoint.)
In my case, I want to attach it to the Private Subnet – Route Table. (Because I want to access the s3 from a public ec2 instance through a private instance.)
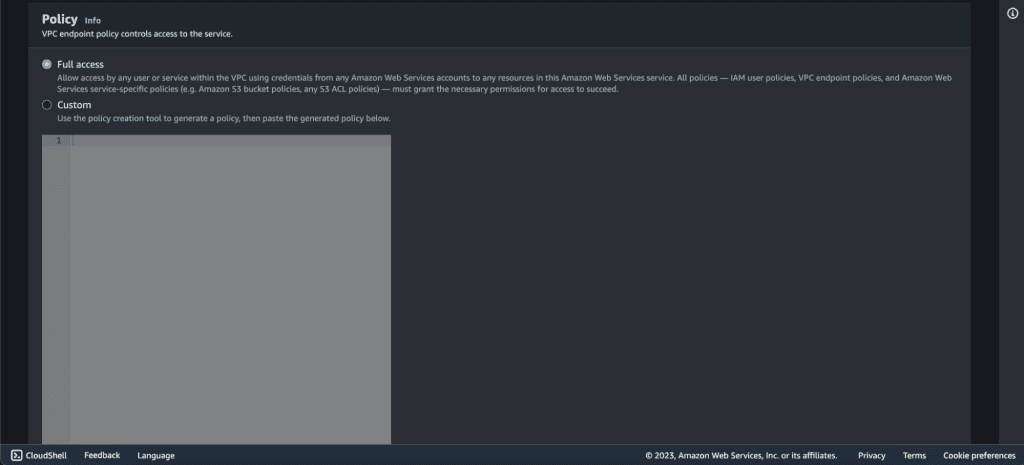
Select the policy as “Full Access.”
Now click on “Create Endpoint.”
The endpoint has been created successfully.
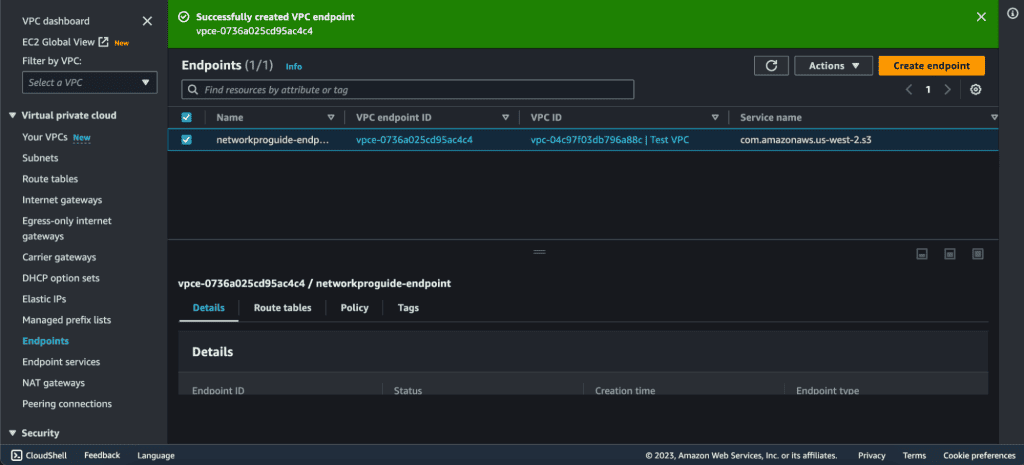
To check it, you can go to “Route Table” and select the private subnet’s route table. There you can see the endpoint on the routes.
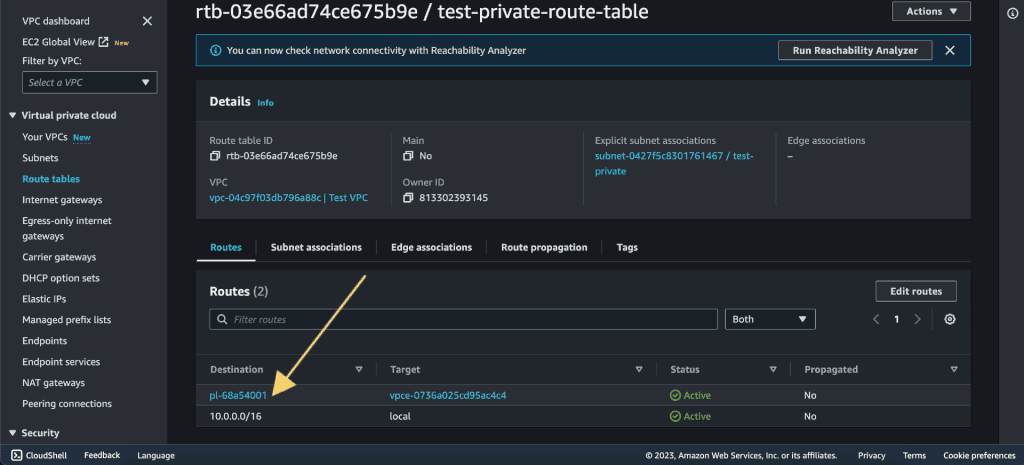
Step 4: Sending file from EC2 to S3 through PrivateLink
First, we need to attach the IAM role for private instances so that it can do operations on the S3 bucket.
Select the private instance.
Click on “Actions.”
Click on “Security.”
Select “Modify IAM Role.”

Click on “Create new IAM role.”
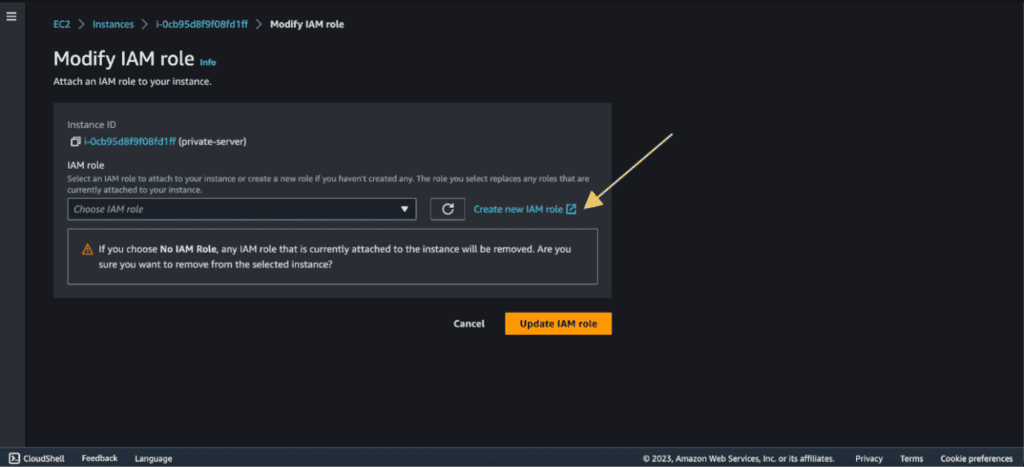
Click on “Create Role.”

Select the trusted entity type as “AWS Services”, use the case as “EC2” and click on “Next.”

Search “s3” and select “AmazonS3FullAccess”, then “Next.”

Give the name for the IAM role and click on “Create Role.”

Now go back to the “Modify IAM role” and refresh the role list (click on the small refresh icon).
Then select the role that we have just created.
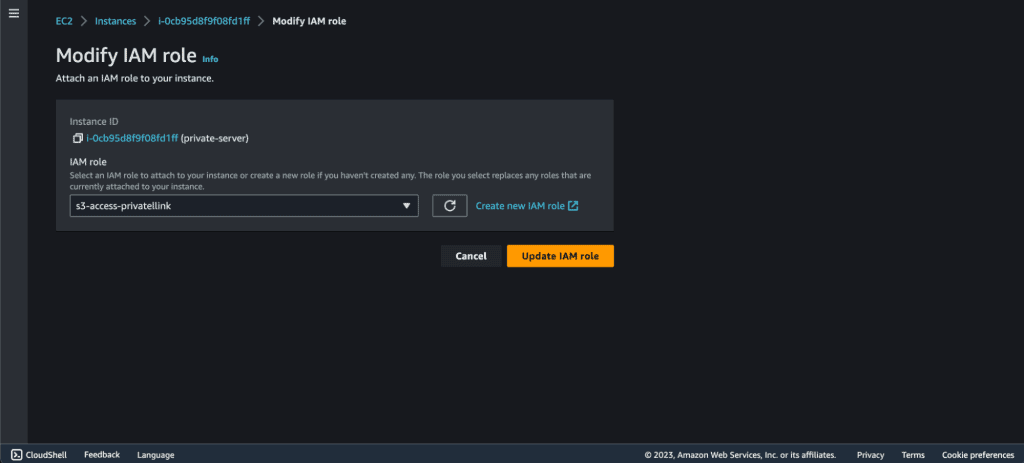
Click on “Update IAM role.”
Now after attaching the IAM Role, Connect to the Public Server EC2 through SSH Client or EC2 Instance Connect.
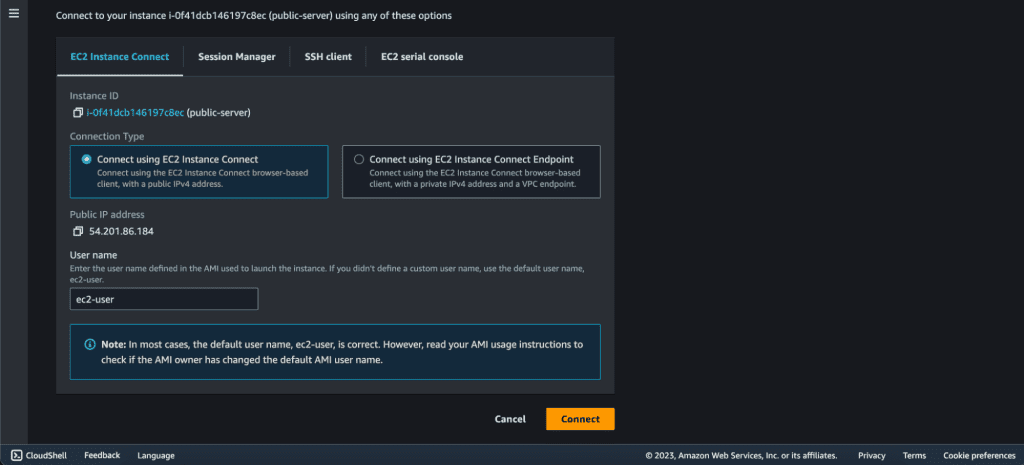
Make a .pem file on the instance. Copy the Private Instance .pem file and paste that into the .pem file that you have created.
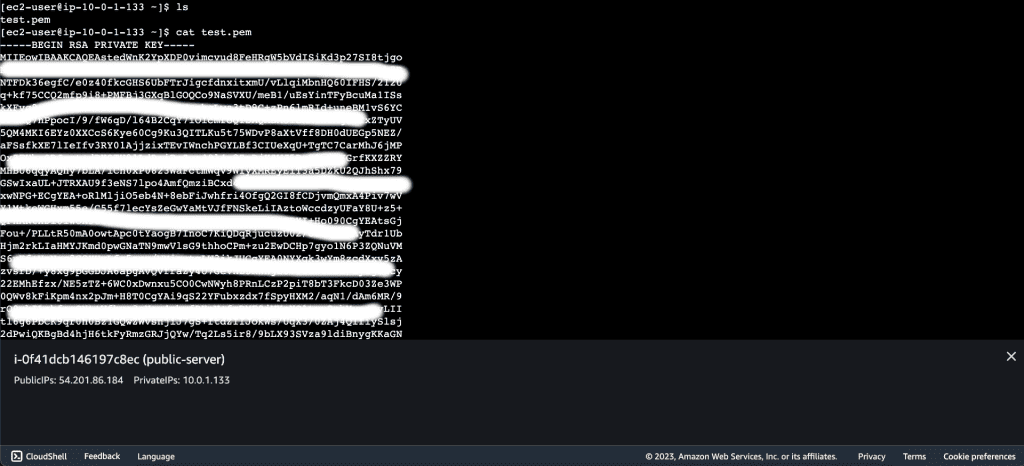
(I have created a .pem file through the vi test.pem command. Then I copied the downloaded private instance .pem file value and pasted it on this test.pem file.)
Change the permission of the file. Cmd:
chmod 400 test.pem.
Connect to the private instance through its private IP.

The cmd to connect private instance is:
ssh -i “your-file-name.pem” user@your-server-private-ip
Now we are inside the private server. Switch the user to root. Cmd:
sudo su -
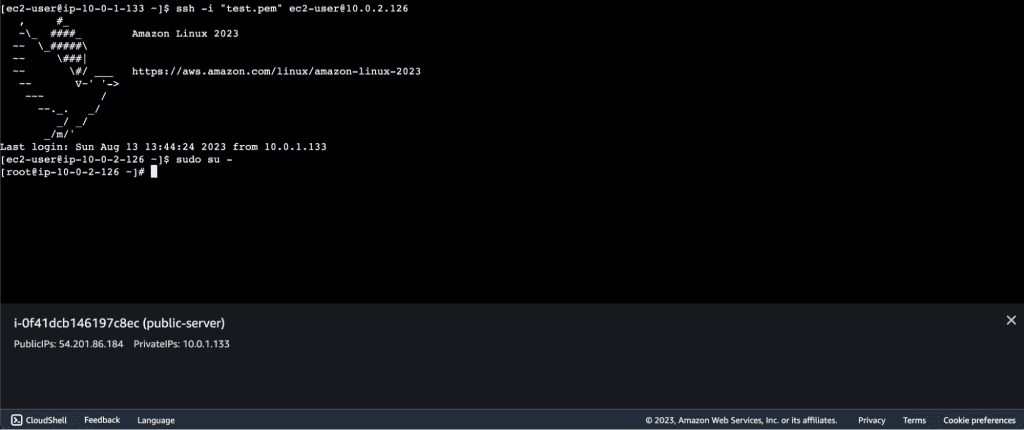
Now create one test file so that we can send it to S3 using the endpoint.

Copy the file that we have created to the s3 bucket. The cmd is:
aws s3 cp /path/FileName s3://bucket-name
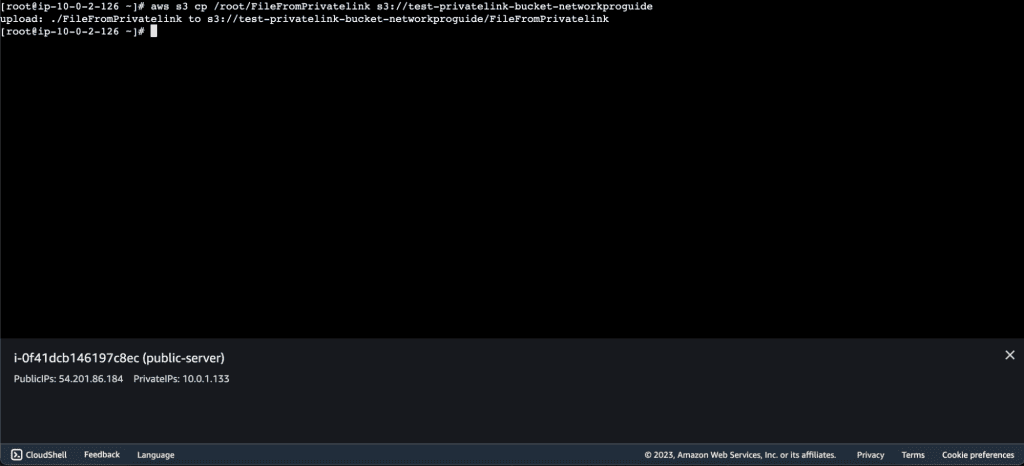
Now, check if the file is uploaded to the S3 bucket.
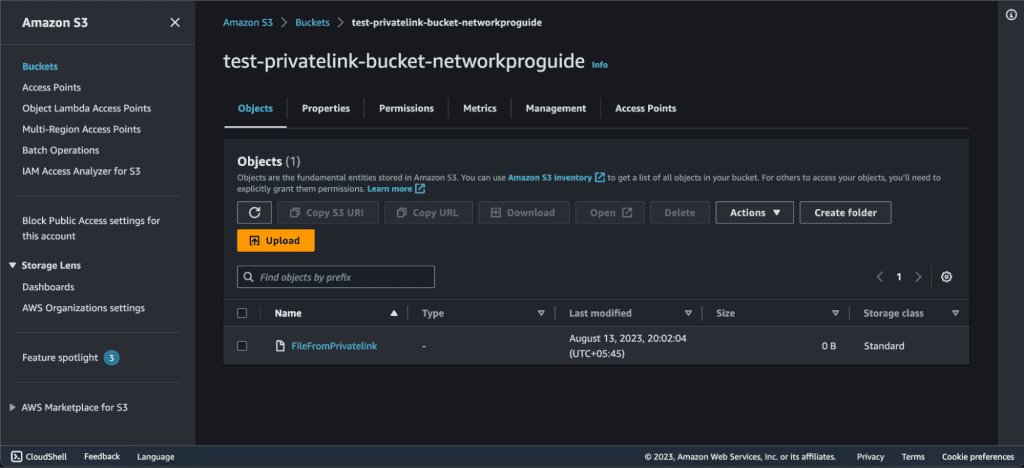
Congrats you have just connected AWS S3 and EC2 through PrivateLink.
Related: How to Create a VPC on AWS Step-by-Step
When to use PrivateLink with different AWS services
- You want to securely access AWS S3 storage from your VPC without exposing your data to the public internet.
- Example: Your application requires access to an S3 bucket to store and retrieve sensitive data. By creating an S3 VPC endpoint, your instances can access S3 securely without the need for an internet gateway. This is particularly useful for maintaining data privacy and reducing latency.
- You need to securely access Amazon DynamoDB tables from within your VPC.
- Example: Your backend services require access to a DynamoDB table for storing user data. By creating a DynamoDB VPC endpoint, your services can communicate with DynamoDB securely and efficiently, while minimizing exposure to external threats.
- You want to enhance the security of communication between your VPC and Amazon Simple Notification Service (SNS).
- Example: Your application needs to publish notifications to an SNS topic. With an SNS VPC endpoint, you can ensure that these notifications are sent securely and privately within the AWS network, mitigating potential risks associated with public internet communication.
- You need to integrate your VPC-based applications with APIs hosted on Amazon API Gateway.
- Example: Your microservices in a VPC need to communicate with RESTful APIs exposed through Amazon API Gateway. By creating a VPC Link, you can securely connect your VPC to the API Gateway, ensuring seamless and private communication.


